


OPERATION
-12-
1). Advanced: In PC Mode is available.
(1).H-Pos:Adjust the horizontal position of the screen.
(2).V-Pos:Adjust the vertical position of the screen.
(3).Clock: Fine tune the screen width.
(4).Phase: Fine tune the phase of the screen. Usually
don`t adjust this item.
(5).Auto: Auto adjust to fit the screen.
Press
button to select Advanced item , Press
button, the screen will display as follow:
2). Closed Caption: switch close caption mode.
(2):Option:Used to edit CC font.
Press
button, the screen will display as follow:
Press
button to select Closed Caption item,
Press
button, the screen will display as follow:
H-pos
V-pos
Clock
Phase
Select
Adjust
Menu
Exit
50
Auto
50
50
50
Setup
Channel
Timer
P.G
CC Mode
Basic Selection
Advanced Selection
Option
Select
Adjust
Menu
Exit
Off
CC4
Service 3
Setup
Channel
Timer
P.G
Mode
Font style
Select
Adjust
Menu
Exit
Custom
Default
Font size
Default
Font Edge style
Default
Font Edge color
Default
FG color
Default
BG color
Default
FG opacity
Default
BG opacity
Default
Setup
Channel
Timer
NOTE: Only ATSC program is available.
5.
MENU
P.G
The fifth item of the MENU is
MENU.
You can setup
here.
Press
to select, press
to adjust, press MENU
to exit.
P G
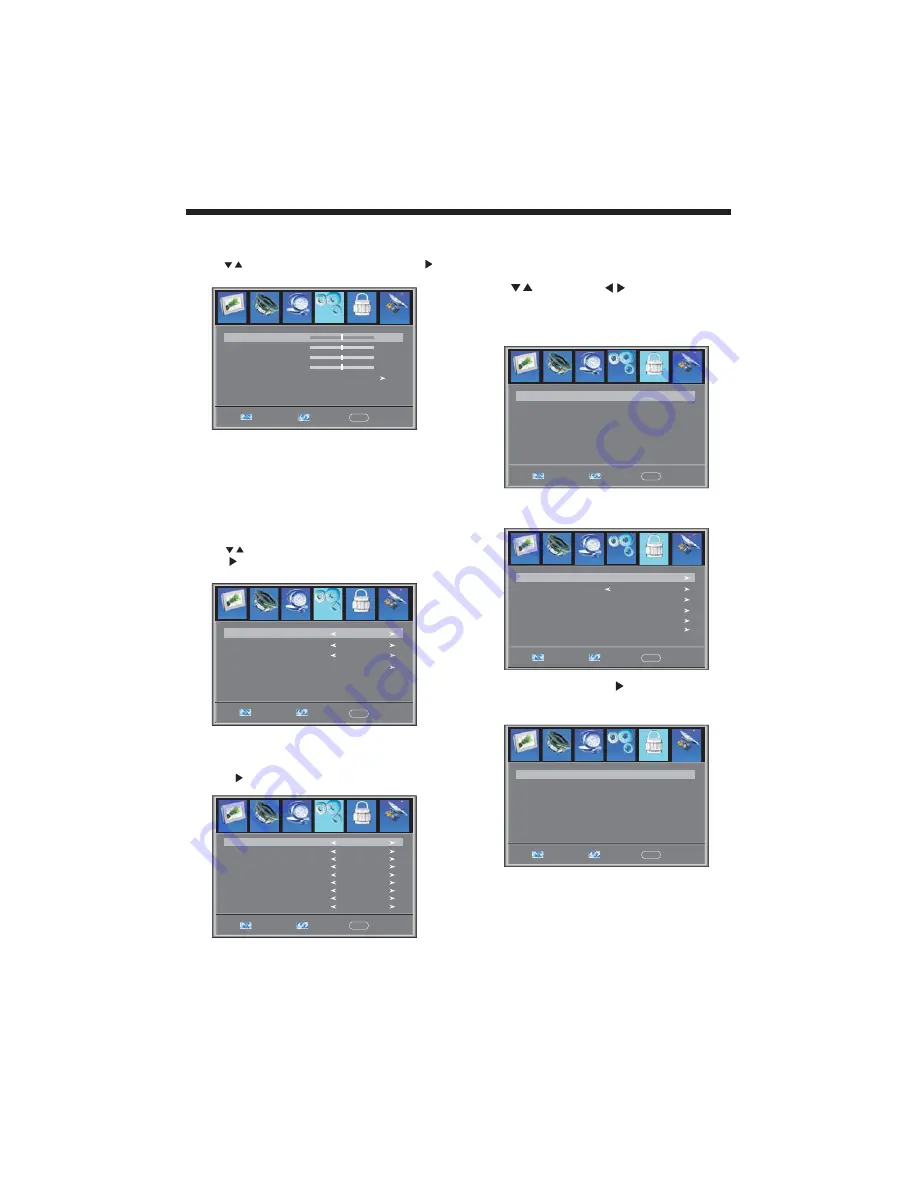
Parental Control
.
Parent Control: input the password, it will go into
menu. Factory default password
is 6666.
Parental Control
Enter password
Select
Adjust
Menu
Exit
----
Channel
Timer
Setup
5.1 .
Input the correct password ,the screen will display
as follow:
Change password
Select
Adjust
Menu
Exit
P.G switch
On
US
Canada
RRT setting
Reset RRT
Channel
Timer
Setup
1). Change Password: Press
button, the screen will
display as follow:
New password
Select
Adjust
Menu
Exit
Confirm password
----
----
Channel
Timer
Setup
1).New Password: Input the new password
2).Confirm Password: Input the new password again
P.G
P.G
P.G
P.G
(1):Advanced Selection: only ATSC program is available.
Audio
Picture
Picture
Audio
Audio
Picture
Picture
Audio
Picture
Audio
Picture
Audio


