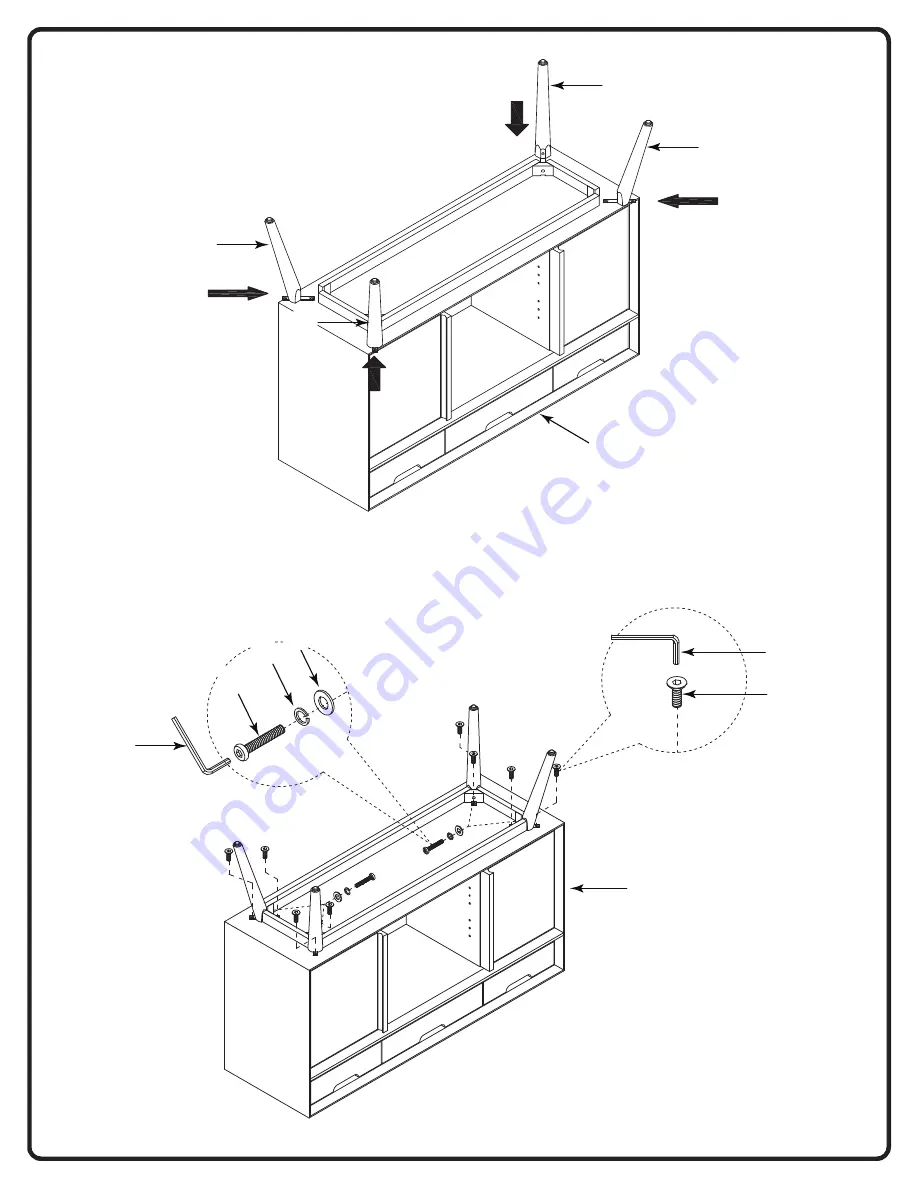
STEP 1
STEP 2
NOTE: FULLY TIGHTEN ALL BOLTS USING ALLEN WRENCH (5).
SLIDE BRACKET OF LEGS (B) INTO CORNER BLOCKS OF CONSOLE TABLE (A).
(A)
(B)
(5)
(2)
(3)
(4)
(1)
Page 1: ...ligence alteration accident vandalism rusting acts of nature or any other event beyond the control of CuriaTM Co is not covered The warranty does not cover cosmetic damage that may result from normal...
Page 2: ...helf 2 PCS DRAWING NO DESCRIPTION SIZE QUANTITY 1 2 3 4 4 PCS 1 Extra 4 PCS 1 Extra 1 PC Lock Washer Flat Washer Allen Wrench 1 4 4 PCS 1 Extra Bolt 1 4 x 1 3 4 8 PCS 1 Extra Bolt 1 4 x 1 2 1 4 x 19mm...
Page 3: ...STEP 1 STEP 2 NOTE FULLYTIGHTEN ALL BOLTS USING ALLEN WRENCH 5 SLIDE BRACKET OF LEGS B INTO CORNER BLOCKS OF CONSOLETABLE A A B B B B A 5 2 3 4 5 1...
Page 4: ...STEP 3 STEP 4 6 C C NOTE INSERT SHELF PINS 6 INTO CONSOLETABLE A NOTE PLACE SHELVES C D ONTO SHELF PINS 6 D D...
Page 5: ...STEP 5 NOTE ADJUST LEVELERSTO LEVEL CONSOLETABLE...
Page 6: ...tap Anchor into pilot hole Secure Bracket to wall using one Long Screw FULLYTIGHTEN LONG SCREW USING PHILLIPS SCREWDRIVER not provided Secure Mount to rear of cabinet using two Short Screws FULLYTIGHT...