ASSEMBLY INSTRUCTIONS
10
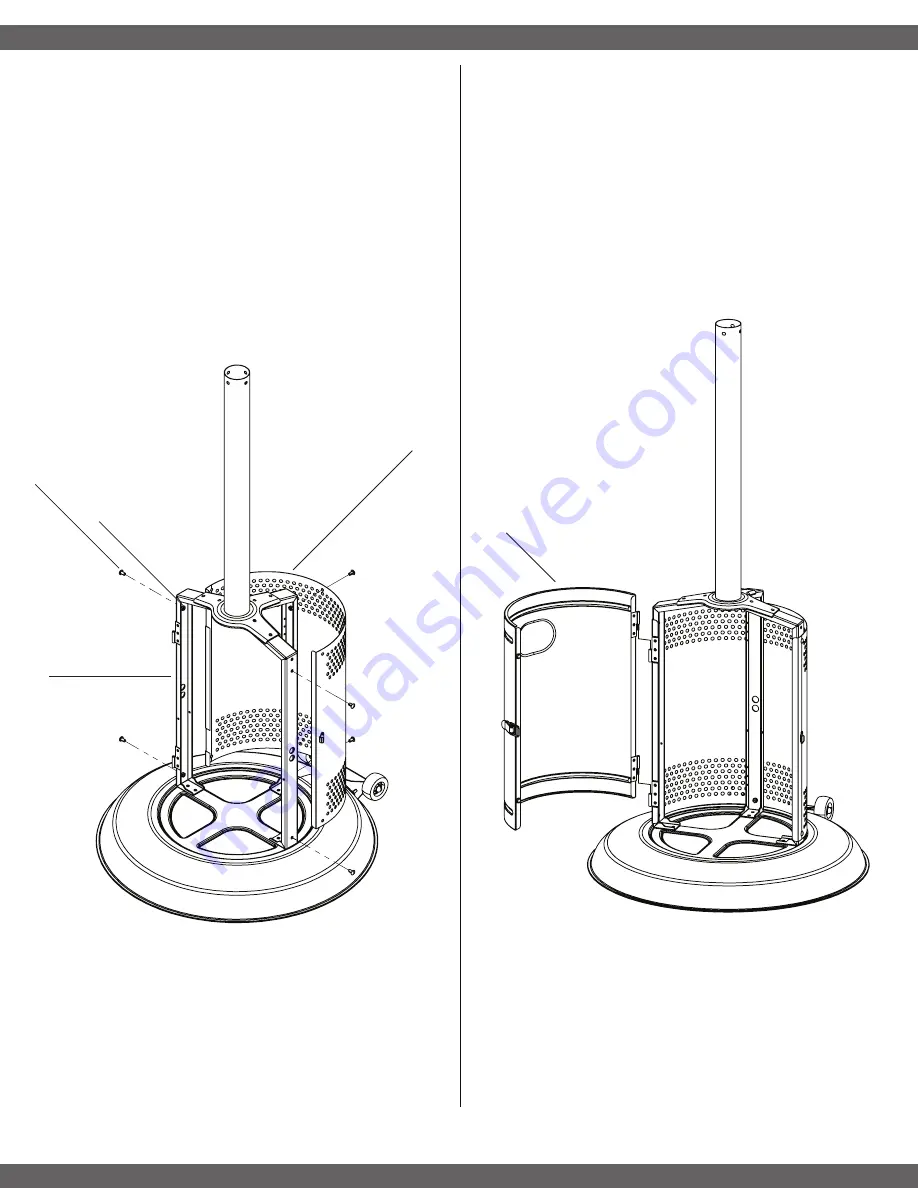
STEP 3 ATTACHING THE CYLINDER CHAMBER WALL
•Using six of the bolts (AA) and nuts (BB), attach the
cylinder chamber wall (4) to the cylinder chamber
supports (2).
•Finger tighten only at this stage.
STEP 4 ATTACHING THE CYLINDER CHAMBER DOOR
•Hang the cylinder chamber door (5) on the hinges.
•Ensure that the alignment is correct and tighten all
bolts securely.
2
4
5
AA
BB


