background image

6

5.   

TO STOP THE BLENDING PROCESS:

 Re-press the activated 

speed button. The blending process will stop. The red On 

indicator light will continue to flash to let you know that the 

blender is still on and can be reactivated by pushing the 

desired speed button. The blender can be completely 

deactivated and stopped at any speed by pushing the Off 

button. You will need to press the On button again to continue 

blending.

6. 

   PULSE MODE:

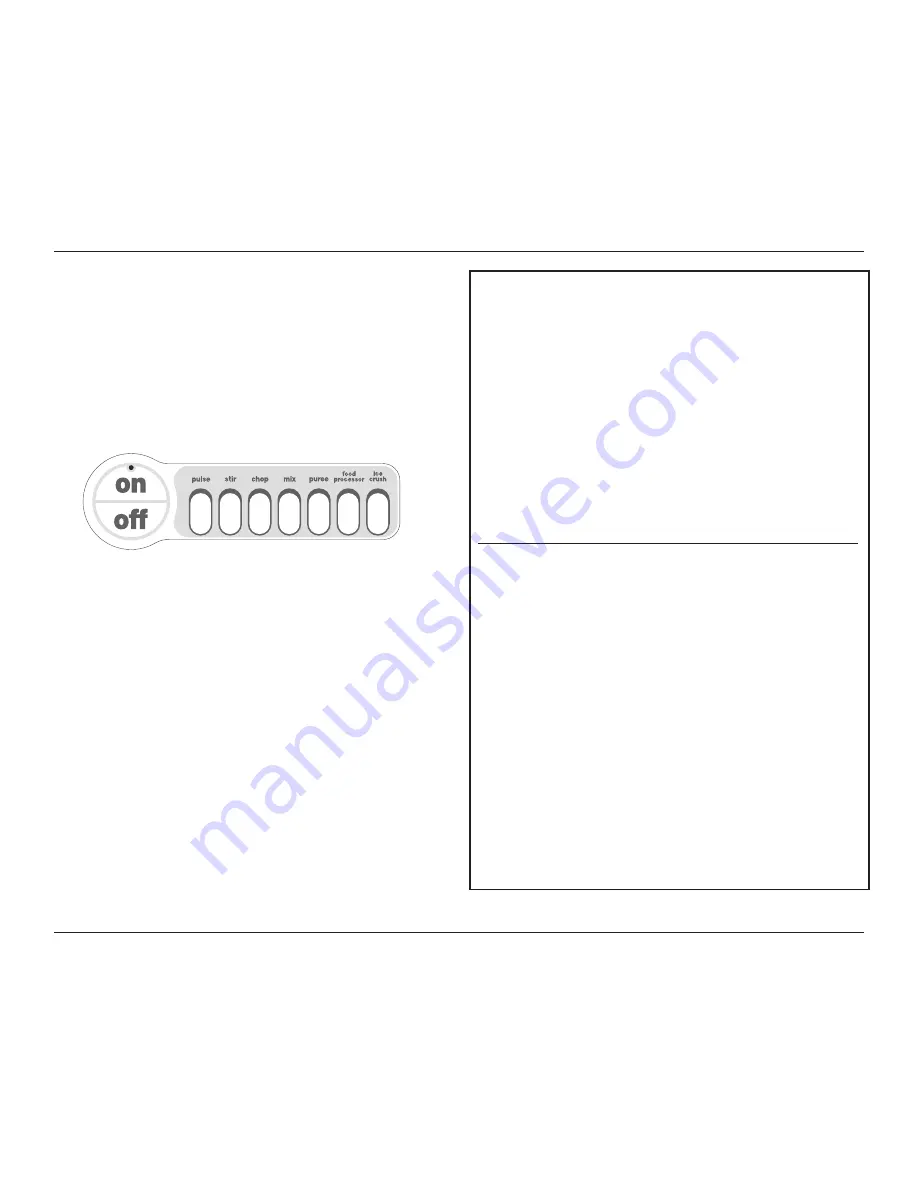
 While the blender is turned on, you can create 

a burst of power for quick, efficient blending, by activating the 

pulse function. To do so, first push the Pulse button, which will 

cause the pulse indicator light to flash. Next, push and release 

the desired speed button. Repeat as desired. You determine 

the duration of each pulse. While pulsing, all indicator lights 

(the on, the pulse, and the desired speed lights) will glow. The 

pulse function can be used to break apart larger pieces of food 

or to control the texture of food when chopping. The pulse 

function is also effective in starting the blending process when 

you do not want continuous power, or when processing items 

which do not require an extended amount of blending. 

7.   

TO CRUSH ICE:

 The PowerBlend Duet

 motor is strong 

enough to crush ice without liquid at any speed; however,  

for your convenience, we have preset the best speed for ice 

crushing. To give you greater control, the ice crush function 

automatically operates as a pulse function. To crush ice, place 

ice cubes in the blender jar, and place the cover and the 

measured pour lid on the blender jar. Press the On button. 

Press the Ice Crush button in short pulses until ice is crushed 

to desired consistency. See the Recipe Tips section in recipe 

booklet for more details.

8.   

TO DISLODGE FOOD:

 Use a rubber or plastic spatula to help 

remove food lodged around the cutting assembly. 

DO NOT 

USE SPATULA UNTIL YOU HAVE TURNED THE BLENDER 

OFF.


QUICK REFERENCE GUIDE

FOR BLENDER FUNCTION

To Activate Blender  


Press On – The blender is in On mode.

To Begin Blending  


Press desired speed button.

To Change Speeds  


Press desired speed button.

To Pulse  


In On mode press Pulse,  


then press and release desired speed 


button as needed.

To Crush Ice  


In On mode, press and release Ice    


Crush button as needed.

To Stop Blending (and Deactivate Blender)  

Press Off Button.

To Stop Blending (in Pulse or Ice 


Release button. 

Crush Mode) 
To Stop Blending in Stir, Chop, Mix, Purée,  

Press Speed button again. This will  

or Food Processor Mode 


return the blender to On mode. Press    


Off button to turn blender off. 

QUICK REFERENCE GUIDE

FOR BLENDER SPEED

Refer to this guide to choose the best speed for your desired result. 

Ingredient/Recipe  

Speed  


Result

Reconstituting frozen

orange juice concentrate  

Stir  


Smooth and full-bodied 

Mayonnaise  

Stir  


Thick and creamy

Salad dressings  

Stir  


Desired consistency

Nuts  

Chop 


Coarse to fine

Whipping cream  

Mix  


Thick topping

Bread crumbs 

Mix 


Uniformly fine

Grating citrus zest  

Purée  


Uniformly fine

Soups 

Purée 


Uniformly smooth

Milk shakes  

Food Processor  

Smooth and creamy

Baby food 

Food Processor  

Smooth and creamy

Health drinks  

Food Processor  

Smooth and creamy

Frozen cocktails  

Food Processor  

Thick and slushy

Grinding hard cheese  

Food Processor  

Coarse to fine

Ice  

Ice Crush    

Snowy

Summary of Contents for BFP-10 Series

Page 1: ...BOOKLET For your safety and continued enjoyment of this product always read the instruction book carefully before using PowerBlend Duet Blender Food Processor BFP 10 Series Recipe Booklet Reverse Sid...

Page 2: ...nterfere with blade movement or remove blender jar cover Accidentally touching a speed button may activate the blender 12 BLADES ARE VERY SHARP HANDLE CAREFULLY Store out of reach of children 13 To re...

Page 3: ...sturdy surface before unpacking 2 Remove the instruction booklet and other printed material from top of corrugated insert 3 Next remove the top corrugated insert containing the fill cap 4 Carefully l...

Page 4: ...en during ice crushing The motor is strong enough to handle all blending tasks including crushing ice without liquid and is backed by a three year limited warranty 8 7 Speed Touchpad Control with Indi...

Page 5: ...he blender jar Do not place ice frozen foods or very cold liquids in a blender jar which has come directly from a hot dishwasher Do not place very hot liquids or foods in a blender jar which has come...

Page 6: ...pour lid on the blender jar Press the On button Press the Ice Crush button in short pulses until ice is crushed to desired consistency See the Recipe Tips section in recipe booklet for more details 8...

Page 7: ...her liquid or place in the dishwasher Tip You may wish to clean your blender cutting assembly as follows Squirt a small amount of dishwashing liquid into assembled blender jar and fill halfway with wa...

Page 8: ...pt ice cubes or pieces of frozen fruit to glass blender jar Boiling liquids should cool for 5 minutes before being placed in blender jar The food processor accessory is not intended to crush ice This...

Page 9: ...ts into position Insert food in feed tube 3 Hold pusher with more rounded side toward the outside of the bowl and insert it in feed tube over food Always use pusher to guide food through feed tube Nev...

Page 10: ...void chopping too fine Use a plastic spatula to scrape down any pieces that stick to inside of bowl Onions and other food with a high water content turn into a smooth pur e very quickly Do not overcho...

Page 11: ...be very cold but not frozen First cut into pieces Put up to pound in work bowl If you want to chop or pur e more do it in batches of not more than pound each Pulse chop or run continuously until desir...

Page 12: ...hs Remove skin if desired Wrap in plastic wrap and put in freezer until it feels hard when you try to squeeze it but is still easily pierced with tip of sharp knife Remove plastic wrap and stand piece...

Page 13: ...nart PowerBlend Duet Blender Food Processor has been manufactured to the strictest specifications and has been designed for use only with authorized accessories and replacement parts This warranty exp...

Page 14: ...marks of third parties used herein are the trademarks or service marks of their respective owners 2006 Cuisinart Cuisinart is a registered trademark of Cuisinart 150 Milford Road East Windsor NJ 0852...

Page 15: ...m H Total Pages 32 pages Material Cover 157gsm MattArtpaper Inside 120gsm GlossArtpaper Coating Varnishing in cover Color Cover 4C 1C Black Inside 1C 1C Black Date 09 15 2006 P O No 0609000 09 00 2006...

Reviews: