


Step 1 – Familiarize yourself with Attack IR
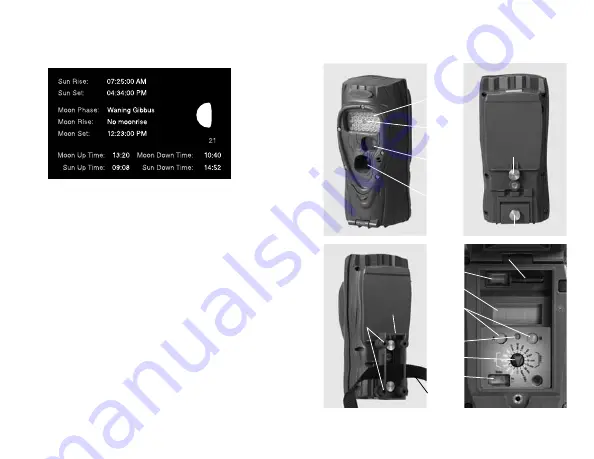
Take a moment to familiarize yourself with Attack IR’s parts.
Front
NOTE: After the bracket has been mounted to a tree, slide
Attack IR’s two thumb screws down into the bracket.
Back
Back
Back
Test
LED
USB
Connector
SD Card Socket
Mount
Bracket
Screw
Holes
Strap &
Slots
LCD
Screen
Video
Switch
Rotary
Knob
A/B
Buttons
User
Interface
LED
Camera
Lens
Motion-
Heat
Sensor
User Interface
Door
Battery Door
IR LEDs
2
3) Displays sun and moon data for each image, including moon
phase, moon rise and set, sunrise and set, and moon and sun
position in the sky at the time the image was taken.
4) Categorizes images as buck, doe, fawn, bear, etc. There are
28 categories to select from. For whitetail deer you can enter
point count and give deer a name to allow easy monitoring
of trophy animals.
5) Automatically calculates the buck/doe/fawn ratios based
upon your images.
6) Includes
CuddeCharts
with which you can analyze your images
to determine peak movement patterns based upon sun and moon
phase and position.
7) Includes
Crystal Ball
with which you can use the data you’ve
collected and analyzed with CuddeCharts to predict future
activity. Think of this as the traditional moon tables, only
tailored to you.
8) Allow you to rapidly view Cuddeback images taken in Guard
Duty mode.
9) Is FREE and works with all Cuddeback cameras. You can
download it at www.cuddeback.com.
Trophy Room data screen example
13


