


2
Battery Charging and Feedback
A battery indicator symbol appears at the left bottom of the screen.
The symbol displays battery in the form of percentage.
To charge the battery, connect Cubetape PRO to a PC or power adaptor via the USB cable.
The charge light is on during the charging process.
When charging is finished, the charge light will go off.
If the battery remaining drops below 10%, the symbol turns red and alerts the operator.
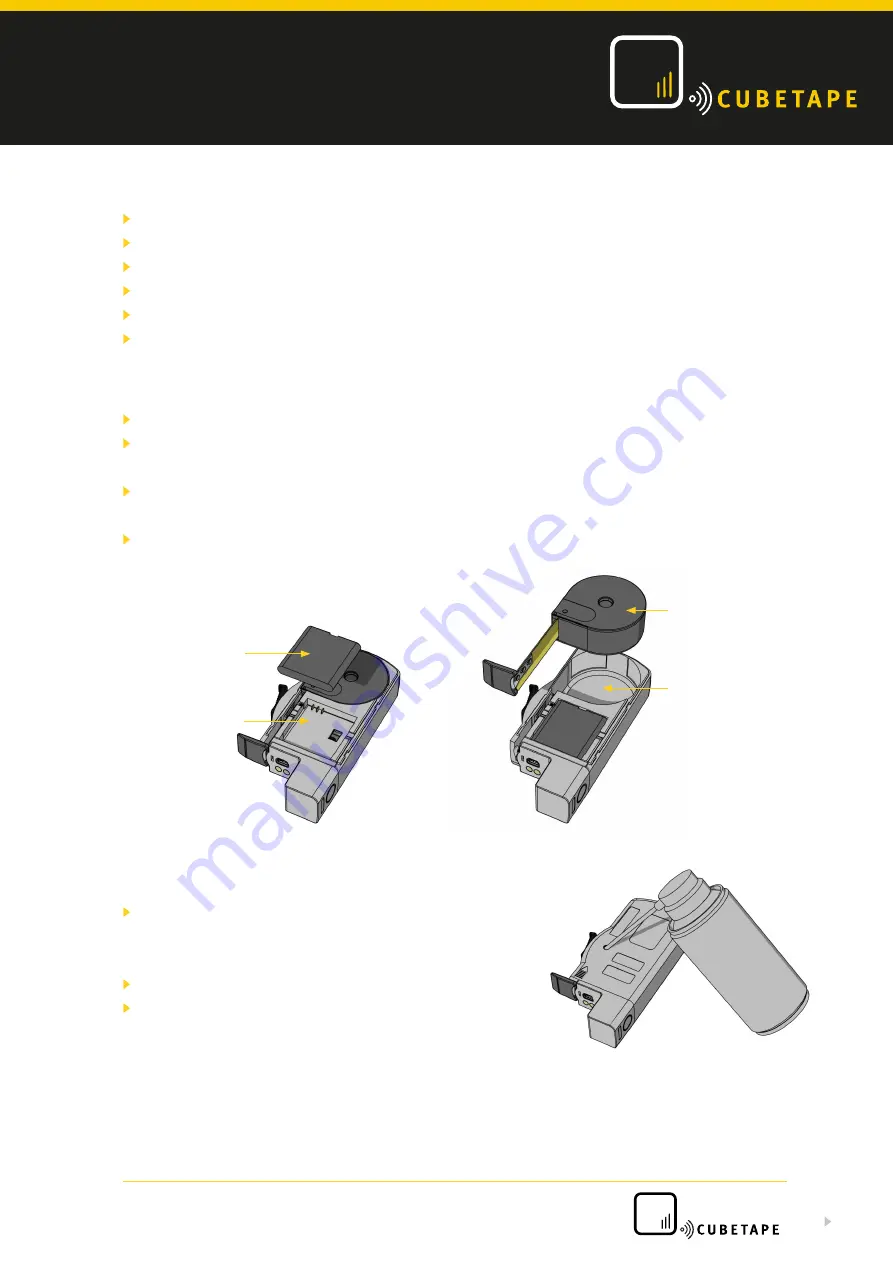
Tape Cassette and Battery Replacement
To replace the tape cassette and battery, remove the rubber sleeve first.
Slide the rear cover of the device down by pushing the index triangle at the
upper right corner of the rear cover as indicated below.
Remove and replace the battery by slightly press the trough at the middle edge
of the battery upward as indicated below.
Remove and replace the tape cassette by turning Cubetape PRO over,
extracting the tape a few centimeters and then lifting the
tape away from the device slowly.
Cleaning and Maintenance Process
Daily clean the sensor system using the air duster and
maintenance port as shown. (Note the maintenance port
is concealed beneath the rugged cover.)
Regularly wipe the tape blade with a non-solvent cleaner.
Replace the tape when tape is worn and
yellow particles appear.
Structured maintenance is critical to the long term operation of the system and to assist with this Cubetape
firmware includes an alert system to support the process of cleaning and replacement of tapes. Cubetape
tracks tape usage and will issue two types of service alerts, “clean tape” and “replace tape cassette” alert.
Battery Compartment
Battery
Tape Cassette
Tape Compartment
Cubetape PRO Quickstart Guide


