background image

♦♦♦

11

English

CONTROLS AND ADJUSTMENTS

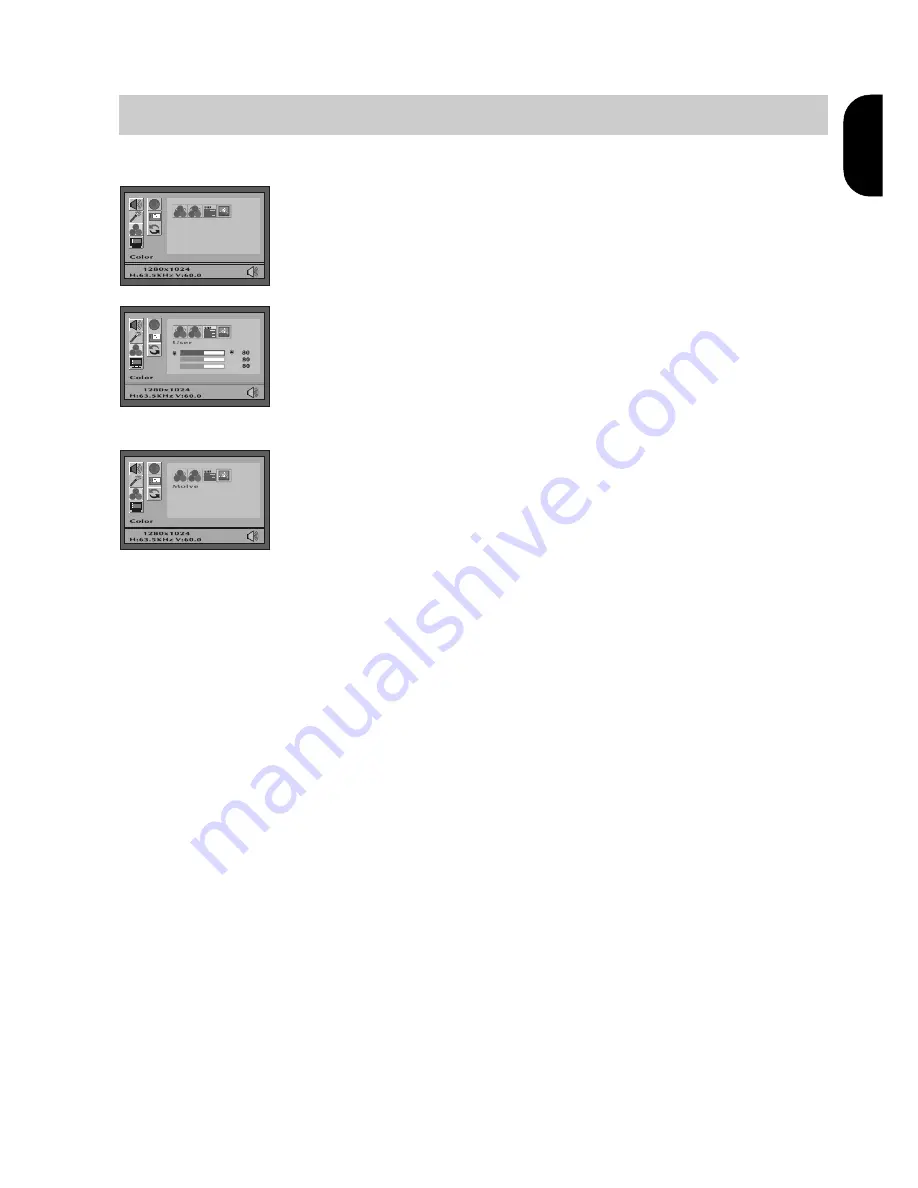
3. Color

You can choose either the 6500°k, 9300°K color temperature
mode, User mode or Motion Picture to store your user defined
color settings.

• User Mode
a. Press " 

↵ 

" button to enter User mode.

b. Press the "

" or "

" button to select the R/G/B gain , then

press " 

↵ 

" button to proceed.

c. Press "ESC" button to leave this function.

• Motion Picture Mode

Press " 

↵ 

" button to enter Motion Picture mode.

a. Saturation:

Press the "

" or "

" button to adjust Saturation.

b. Tint:

Press the "

" or "

" button to adjust Tint.

c. Flesh Tone:

Press the "

" or "

" button to adjust Flesh Tone.

d. Black Level:

Press the "

" or "

" button to adjust Black Level.

e. Recall:

Press the " 

↵ 

" button to recall factory default settings.

Summary of Contents for p772L

Page 1: ...User s Manual P772L LCD Monitor ...

Page 2: ...pliance could void your authority to operate the equipment Copyright This publication including all photographs illustrations and software is protected under international copyright laws with all rights reserved Neither this manual nor any of the material contained herein may be reproduced without the express written consent of the manufacturer Disclaimer The information in this document is subjec...

Page 3: ...saving mode after a certain time beneficial both for the user and the environment Electrical safety Emissions Electromagnetic fields Noise emissions Ecology The product must be prepared for recycling and the manufacturer must have a certified environmental management system such as EMAS or ISO 14 001 Restrictions on chlorinated and brominated flame retardants and polymers heavy metals such as cadm...

Page 4: ...s for Operating the Viewing Angle of LCD Monitor 7 CONTROLS AND ADJUSTMENTS 8 Front User Controls 8 OSD Directly Adjustment 9 Brightness 9 Contrast 9 Audio 9 OSD Main menu 9 Volume 9 Auto Tune 10 Color 11 Image Clock Phase Image Position Smooth 12 Language 13 OSD Position 13 Reset 13 Energy Declaration 14 TROUBLESHOOTING 15 TECHNICAL INFORMATION 16 Compatibility 16 Pin Assignment 16 Preset Modes 1...

Page 5: ...n an area where it will not be stepped on 4 Do not apply pressure to the LCD screen Excessive pressure may cause permanent damage to the display 5 Do not remove the cover or attempt to service this unit by yourself You may void the warranty Servicing of any nature should be performed only by an authorized technician 6 Safe storage of the LCD Monitor is in a range of minus 20 to plus 60 degrees Cel...

Page 6: ...SA Direct RGB input SXGA 1280x1024 resolution up to 16M colors Lightweight compact design weighting less than 6 6 Kgs DPMS power saving Compatible Built in universal power supply Anti glare display On Screen Display OSD controls and adjustments 1W x2 Audio function inside the monitor Audio volume adjustment by OSD Package Overview Your monitor package contains CAUTION Keep the shipping carton in c...

Page 7: ...tion of the Monitor Arm CAUTION 1 The Monitor Arm is an optional item 2 The Arm Mounting Device must be VESA Flat Physical Mounting Interface Standard 3 Please fix LCD monitor to monitor arm with 4x12mm screw INTRODUCTION ...

Page 8: ...if another type of power cord is required power cord H05VV F or VW 1 18AWG x 3G should be used Do not overload wall outlets or power cords Ensure that the total of all units plugged into the wall outlet does not exceed 7 amperes Ensure that the total ampere ratings on all units plugged into the extension cord is not above the cord s rating If the power supply cord which came with your monitor is t...

Page 9: ...lly match up the three hinges at the top of the cover with the three corresponding slots slide and lock into place 3 Using a flathead screwdriver insert the screws and tighten in the direction indicated 2 Once the back cover is attached you can rotate it down to a fully closed position INTRODUCTION ...

Page 10: ...o 502 5mm 3 Rotate The monitor screen can be swiveled left or right by holding the monitor support at the top grabbing the edge of the screen and turning it to face 35 degrees left or right 4 Pivoting Grab the opposite corners and rotate the screen 90 degrees 2 Backward Forward Angle Adjustment The vertical angle of the monitor can be adjusted 5 degrees forward and 35 degrees backward by holding t...

Page 11: ...ference 1 Enter button To display the OSD manual and select functions 2 Down button To adjust the selected OSD function or the brightness directly 3 Up button To adjust the selected OSD function or the contrast directly 4 ESC button To close the OSD manual and to escape function or audio mute 5 Power LED Indicator As long as the monitor is powered this indicator is lit In normal operation it light...

Page 12: ... exit 1 Volume Press to adjust volume and enter sound playing mode AUDIO Normal Mode a Press the ESC button to enter sound playing mode in mute mode b Press the ESC button to enter mute mode in sound playing mode c Press the to turn on the OSD main menu Power Saving Mode when power indication lights amber a Mute Hot Key When playing music Press ESC to enter Mute Mode and press ESC again to return ...

Page 13: ... Color Press button the system will automatically adjust color balance for optimal setting Auto Geometry Press button the system will automatically adjust the clock phase H position and V position values for optimal settings ADVANCED AUTO TUNE PATTERN PROGRAM USAGE GUIDE As some VGA Cards do not match the VESA standard they cannot output 0 7 V p p VESA standard Therefore you need the ADVANCED AUTO...

Page 14: ... or button to select the R G B gain then press button to proceed c Press ESC button to leave this function Motion Picture Mode Press button to enter Motion Picture mode a Saturation Press the or button to adjust Saturation b Tint Press the or button to adjust Tint c Flesh Tone Press the or button to adjust Flesh Tone d Black Level Press the or button to adjust Black Level e Recall Press the button...

Page 15: ...ress the or button to reduce the noise on the screen Smooth Press the or button to adjust smooth The Smooth function key will perform only under the resolution range 1280 x 1024 Image Position a H Position Press the or button to reposition the Image to the right or left b V Position Press the button to move the Image downwards and to move it upwards CONTROLS AND ADJUSTMENTS ...

Page 16: ...ow downwards and to move it upwards Center The OSD window will be adjusted automatically to the center of the screen 5 Language 7 Reset Press the or button to select Yes or No Choose Reset to call back all the settings for the current Input Signal mode to factory preset CONTROLS AND ADJUSTMENTS Press the or button to select between English German French Spanish or Italian languages ...

Page 17: ... T U N e t a t s A S E V r o t a c i d n i D E L n o i t p m u s n o C r e w o P l a m r o N n o i t a r e p o n O e u l B W 9 3 g n i v a S r e w o P f f O r e b m A W 2 h c t i w S r e w o P f f O f f O f f O W 1 Audio mute mode CTX is committed to incorporating TCO 03 safety standards into our production process so as to provide customers with the best in product quality This display unit is an...

Page 18: ...n it initializes Turn off the monitor and turn it on again Refer to the Controls and Adjustments section to reload the default setting RESET on the OSD main menu Partial image or incorrectly displayed image Check to see if the resolution of your computer is higher than that of the LCD display Reconfigure the resolution of your computer to make it less than or equal to1280x1024 or to make sure refl...

Page 19: ... c n y S l a c i t r e V 4 1 d n u o r G 1 1 0 1 8 7 6 5 n o i t c e n n o C o N 4 C D D A D S 2 1 C D D L C S 5 1 C D D V 5 9 n o i t u l o s e R z H M K L C V l a t n o z i r o H z H K y c n e u q e r F l a c i t r e V z H y c n e u q e r F d r a d n a t S 0 0 4 0 2 7 2 2 3 8 2 9 6 4 1 3 0 0 0 0 7 A G V M B I 0 8 4 0 4 6 5 7 1 5 2 9 6 4 1 3 0 4 9 9 5 A G V M B I 0 8 4 0 4 6 0 0 5 1 3 1 6 8 7 3 0...

Page 20: ...rizontal 30 to 80kHz Vertical 59 to 75 Hz Audio Input 1V RMS typical Audio Output 1W x 2 User controls Power Enter Up Down Escape Volume Power Consumption 39W 2W Power Saving Audio mute mode 1W Power switch off Input signal D 15 Analog 0 7V peak to peak separate TTL Positive or Negative Power Supply 100 240V 50 60Hz automatically Plug Play DDC 2B Dimension Weight Size WxDxH 379 5x197 5x383 5 small...

Reviews: