CTT Sport Manual Download Page 11

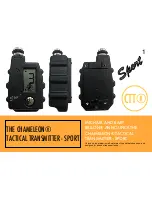
Why do we want to unpair the CTT® Sport 

from the Chameleon®? 

If you have four ID codes paired and you pair a fifth 
ID code, the fourth ID code will be knocked out. The only way 
to delete ID code 1, 2, 3 from being paired is to knock them all 
out!  

Unpairing a Chameleon® Collar Receiver from the 

CTT® Sport  

1. Make sure that the CTT® Sport and the collar receiver are 
charged. 

2. To unpair a Chameleon® Collar Receiver from the CTT® 
Sport, one must follow the same steps as when pairing, but 
when the 4 fast blinking LEDS begin to flash, the transmitter 
must be moved at least one meter from the Chameleon® 
Collar Receiver for about three seconds.  

3. Then you bring the magnet on the transmitter back to the 
synchronization point on the receiver until the fast lights stop 
flashing. This erases the pairing. Now you will see that your 
collar receiver immediately goes in standby (1 LED blinks every 
2 to 3 seconds). This collar will not respond to any transmitter. 

If you hold the Chameleon® Collar Receiver and the 
transmitter apart for too long before bringing them back 
together, the transmitter and receiver will not unpair. If the 
Chameleon® Collar Receiver is not unpaired, try again. 
Sometimes it is easier to use the independent magnet from the 
set for unpairing instead of the magnet on the transmitter.  

Once the ID codes are unpaired, the collar needs to be 
paired again with one or more ID codes for subsequent use. 

To program the receiver (Chameleon® or Micro Collar) 

to operate with the CTT® Sport, you need to first turn on 

the CTT® Sport by pressing and releasing the Program 

Button.  

Make sure that the CTT® Sport and the collar receiver 

are charged. 

1. Hold your CTT® Sport with the Magnetic start point (see Figure 

2 on Page 2) to the Magnet Point of the Chameleon® (the 
on/off for the Chameleon®). Let them touch and hold still and 
wait. Wait until the 4 LEDs flash quickly and simultaneously. 
(This is after LEDs light in a repeat of what happens when the 
collar is switched “on”.)  

2. After you see the quickly and simultaneous 4LEDs, you may 

separate the CTT® Sport and the Chameleon® to 
approximately 1 meter distance apart and then press a 
Finger-Kick that is paired to an option on your CTT® Sport. You 
will see that the collar receiver will react. We call the 4 fast 
blinking LEDS “pairing mode”. The pairing mode will last for 
approximately 10 seconds. If you do not pair during pairing 
mode, the collar will go back into standby (1 LED blinks every 
2 to 3 seconds).  

3. Test your pairing by pushing the Finger-Kick and see if the 

Chameleon® LED shows that it is paired. A LED will light on the 
Chameleon® Collar Receiver when a Finger-Kick  paired to 
an option on the CTT® Sport transmitter is depressed after 
there is pairing with the collar to that identification code. 
Other ways to check the pairing are that you can set the 
transmitter to tone for testing purposes, and you can test 
output on yourself (manually) to check if the pairing is 
complete.  

4. If the pairing between the Chameleon®


and the CTT® Sport 

was not successful, repeat the procedure.

11

Summary of Contents for Sport

Page 1: ...EON TACTICAL TRANSMITTER SPORT Unique on the market small waterproof sophisticated settings and designed for a hands free experience MICHAEL AND BART BELLON ANNOUNCE THE CHAMELEON TACTICAL TRANSMITTER SPORT CTT 1 ...

Page 2: ... display not lighted for tactical reasons the magnetic start point and the Program button that has the following functions 1 an ON button 2 A navigating button 3 A pairing button to the Finger Kick 4 A stimulation button in SOS 2 Chameleon II collar receiver with Feather contact accessories Figure 2 LED display Magnetic start point Rotation knob Special o ring for smoother tuning Figure 1 Figure 3...

Page 3: ...F THE CTT SPORT 3 HOLE IN STAINLESS STEEL FIXATION PLATE FOR ATTACHMENT OF LANYARD OR STRAP 4 LED HOLE 3 Holes for fixation of plate via screws Metal plate that is under the molded injection will affix the CTT Sport to a strong magnet LED will be GREEN if in loading procedure on induction plate A wrench and 5 screws will be provided ...

Page 4: ...ion level 7 Option Dog 1 A 8 Option Dog 1 B 9 Option P comes from factory with setting set on Level 18 10 Martin System Logo USB Emily is an accessory and can be purchased separately USB Emily can customise features of Chameleon II Chameleon I and micro collar receiver Martin System USB Emily is available on bartbellonshop com or shop martinsystem com CTT Display Configuration 4 10 Option P ...

Page 5: ...stimulation options One identification code is used only to remove stimulation Note that the Chameleon can be paired from factory setting to both identification codes The micro collar with 4 masters can also be paired at factory settings to both identification codes The micro collar can be tuned with USB Emily to accept 4 identification codes 5 2 7 cm Technical specifications of the CTT Sport 1 Ca...

Page 6: ...aired with the CTT Sport the linking is unique and can not disturb another user of similar material To pair the Finger Kick to the CTT Sport please consult page 9 of this manual THE FINGER KICK BLUETOOTH RING STIMULATION BUTTON Technical Characteristics of the Finger Kick Dimensions 27x30x17 mm Weight 6 grams Waterproof Battery CR1025 3V 30mAh Frequency 2 4 GHz Power 1mW No charging necessary 6 ...

Page 7: ...e arrow is on the bottom of the left SOS In the case of emergency SOS you can work with the program button as your stimulation button For example if you lose your Finger Kick or when the battery from the Finger Kick is unexpectedly empty you can use the program button as an SOS button In SOS mode the display will always refer to Dog 1A at continuous stimulation You can still modify the stimulation...

Page 8: ...ess on the program button will inevitably send a continuous stimulation at the preset level to your collar 4 To turn off the CTT Sport just turn the rotation knob under 0 The display will go blank and the transmitter is now OFF You cannot turn off the CTT Sport when your CTT Sport is on Option P 5 After three and a half hours your CTT Sport will automatically switch off This count down will start ...

Page 9: ...release your program button and the display arrow will now navigate to another option Now press your Finger Kick If the display jumps back to the option where you paired the Finger Kick you know your Finger Kick is paired It is possible to link each option Dog 1A Dog 1B and option P with a Finger Kick After pairing a Finger Kick to Option P if you push the Finger Kick linked to that option you wil...

Page 10: ...tomatically paired with option Dog 1B and vice versa If you pair your Chameleon with option Dog 2A it is automatically paired with option Dog 2B and vice versa The Chameleon can accept up to 4 identification codes On the CTT Sport you can pair your Chameleon to both identification codes In this way you can have up to 2 Finger Kicks working as independent and immediate preset levels and modes on ea...

Page 11: ...ogram the receiver Chameleon or Micro Collar to operate with the CTT Sport you need to first turn on the CTT Sport by pressing and releasing the Program Button Make sure that the CTT Sport and the collar receiver are charged 1 Hold your CTT Sport with the Magnetic start point see Figure 2 on Page 2 to the Magnet Point of the Chameleon the on off for the Chameleon Let them touch and hold still and ...

Page 12: ...n be on or off the position of the CTT Sport on the charging plate is not symmetrical see red dotted line The CTT Sport must be on the LEFT side of the charging plate where from the backside of the CTT Sport the two screw holes for the fixation plate on the right side of the CTT Sport bisect the charging plate and the bottom of the CTT Sport should be about a centimetre above the edge of the plate...

Page 13: ...th the display side down onto the top side of the charging plate as in the picture above As you can see the CTT Sport is on the left side of the charging plate it is NOT centralised on the charging plate The LED on the CTT Sport will be green if the CTT Sport is charging If the CTT Sport does not need charging no light will be illuminated Put your CTT Sport on the charging plate in charging positi...

Page 14: ...elease the program button press the program button again and release The display now will show Dog 1A in continuous electricity From now on your program button is the stimulation button Remember in SOS mode the program is set on continuous electricity with no tone When in SOS mode your Finger Kicks are automatically disconnected from your CTT Sport This means that no Finger Kick will or can contro...

Page 15: ...Notes My CTT Sport chip number My Chameleon chip number ...

Page 16: ......

Reviews: