13
12
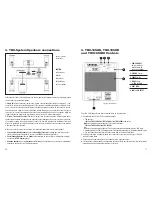
5. Subwoofer Installation Guide
The following instructions are for THX Certified as well as non-certified Dolby Digital/DTS A/V
receivers or surround processors.
1.
Turn off your receiver or multichannel amplifier and make sure the THX-SUB is off
2.
Use high quality shielded interconnect with RCA connectors to link the THX-SUB to the output
of your receiver or multichannel amplifier
3.
Set the Operational Mode switch on your THX-SUB to the THX position
4.
Set the Phase switch to Normal
5.
Turn on your system and the THX-SUB
6.
Navigate to the Speaker Setup menu of your receiver or processor to calibrate channel level
and size of your front, center and surround speakers
7.
Set your main and surround speakers to Small on your receiver or processor
8.
Set the roll off point to the following:
80Hz (THX standard) for THX Select loudspeakers
120-150Hz for other small speakers (Crystal Acoustics Plasma, SmArt System and Super Baby series)
The higher the crossover, the better the power handling of your main speakers
11.
Change the Phase Control of your THX-SUB between Normal and Reverse positions
12.
Listen to music with prominent bass
13.
Stay with the switch position that produces the fullest, deepest and tightest bass in your listening area
14.
Use the pink noise test signal of your receiver, processor or Test-DVD
15.
Take a seat at the main listening and viewing position
16.
Use an SPL meter (C scale, slow) and calibrate the output sound level of each channel
(fronts, center, surrounds) plus your subwoofer so that all outputs levels are equal
17.
When using a single THX-10SUB or THX-10SUBt subwoofer, you must increase the subwoofer
output level of your receiver or processor by 4.5dB to get the proper bass levels to meet
THX standards
18.
Connection of multiple subwoofers to a receiver or processor with only one SUB/LFE output
can be accomplished with Y-adapters (RCA male to two RCA female connectors)
6. Troubleshooting
6.1 No sound from THX-SUB
Make sure your THX-SUB is plugged into an AC outlet
Make sure the LED on the back of the THX-SUB is on and lit red (operating) and not orange (stand-by)
Otherwise switch the subwoofer's power off then on again
Make sure the
Subwoofer Y/N
option is set to Yes in your receiver or processor's speaker setup menu
Make sure the Volume Control is not set to Minimum if the subwoofer's in Variable Mode
Make sure your subwoofer interconnect is functioning properly and replace any defective cables
6.2 Boomy, dull, out of focus low frequencies
Try moving your subwoofer away from corners or walls in small steps
The boom results from exciting room resonances
Small changes in position can make a big difference
6.3 50/60 cycle hum coming from the subwoofer
Your THX-SUB is reproducing ground loop hum from elsewhere in your system
Make sure interconnect and speaker cables are routed away from AC power cords and component
power supplies to avoid induced hum
Cross interconnects at 90 degrees to AC power cords and keep them separated by at least an inch.
Also connect the power cord of your THX-SUB and receiver/processor and multichannel amplifier to the
same AC outlet to keep the grounds all at the same potential avoiding hum
7. Specifications
Model nam
THX – T3
THX - SURROUND
THX - DIPOLE
THX - B1
THX - CENTER
THX-12SUB
THX-10SUBt
THX-10SUB
CROSSOVER TYPE
31/2-way
2-way
2-way
2-way
2-way
THX/Variable
THX/Variable
THX/Variable
MAGNETICALLY SHIELDED
WOOFER 6.5’’
3
1
1
1
1
WOOFER 12’’
WOOFER 10’’
TWEETER 1’’ NEODYMIUM MAGNET
1
1
2
1
1
POWER (Wrms)
180
100
100
100
100
200
120
120
MAXIMUM POWER (Watt)
350
200
200
200
200
SENSITIVITY (dB/W/m)
92
88
88
89
89
93
92
92
IMPEDANCE (Ohm)
4
8
8
4
4
4
4
4
FREQUENCY RESPONSE (Hz - kHz)
35-22k
35-22k
45-22k
45-22k
45-22k
20-350
20-350
20-350
BASS REFLEX
BI-WIRE GOLD PLATED BINDING POST
FRONT DIMENSIONS DxHxW (mm)
165x1200x160
165x1030x160
310x330x140
165x370x230
530x165x170
470x470x350
470x470x310
470x470x310


