background image

ReDi 100 User Manual 


V. Ipirou 45, 15125 Marousi, 

Τ

el: 210-8098700, Fax: 210-6122512 

Site: 

www.crypto.gr

, Email: [email protected]


12 

7. 

EDIT CHANNEL 

7.1      Edit Channel menu   

1. Press the "MENU" button to enter main menu. 

2. Press "UP" or "DOWN " button to highlight "Edit Channel", press "RIGHT" button to enter 

the Edit Channel menu. 

3. Press "UP" or "DOWN" cursor button to highlight the desired item and press "OK" button to 

enter the sub-menu . 

4. Press "EXIT" button to exit. 


7.2      TV Channel list 

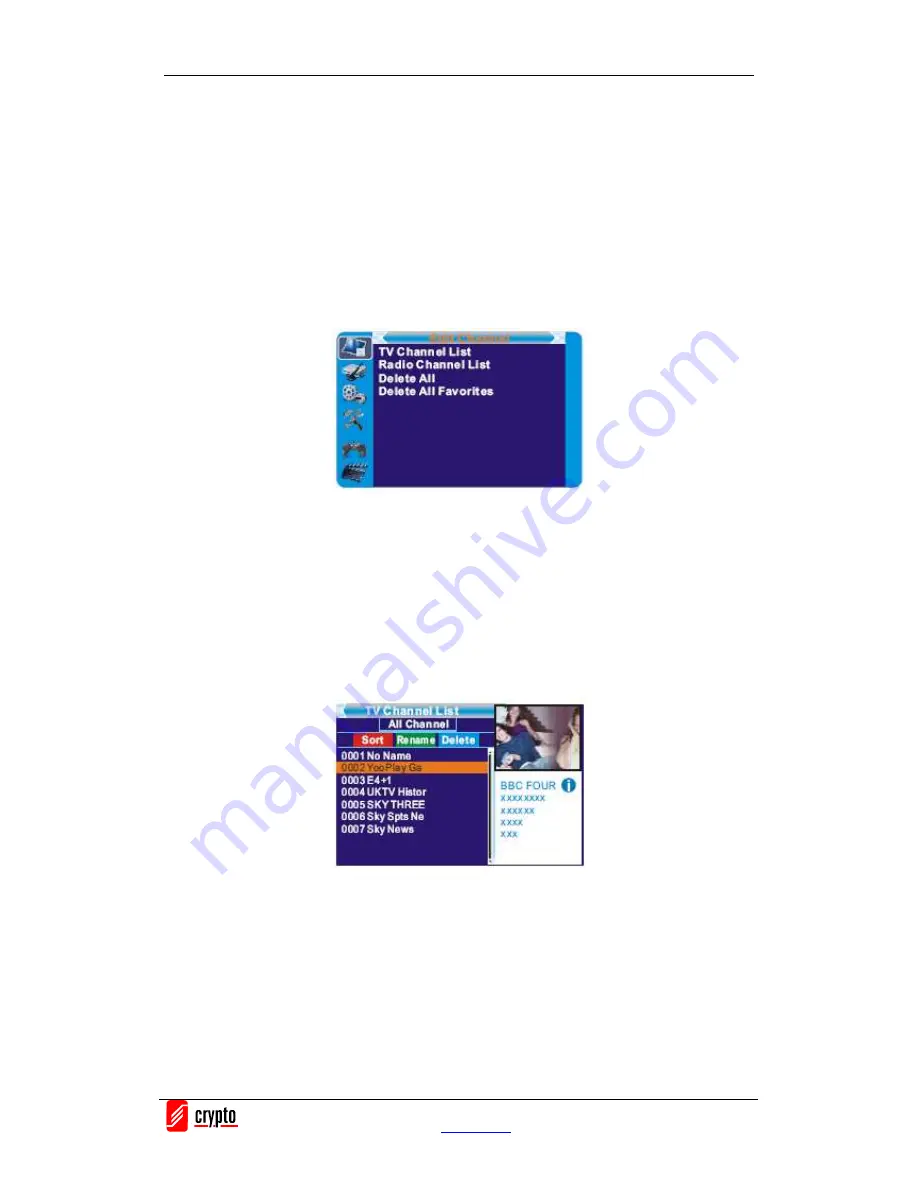
1. In the Edit Channel menu, select "TV Channel List", press "OK" button to enter TV channel 

list menu. 

2. Press "UP" or "DOWN» button to highlight a channel, press the "OK" button to preview the 

desired TV channel. 

- Use this menu to favor, lock, skip, move, sort, delete and rename a channel. 

(1) Press "FAV" button, then press "OK" button to edit the FAV function. 

(2) Press "color" button, then press "OK" button to edit the corresponding function. 


7.4      Radio Channel list   

1. In the Edit Channel menu, select "Radio Channel List", press "OK" button to enter the Radio 

Channel list menu. 

2.  Press  "UP"  or  "DOWN"  button  to  highlight  channel  press  the  "OK"  button  to  listen  the 

desired TV channel.   

Summary of Contents for ReDi 100

Page 1: ...ReDi 100 User Manual V Ipirou 45 15125 Marousi Τel 210 8098700 Fax 210 6122512 Site www crypto gr Email crypto crypto gr 1 SD DVB T MPEG 4 RECEIVER ReDi 100 User Manual ...

Page 2: ...use liquid cleaners or aerosol cleaners Use a dry cloth for cleaning 3 You will notice that the product has slots and openings These are used for ventilation to ensure reliable operation and to protect it from overheating The openings should never be blocked by other devices This product should not be placed in an installation unless proper ventilation is provided Do not put anything above the pro...

Page 3: ...ONNECTION 4 1 General 4 2 Connection to the TV and video recorder 4 3 Connecting a HiFi System 5 GETTING STARTED 5 1 Welcome 5 2 Installation 6 OPERATION 6 1 Changing channels 6 2 Access the Electronic Program Guide EPG 7 EDIT CHANNEL 7 1 Edit Channel menu 7 2 TV Channel list 7 3 Radio Channel list 7 4 Delete All 8 SYSTEM SETUP 8 1 System setup menu 8 2 Language 8 3 TV System 8 4 Local Time Settin...

Page 4: ...ceiver Information 9 3 Load Factory Default 9 4 Software Upgrade 9 5 Remove USB device safely 10 GAMES 10 1 Games 11 REC MEDIA 11 1 REC main menu 11 2 Media 11 3 Record Manager 11 4 DVR HDD Information 11 5 HDD Format 11 6 DVR Configuration 11 7 Jump 12 TIMESHIFT RECORD 12 1 Times Shift 12 2 Personal Video Recording PVR 13 TROUBLESHOOTING 14 SPECIFICATIONS ...

Page 5: ...1 Front panel 1 Remote sensor 2 Channel up Down 3 Display 4 Standby button 3 1 2 Rear panel 1 TV aerial for an external TV antenna 2 USB port 3 TV Scart for connection to the TV 4 Down Mix Audio 2 Channel L R 5 Composite Video 6 AC Mains 7 RF Loop through for an external device 8 AUX Scart for connection to a VCR or a satellite receiver 9 Coaxial Digital Audio ...

Page 6: ...reen 7 Cursor CH VOL Cursor Navigation buttons used to navigate menu s items CH Channel Up and Down VOL Volume Up and Down 8 OK button Confirm a selection within a menu 9 RECORD Record the TV program 10 Numeric entry Enter numeric values and select the channel directly by entering it s number 11 USB Enter File Manager 12 MEDIA Enter Recorder menu 13 TTX Open interactive service 14 TIMER Timer wake...

Page 7: ...program playback or recording 20 EPG Open up Electronic Program Guide Menu 21 BACK Switch to previous channel 22 TV RADIO Switch between TV and Radio 23 AUDIO Select audio mode and audio track 24 MUTE Turn off on the volume 25 FAV Open the Favorite list 26 RED GREEN YELLOW BLUE Buttons For interactive function Submenu functions buttons ...

Page 8: ...4 1 General There are many different types of TV and other equipment that you can connect to the device In this manual you will see some of the most common ways to connect your equipment 4 2 Connection to the TV and video recorder 4 3 Connecting a HiFi system 1 Antenna 2 RF cable 3 Scart cable 4 Red 5 White 6 Yellow 7 Scart cable 8 Coaxial cable ...

Page 9: ...lation 1 Press the MENU button to enter main menu 2 Press UP or DOWN button to highlight Installation press RIGHT button to enter to the Installation menu 3 Press UP or DOWN cursor button to highlight the desired item and press OK button to enter the sub menu 4 Press EXIT button to exit 5 2 1 Channel Auto Scan 1 Select the Auto Scan press OK button to enter the Auto Scan menu 2 Press the cursor bu...

Page 10: ... start channel scan Channel Scan mode By channel By frequency 5 2 3 Aerial Adjustment 1 Select the Tuner Power press OK to enter the Aerial Adjustment 2 Press the cursor button to set the desired setting When Tuner Power is selected On the STB will provide 5V power to the antenna It will not provide anything when Off is selected 5 2 4 LCN If LCN Logical Channel Number Select function is activated ...

Page 11: ...g the Electronic Program Guide EPG With the DVB T you can have access to program information any time you want This feature is displayed on screen with functions allowing a viewer to navigate select and see content by time title channel etc Also you can have access to TV guide of any digital channel To use this function simply follow the following 1 Press EPG button to enter EPG menu 2 Press curso...

Page 12: ...nnel list 1 In the Edit Channel menu select TV Channel List press OK button to enter TV channel list menu 2 Press UP or DOWN button to highlight a channel press the OK button to preview the desired TV channel Use this menu to favor lock skip move sort delete and rename a channel 1 Press FAV button then press OK button to edit the FAV function 2 Press color button then press OK button to edit the c...

Page 13: ... press OK button 2 A warning window appears Select Yes press OK button to delete all channels Select No Press OK button to cancel deleting 8 SYSTEM SETUP 8 1 System setup menu System setup menu allows us to set Language TV System Local Time Setting Timer Setting Parental Lock OSD Setting and Favorite 1 Press the MENU button to enter main menu 2 Press UP or DOWN button to highlight System Setup pre...

Page 14: ...f On GMT Offset This menu is valid only when selected Uesr Define in GMT Usage menu The GMT offset range is 11 30 12 00 increasing half hour progressively Date Date and Time menus are valid only when selected Off in GMT Usage menu Time Press OK then numeric button to input the time 8 5 Timer Setting 1 Program Timer This menu allows us to set the program timer for a scheduled recording or channel s...

Page 15: ...numeric buttons the parental lock menu appears Menu Lock To lock the installation menu and Edit menu When you want to enter Auto Scan Channel Scan menu you must input the password You can set menu lock to on off Channel Lock Off Manual AGE 10 AGE 12 AGE 16 AGE 18 New Password To change the password Confirm Password To confirm the new password 8 7 OSD Setting This menu allows you to set OSD Timeout...

Page 16: ...pad to confirm then you have you change Favorite group name successfully 3 Press EXIT button to quit the group rename menu 9 TOOLS 9 1 Tools main menu 1 Press the MENU button to enter main menu 2 Press UP or DOWN button to highlight Tools press RIGHT button to enter the Tools menu 3 Press UP or DOWN cursor button to highlight the desired item and press OK button to enter the sub menu 4 Press EXIT ...

Page 17: ...irmation window will be displayed Select Yes to activate a reset back to the factory settings and clear all channels 3 Select No to cancel Press EXIT button to exit 9 4 Software Upgrade We offer the functions for user to upgrade software version by OTA or by USB 1 Enter Tools menu select S W Upgrade by OTA or Upgrade by USB press OK button and the Software Upgrade menu will be shown 2 Press cursor...

Page 18: ...safely Press OK button to confirm Then a window is displayed Press OK button again 10 GAME 10 1 Game This menu allows you to play games 1 Press the MENU button to enter main menu 2 Press UP or DOWN button to highlight Game press RIGHT button to enter the Game menu 3 Press UP or DOWN cursor button to highlight the desired item and press OK button to enter the game 4 Press EXIT button to exit ...

Page 19: ...e sub menu 4 Press EXIT button to exit 11 2 Media This function allows you to play files from USB port 1 In Tools menu select Media press OK button to enter Media Player menu 2 Press UP or DOWN cursor button to select a desired item and press OK button to play the desired files 3 Press EXIT button to exit 11 3 Record Manager This menu allows you to play the recorded files 1 In REC MEDIA menu selec...

Page 20: ...VR HDD information window 2 Press EXIT button to exit 11 5 HDD Format This menu allows you to format the removable disk 1 In REC menu select HDD Format press OK button to open HDD Format menu 2 Highlight Storage Partition press LEFT or RIGHT cursor button to change Partition 3 Highlight Format press OK button a window appears Select FAT NTFS press OK button to format Select Cancel Press OK button ...

Page 21: ...ream which includes information like teletext subtitle epg etc PS Program stream which will be packeted with the file format of mpg and be also playbacked by PC or other devices Record Selection You can press LEFT or RIGHT cursor button to change Selection 11 7 Jump 1 Press Left or Right button to switch the jump time The option is 30 second 1 min 5 min 10 min 30 min 2 When you play a recorded pro...

Page 22: ...an Pause the program and continue to see if another time NOTE For proper operation of TIME SHIFT it is recommend using a storage device that supports USB 2 0 and has high speed read write Also if it is possible it is recommended to use a USB stick or HDD with high storage space The product can support up to 2TB disks The TIME SHIFT is a feature where you can simultaneously track pause or to go bac...

Page 23: ...ram Stop TIME SHIFT The TIME SHIFT is switch off when you change the channel or if you enter the main menu NOTE The TIME SHIFT is disabled when you activate it for a specific channel and you have scheduled a recording PVR to another channel When that recording starts the device will take you to that channel automatically and it will deactivate Time Shift to the other The TIME SHIFT can be activate...

Page 24: ...ams you have recorded press 1 Menu Rec Media select Record Manager press OK 2 Press the Up and Down arrow keys to select the desired entry and press the OK to play the file 3 Press EXIT on the remote to exit the menu Note When you write a program in a particular channel you can watch another of the same group of four digital channels at the same time you make the record When you have programmed a ...

Page 25: ...dset not aimed correctly Front panel obstructed Hand set batteries exhausted Plug in and turn on plug Aim handset at front panel Check for obstructions Replace handset batteries Forgotten channel lock code Re install channels to cancel channel lock Forgotten menu lock code Contact help line The remote control will not operate your device 1 The batteries in your remote control need replacing 2 Ther...

Page 26: ...Video resolution 480i 576i Media Format Audio mp3 Image jpg bmp OSD Menu Multi Language Supports Greek Teletext Greek Tuner RF Input Connector IEC FEMALE Loop Through IEC Male Receiving Channel Range 174 230MHz 470 862MHz Modulation QPSK 16QAM 64QAM Band Width 7MHz 8MHz Outputs CVBS Video Output 3xRCA Yellow White Red L R Audio Output 2x RCA White Red TV SCART 2 x SCART Digital Audio Coxial Output...

Reviews: