background image

Adjust current screen position and size


PAS TYPE : Select type of parking guide line  
   - NOT USED: No use parking guide line  
   - PAS ON: Selecting Dynamic parking guide line


   - PAS OFF Selecting fixed parking guide line


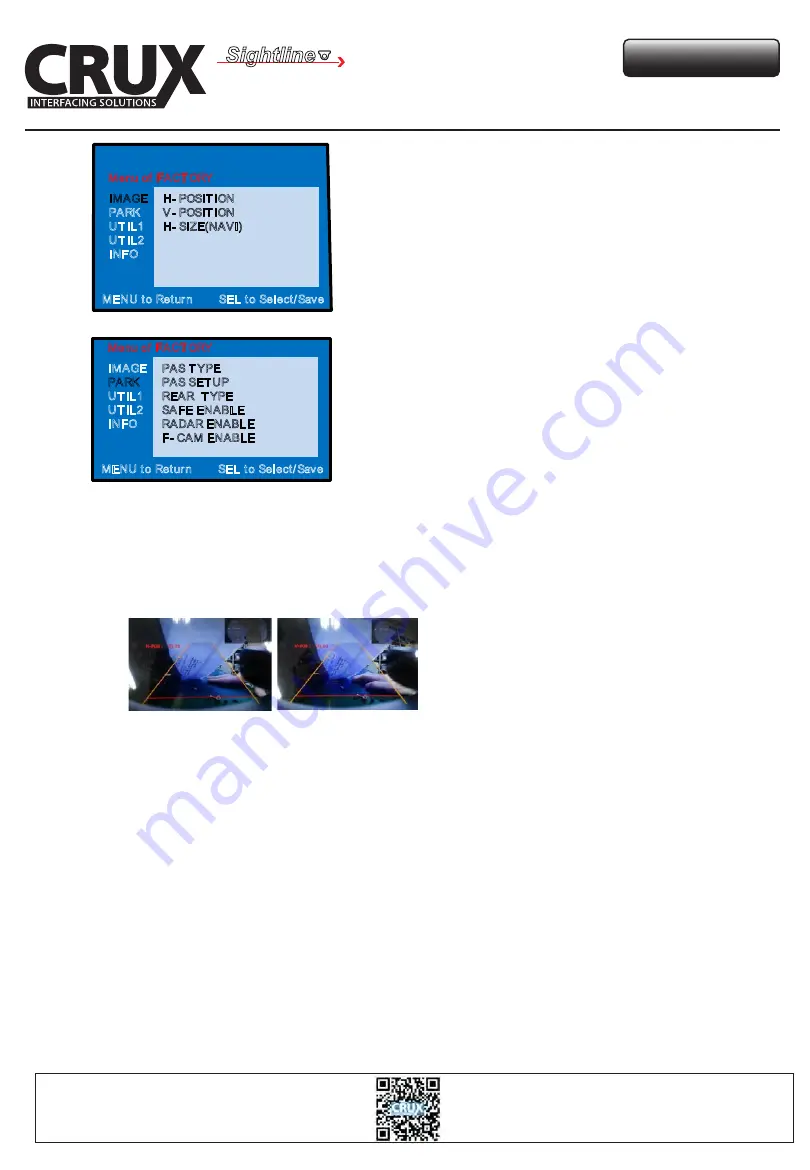
PAS SETUP: Adjusting the position of the parking guide line


REAR TYPE: Choose rear camera recognition.


   - CAN: By connecting to “CAN” wires of the car gear, changing to 

rear camera mode when shifting into reverse. (Connect “CAN” 
cable of the power cable to the “CAN” cable of the car gear.)


   - LAMP: By connecting to the reerse light of the car, switch to rear 

camera mode when shifting into rear. (Connect “Rear -C” cable of 
the power cable to the rear lamp of the car.)


SAFE ENABLE: If enabled, HDMI, RGB, and A/V mode will not show up 

while driving. (Default: OFF)


RADAR ENABLE: Setting up parking distance alarm sensor. (ON/OFF)


F-CAM ENABLE: Front camera setting  

- OEM CAMERA : Select OEM front camera  
- EXT CAMERA : Select aftermarket front camera


- NOT USED  

<H-POSITION> 

<V-POSITION> 

Adjust rear view camera setting.


H-POSITION : Move display horizontally  
V-POSITION : Move display vertically  
H-SIZE(NAVI) : Adjust the size of navigation   
                         display horizontally  

IMAGE 

PARK 
UT IL1 
UT IL2 
INFO 

H- POSIT ION 
V - POSIT ION 
H- SIZE(NAVI) 

Menu of  FACT ORY 

MENU t o Retur n       SEL t o Select/ Save  

IMAGE 

PARK 

UT IL1 
UT IL2 
INFO 

PAS T YPE 
PAS SET UP 
REAR  T YPE 
SAFE ENABLE 
RADAR ENABLE 
F- CAM ENABLE 

Menu of  FACT ORY 

MENU t o Retur n       SEL t o Select/ Save  

Crux Interfacing Solutions
www.cruxinterfacing.com

tel. #: (818) 609-9299
fax #: (818) 996-8188

7 / 10

rev.012217

Rear-View Integration Interface with Dynamic Parking Guide Lines

for MERCEDES BENZ E Class with NTG5.5 Systems

RVCMB-78E

Sightline

REAR-VIEW INTEGRATION

Summary of Contents for RVCMB-78E

Page 1: ...quipped with an OEM rear view camera With OE type Dynamic Parking Guidelines Toggle AV inputs from Comand knob wireless remote control or wired push button switch provided On screen display and setup Mercedes Benz 2016 2017 E Class Works on Mercedes Benz E Class with NTG5 5 systems and 12 3 or 8 4 screens 12 3 Screen 8 4 Screen 1 10 rev 012217 ...

Page 2: ...OUCH IN Cable Crux Interfacing Solutions www cruxinterfacing com tel 818 609 9299 fax 818 996 8188 Parts Included Rear View Integration Interface with Dynamic Parking Guide Lines for MERCEDES BENZ E Class with NTG5 5 Systems RVCMB 78E Sightline REAR VIEW INTEGRATION 2 10 rev 012217 RVCMB 78E Rear View Integration for MERCEDES BENZ E CLASS NTG5 5 R ...

Page 3: ...e white OEM connector and connect it to white CAN2USBconnector OEM connector Capa citivetouch screen connection Power cable Crux Interfacing Solutions www cruxinterfacing com tel 818 609 9299 fax 818 996 8188 Wiring Diagram 3 10 rev 012217 RGB Navigation Not Included R RVCMB 78E Rear View Integration Interface for MERCEDES BENZ E CLASS NTG5 5 Rear View Integration Interface with Dynamic Parking Gu...

Page 4: ...hen another side of connector shall be connected to the LVDS IN of the interface OEM LVDS IN Cable 12 3 inch monitor command 8 4inch monitor command Fakra adapter In Case of 8 4 Please remove the left wire Crux Interfacing Solutions www cruxinterfacing com tel 818 609 9299 fax 818 996 8188 4 10 rev 012217 Rear View Integration Interface with Dynamic Parking Guide Lines for MERCEDES BENZ E Class wi...

Page 5: ... where the black connector was removed GROUND B Connect the black ground wire of the supplied power cable to the brown OEM wire Connect the red B wire of the supplied power cable to the orange blue OEM wire POWER Connection CAN Connection Crux Interfacing Solutions www cruxinterfacing com tel 818 609 9299 fax 818 996 8188 5 10 rev 012217 Rear View Integration Interface with Dynamic Parking Guide L...

Page 6: ...ACTORY MENU OK Make a selection change image display UP DOWN LEFT Press this button for 2 seconds to access the factory mode RIGHT Press this button for 2 seconds to reset all the user settings Crux Interfacing Solutions www cruxinterfacing com tel 818 609 9299 fax 818 996 8188 Disconnect Power Harness before changing the DIP Switch settings DIP Switch Settings Remote Control 6 10 rev 012217 Rear ...

Page 7: ... while driving Default OFF RADAR ENABLE Setting up parking distance alarm sensor ON OFF F CAM ENABLE Front camera setting OEM CAMERA Select OEM front camera EXT CAMERA Select aftermarket front camera NOT USED H POSITION V POSITION Adjust rear view camera setting H POSITION Move display horizontally V POSITION Move display vertically H SIZE NAVI Adjust the size of navigation display horizontally IM...

Page 8: ...calibration Check the version number IMAGE PARK UTIL1 UTIL2 INFO NAVI MODEL AVOUT SELECT FACTORY RESET Menu of FACTORY MENU to Return SEL to Select Save IMAGE PARK UTIL1 UTIL2 INFO I DRV REMOTE I DRV CONTROL IR MEMORY CALIBRATE Menu of FACTORY MENU to Return SEL to Select Save IMAGE PARK UT IL1 UT IL2 INFO SYSTEM VERSION MAIN 130723 TRIP 130723 Menu of FACTORY MENU to Return SEL to Select Save Cru...

Page 9: ...t press Back to OEM mode BACK button Long press Switch mode Short press Back to OEM mode Using the Factory Buttons Crux Interfacing Solutions www cruxinterfacing com tel 818 609 9299 fax 818 996 8188 9 10 rev 012217 Rear View Integration Interface with Dynamic Parking Guide Lines for MERCEDES BENZ E Class with NTG5 5 Systems RVCMB 78E Sightline REAR VIEW INTEGRATION ...

Page 10: ...remote will appear if the joy shuttle is moved to the left for a short time in DVD DTV mode Monitor Direction Mode Movement 12 3inch 8 4 inch DVD DTV Short UP DOWN LEFT RIGHT Long Select Crux Interfacing Solutions www cruxinterfacing com tel 818 609 9299 fax 818 996 8188 10 10 rev 012217 Push Comand Knob Rear View Integration Interface with Dynamic Parking Guide Lines for MERCEDES BENZ E Class wit...

Reviews: