background image

CRU 


R T X 1 0 0 - 3 Q   U s e r   M a n u a l   A 9 - 1 0 0 - 0 0 0 6   R E V   1 . 0  

  - 6 -       


d)

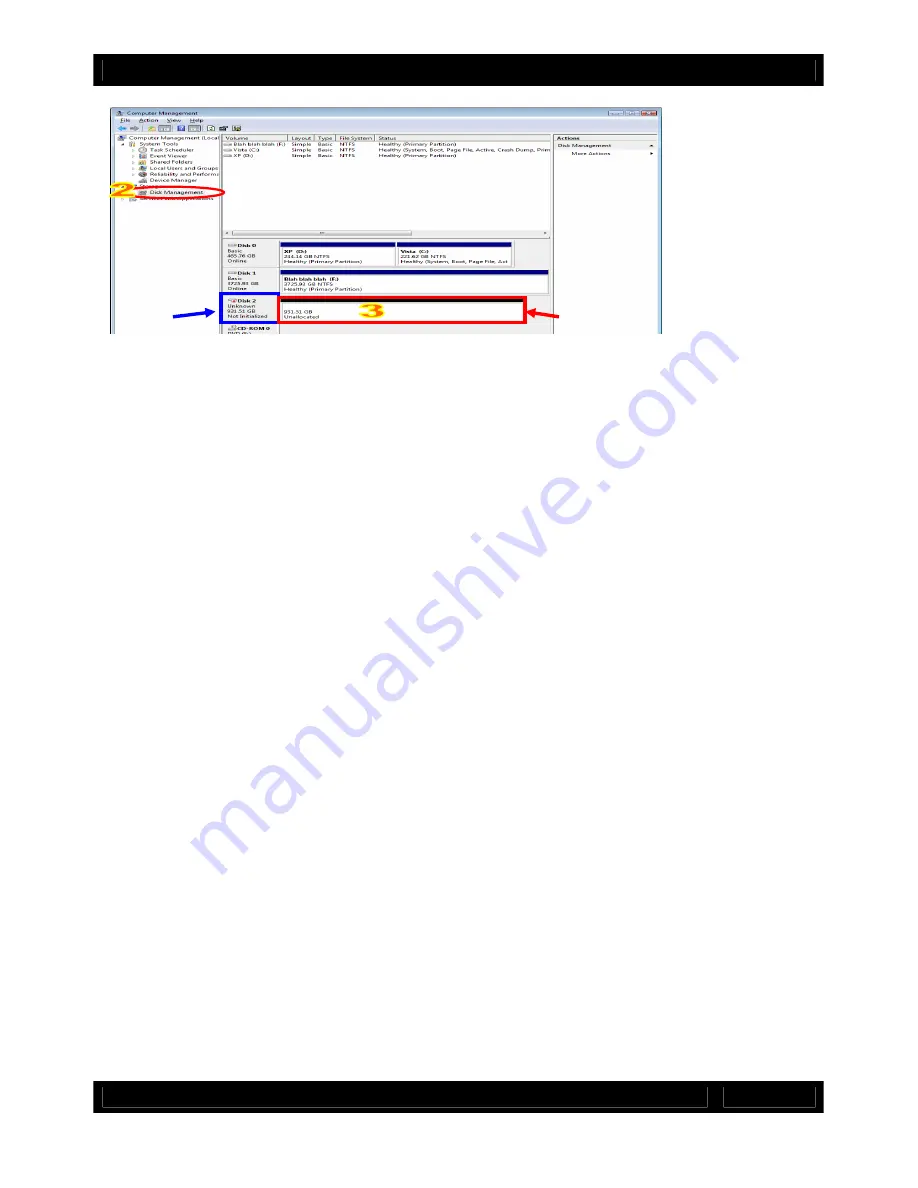
 To format the drive, right-click the Drive Properties Box and select Format.  


e)

 If you are prompted to select a partition type, select MBR for volumes 2TB or smaller, 

or GPT for volumes larger than 2TB.  Note: Windows XP does not support GPT or 
volumes larger than 2TB.   

f)

 Click through several more windows, leaving the default settings, until you see a 

window that allows selection of a file system.  Choose NTFS and enter a name for the 
new volume.  Be sure to check the box labeled “Perform a quick format” unless you 
want to completely erase any data on the drive and have time to wait.  A quick format 
should take less than a minute, while standard formatting may take several hours.   

g)

 Click “Next” and then “Finish” to start the format process.  When the format is 

complete, the Drive Properties Box will update to show the new volume name.  The new 
volume can now be found in My Computer.   

3.2.3 Mounting and ejecting volumes 

If the hard drives attached to RTX are already formatted, you can begin using the 
volume right away.  When the unit is properly connected and turned on, a window may 
open to allow you access to the volume.  If no window appears, you can find the volume 
by double-clicking “My Computer.”  
 
Eject RTX before powering it down by single-clicking the green arrow icon on the task 
bar, then selecting “Safely remove….”  Windows will indicate when it is safe to 
disconnect RTX.  Disconnecting the unit without first ejecting it can result in data loss.   

3.2.4 Creating a Boot Drive 

Some PC motherboards support booting from an external device.  To activate this 
feature, you will need to adjust the motherboard’s BIOS settings.  Check with your 
motherboard’s manufacturer or owner’s manual for details.  


Drive 
Properties  

Device 
Properties  

Summary of Contents for RTX 100-3Q

Page 1: ...e and shut the door Patented custom SATA drive interface is built to withstand thousands of drive insertions Fast data connection options USB 3 0 eSATA and dual FireWire 800 Sturdy aluminum case provi...

Page 2: ...2 Mounting and Ejecting Volumes 4 3 2 Usage with Windows Computers 4 3 2 1 Compatibility 4 3 2 2 Formatting Volumes 4 3 2 3 Ejecting Volumes 5 4 Warnings and Notices 5 5 Frequently Asked Questions 5 6...

Page 3: ...tions 2 Using RTX100 3Q 2 1 Installing a Hard Drive RTX100 3Q features TrayFree technology so installing a hard drive couldn t be easier Simply pull the ejection handle to open the door slide a SATA d...

Page 4: ...rivers for operation under Mac OS X However if you install a host card specifically to work with this product that card may require drivers See your card s User Manual for drivers and instructions 3 1...

Page 5: ...up A screen should appear that allows you to select the volume you wish to use This is useful if you wish to boot from your RTX hard drive only some of the time 3 2 Usage with Windows operating syste...

Page 6: ...en the format is complete the Drive Properties Box will update to show the new volume name The new volume can now be found in My Computer 3 2 3 Mounting and ejecting volumes If the hard drives attache...

Page 7: ...does not indicate a problem with the device or its drivers Q Why is my hard drive experiencing data corruption A Many things can cause data corruption on hard drives whether they are inside your compu...

Page 8: ...rive s in this product A Only if that feature is supported by the eSATA host to which you are connecting Many eSATA hosts do not support booting If this feature is important to you you should read the...

Page 9: ...nt or employee is authorized to make any modification extension or addition to this warranty In no event will CRU or its suppliers be liable for any costs of procurement of substitute products or serv...

Reviews: