background image

- User Guide


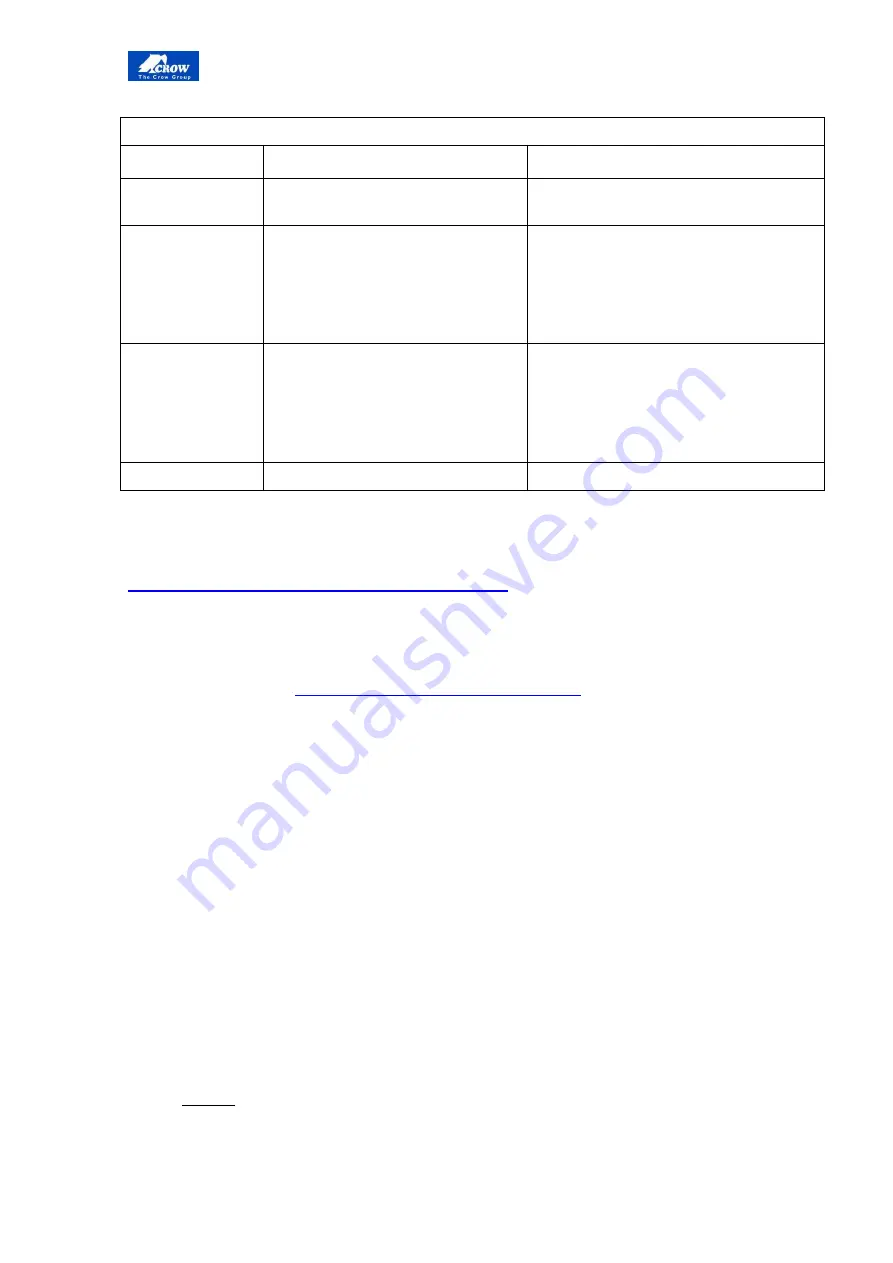
Siren's Jumper's MODE SET-UP


Jumper No.


Function if = O (Open)


Function if =1 (Close)


A


Not in used for RUNNER 2 and 
SERENITY control panels 


B


NO Flashes with ARM/Disarm 

Flashes appear with ARM/Disarm 

Arm: 2 Flashes (@LOW BAT 3+3 
Flashes) 
Disarm: 1 Flash (@LOW BAT 2 

Flashes) 


C


NO Beeps with ARM/Disarm 

Beeps sound with ARM/Disarm 

Arm: 2 Beeps(@LOW BAT 3+3 
Beeps) 
Disarm: 1 Beep (@LOW BAT 2 
Beeps) 

D


2 Min Time out 

15 Min Time out 


Learn the FW2 Siren with SERENITY


There


are


3


options


Option


1:


Using Installer programming mode:


Step


1

:


Insert


the


battery


to


the


Siren


while


pressing


learn


button

>The


FW2

Siren


led


will


blink


for


30


sec

 ‐

>


the


FW2

Siren


is


now


ready


for


use.


Step


2

:


Enter


to


the


Installer


mode


P000000E

>


Enter


P64

 ʹ

Learn


radio


output’.


Step


3

:


Use


the


+,

 ‐ 

keys


to


Select


the


required


learned


output


number


Step


4

:


Press


the


Enter


key.


Step


5

:


Press


on


the


learning


button


(Siren),


the


control

panel


will


display


the


message


ʺ

Complete

ʺ 

at


the


end


of


the


learning


process

 ‐

>The


Siren


led


will


blink


,


for


3


sec


to


indicate


that


the


FW2

Siren


was


learned.


Step


6

:


To


test


functionality


of


the


serenity


after


learning


refer


to

 ʺ

function


testing


after


FW2


Siren


learning

ʺ 

page


10


NOTE

:


During


the


learning


process


or


the


operation


of


the


Siren


is


recommended


to


keep


a


distance


as


two


meters


between


the


serenity


C.P


to


the


Siren.


Summary of Contents for FW2-SIREN2CP-8/9F

Page 1: ...FW2 Siren System Installation Guide For RUNNER 2 and SERENITY FW2 SIREN2EXT 8 9F FW2 SIREN2CP 8 9F P N 7102866_A May 2013...

Page 2: ...ons Upon termination you will immediately destroy any downloaded and printed materials Trademarks The trade marks service marks and logos the Trade Marks used and displayed in this document are regist...

Page 3: ...ING THE SIRENS 6 FUNCTION TESTING AFTER LEARNING 6 SETTING THE FW2 SIREN FOR SERENITY CONFIGURATION 7 SETTING THE FW2 SIREN CONFIGURATION 7 LEARN THE FW2 SIREN WITH SERENITY C P 8 FUNCTION TESTING AFT...

Page 4: ...A or both FW2 Siren Introduction to RUNNER2 RUNNER 2 contains The FW2 TRANS which is an advanced product that adds support 2way wireless devices for the CROW RUNNER 2 alarm systems FW2 TRANS include i...

Page 5: ...ct the bus cable while pressing and holding the reset button Continue to hold the reset button for several seconds till led s will finish to flash red green alternately Wait until the led s stops flas...

Page 6: ...Configuration Mode Figure 2 Siren Description Diagram The Siren unit can be powered by Lithium Battery 3 6V 14Ah or by external power supply 12V 0 8A or both in case of both the battery use as backup...

Page 7: ...LOW BAT 3 3 Beeps Disarm 1 Beep LOW BAT 2 Beeps D 2 Min Time out 15 Min Time out Note On control panel must disable Arm Disarm chirps from Output 1 for area A and area B if system is partitioned P50E1...

Page 8: ...open during the leaning mode 5 Set Jumpers B and C according to Table 1 Low Battery indication s beeps and flashes will be on no matter what the status of Mode Jumpers B and C 6 Transceiver Learn Tes...

Page 9: ...dation Before you begin the learning process perform factory defaults on the Siren you wish to learn by pressing on learning button while connecting the battery and hold the button until the Siren wil...

Page 10: ...Siren while pressing learn button The FW2 Siren led will blink for 30 sec the FW2 Siren is now ready for use Step 2 Enter to the Installer mode P000000E Enter P64 Learn radio output Step 3 Use the ke...

Page 11: ...ing FW2 Serial Number ID via Easy Serenity PC application Step 1 Run and login to Easy Serenity application go to change configuration insert installer code go to OUTPUT level go to radio output level...

Page 12: ...Select the learned output number and press the Enter Key alternately ON OFF to activate and deactivate the output and verify Siren s led is start flashing and stopped Step 3 Create an open tamper sta...

Page 13: ...w See Figure 6 and open the cover 3 Place the unit on the installation surface and mark out the four screw holes 4 Use a 6 mm bit to drill the holes Figure 5 Transceiver Unit Figure 6 Transceiver Inst...

Page 14: ...nstallation of each Siren units Make sure that there is Radio coverage to this location from the Transceiver Place the Siren Units high enough off the ground in order to make them inaccessible to pass...

Page 15: ...the holes Figure 4 Open Siren Unit 6 Fix the unit onto the installation surface 7 Ensure that the Piezo Siren is connected to the Piezo connector as shown below 8 Insert the battery into the battery...

Page 16: ...ry by fresh one Verify Low Bat restored and then connect the Power supply The Siren will beep once and then the LED power will blink for a period of 30 seconds please wait to the end of the blinking b...

Page 17: ...User Guide 15 Note Output must be erased in the serenity too Command syntax P000000E P64E go to Delete radio output level...

Page 18: ...rm Period 2 min 15 min According the status of Jumper D Low Battery Level 2 8V Low Battery Indication LED Flash Arm Disarm According the status of Jumper B C Arm Disarm Indication LED Flash Arm 1 Disa...

Page 19: ...puts IN 1 Trigger Alarm IN 2 Trigger Key Arm Disarm BUS Connection via Fast Connection or Terminals Outputs Tamper Out Terminals Dry contacts 12V DC 100mA Indication Blue LED indicate Rx TX Tamper Con...

Reviews: