


Operating Instructions and Parts Manual
MIG/STICK WELDER
3
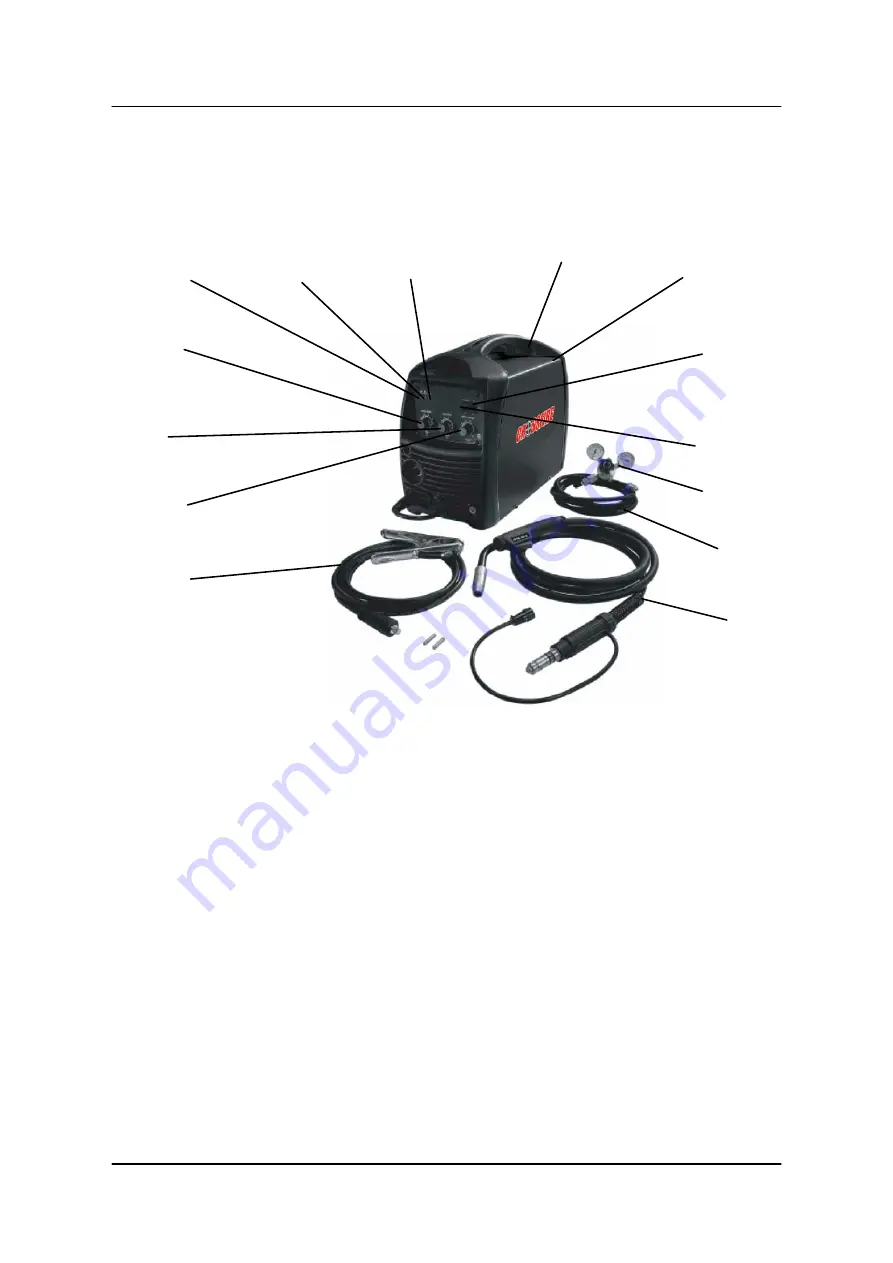
Know your Welder
POWER INDICATOR
When the machine is turned on, the power indicator will be on.
ALARM INDICATOR
When the thermal indicator is on, it shows the machine is overloaded and the
internal temperature is too high.
The welder will turn off automatically but the fan
will still be working. When the internal temperature cool off, the overload light will
turn off and the machine will be ready to weld.
WORK INDICATOR
Lights up when the unit is ON.
WELDING VOLTAGE
Set output voltage and wire speed. Refer to the “set up” chart inside the wire feed
compartment.
WIRE SPEED ADJUST
Adjusts the wire feeding/amperage speed.
SPOT TIMER
When using the Spot welding, set the Spot time.
SPOOL GUN/MIG SELECTOR
When normal MIG welding, this switch should be turned in “MIG” position when
using spool gun, the switch should be in “spool gun” position.
SPOT SELECTOR
When using the Spot welding, the switch should be in “ON” position.
Power Cord
Power Switch
MIG gun
Power
Indicator
Alarm
Indicator
Wire speed
adjust
Welding
Voltage
Work
Indicator
Gas hose
Grounding
cable with
clamp
Spot Selector
Spool gun/Mig
Selector
Spot Time
Gas regulator


