


Copyright © 2007-2012, Critical Link LLC
7)
The following steps were done with Win 7, but Win
XP is similar.
8)
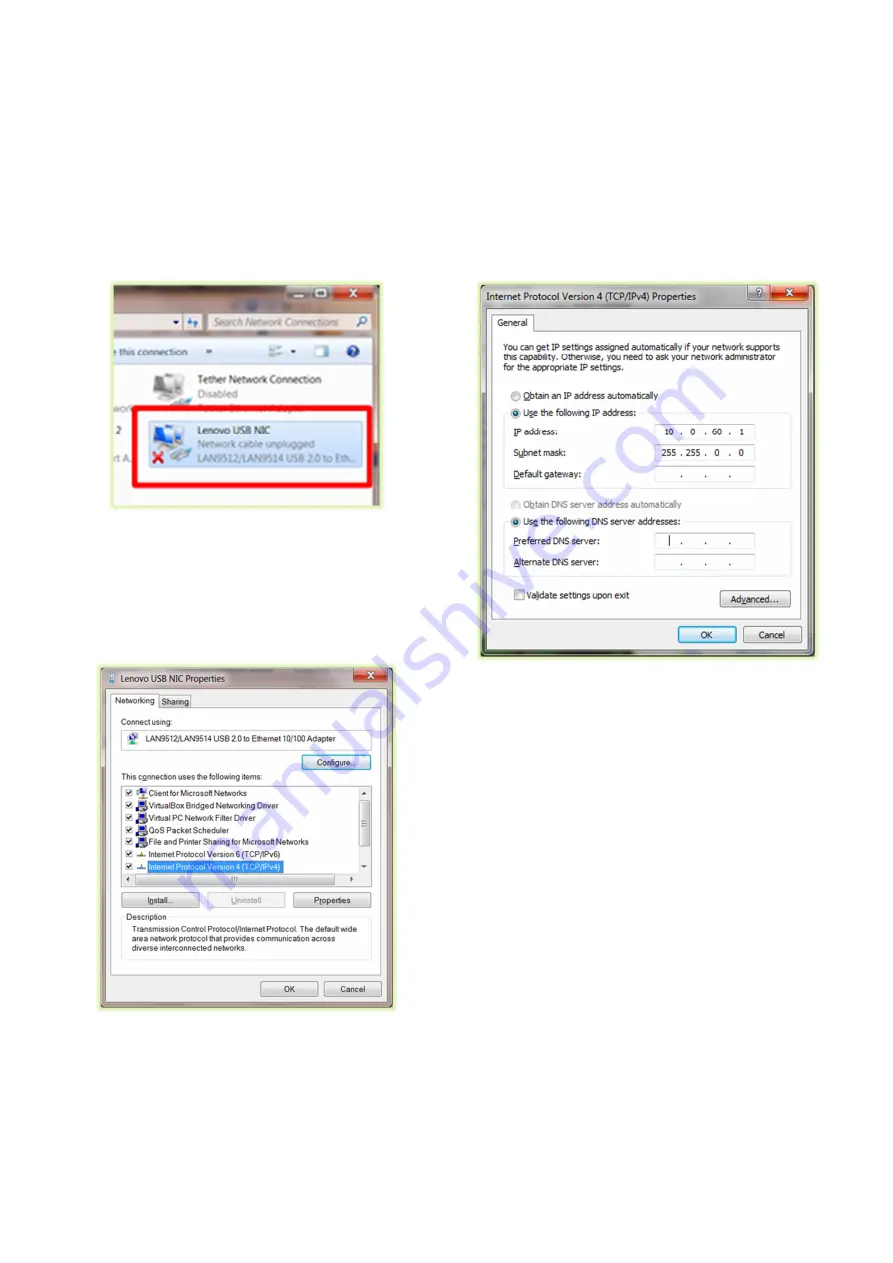
Open the Network Connections dialog (shown
below). The Network Connections may be found
on the main screen or by selecting Control Panel ->
Network and Internet -> Network Connections.
9)
Select and ‘right-click’ the Lenovo USB NIC icon
(highlighted in red) and then select “Properties”
from the pop-up menu.
10)
Select “Internet Protocol Version 4 (TCP/IPv4) and
then press the “Properties” button.
11)
Enable static IP for the USB by NIC by setting the
following parameters:
a.
Select “Use the following IP address” radio
button
b.
Enter IP address: 10.0.60.1
c.
Enter subnet mask 255.255.0.0
d.
Leave Default Gateway blank
e.
Select “Use the following DNS server
addresses” radio button and leave all lines
blank
12)
The USB NIC is now configured for use with the
sCMOS camera.
13)
Record Kit S/N (Identifier #5). This will be used
later in the “Mity Viewer” Application when
connecting to the camera.
14)
Plug power jack into proper outlet and then turn
the “On/Off” switch to the “On” position.
15)
Note that the “I/O” connector is currently not
used, but a flying lead assembly has been included
for future support.
16)
Please continue on to the “sCMOS Application
Quick Start Guide” to setup the software for your
first image acquisition.
Thank you!


