background image

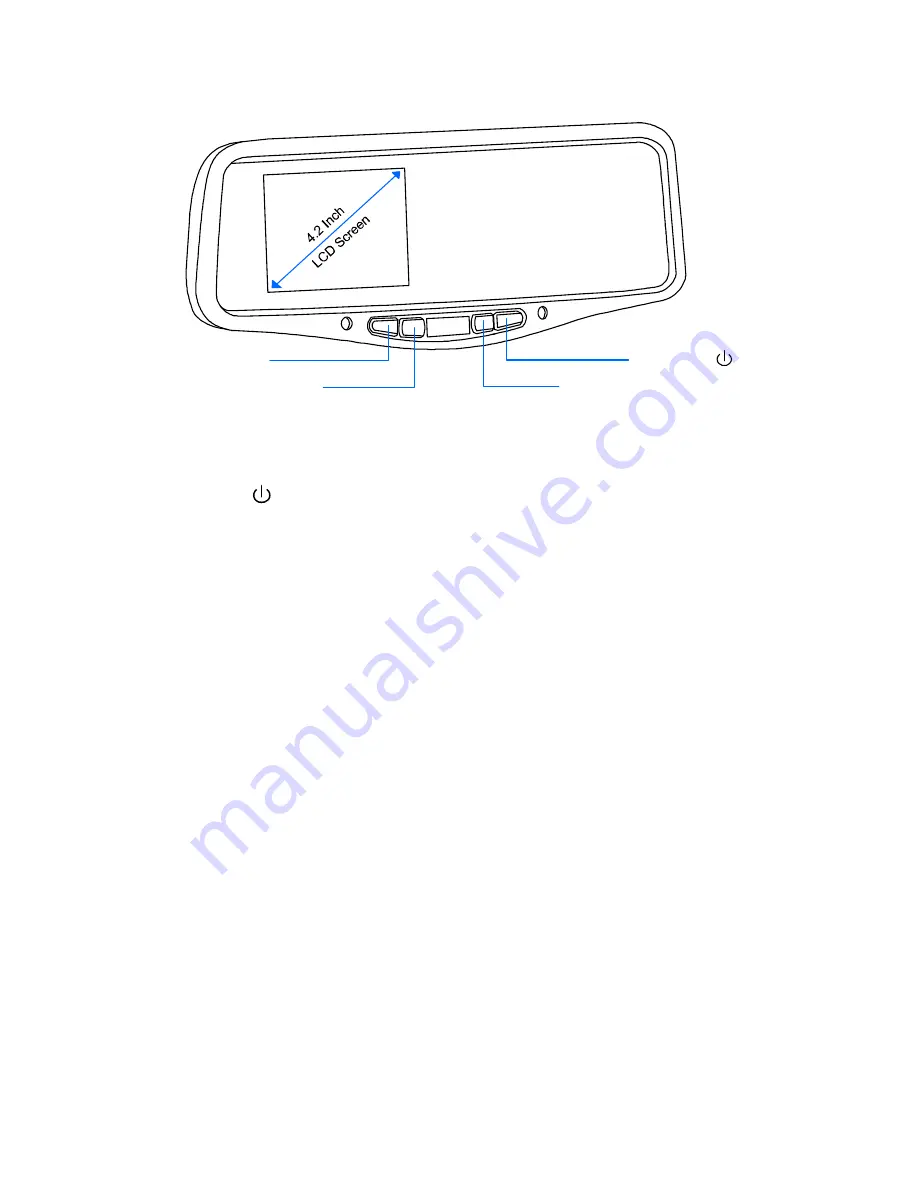
MONITOR CONTROLS 


CAM Select / 

+

_

Menu


MONITOR CONTROLS: 
 

1. 

CAM SEL /


   This button combines two function. Press this button to toggle between the 

VI and V2 Inputs. Press and hold it for 2 seconds to turn off the power to the monitor. This will 
put the monitor into “Standby” mode. Press it again to turn the power back on. 


2. 

MENU


CONTRAST CONTROL:   

To adjust the contrast of the screen, Press the “MENU” button 

and then select CONTRAST on the screen. Use the + and – buttons to increase or 
decrease the picture contrast.


BRIGHTNESS CONTROL:

   To adjust the brightness of the screen, Press the “MENU” 

button and select BRIGHTNESS on the screen. Use the + and – buttons to increase or 
decrease the brightness of the monitor. 


COLOR CONTROL:   

To adjust the color of the screen, Press the “MENU” button and 

select COLOR on the screen. Use the + and – buttons to increase or decrease the color 
contrast of the screen.


NORMAL / MIRROR IMAGE:

    Some reverse cameras have built-in circuitry to “mirror” 

the image so objects on the right of vehicle appear on the right and objects on the left 
appear on the left when looking at a standard monitor.  If your camera does not have this 
function, then you can choose it in the SV-9155 menu. You can set Normal/Mirror imaging 
for CAM1 and CAM2 separately. To adjust, Press the “MENU” button and select MIR1 
OFF on the screen. 


Press the + and – buttons to set the screen to Mirror or Normal 

Image on CAM1. You can set the CAM2 image the same way. 


PARKING ASSIST:   

This can help the user to properly judge distance when parking. 

Press the “MENU” button, and choose DASH (ON) on the screen. Use the + and – 
buttons to activate. The parking assist line only appears when the vehicle is in reverse. At 
this time, the dash can be adjusted horizontally by pressing the + or – buttons. Adjust the 
line to the appropriate position for your actual parking condition. Once this is done, the 
setting will be locked in memory.  


Summary of Contents for SecurView SV-9155

Page 1: ...t In 4 2 LCD Screen for viewing Reverse Camera Compatible with any Camera which uses an RCA video output Provides extra safety precaution when backing up Maintains the Factory look of the vehicle Optional Normal Image and Reverse Image Compatible with 70 80 of GM Ford and Toyota vehicles Compatible with 12V and 24V DC vehicles Built In Interface to allow user to switch between to different video i...

Page 2: ...emove this type of mirror there will be a wiring harness that will need to be unclipped before you can proceed with the removal of the mirror itself Make sure the vehicle owner is aware that the SV 9155 does not have any lamps built into it and that they will be losing this accessory once the factory mirror is removed 3 Once the factory mirror is removed place the SV 9155 into the position of wher...

Page 3: ...Silver Lug BRACKET ADJUSTMENT Mounting Screw Windshield SV 9155 Mirror Cable SIDE VIEW NOTE Mounting Bracket of SV 9155 should slide over the factory mounting plate on windshield Adjustable Mounting Bracket MIRROR MOUNTING ...

Page 4: ...ger wire to the 12V or 24V Reverse Light wire 7 Connect the BLACK wire to a suitable Ground on the vehicle 8 Connect the Grey V1 connector to the video output of the reverse camera V1 is the priority input and will always auto switch when the vehicle is shifted into reverse 9 Connect the Grey V2 connector to the video output of any external video device DVD VCR etc VEHICLE REVERSE LIGHT REVERSE CA...

Page 5: ...ase the color contrast of the screen NORMAL MIRROR IMAGE Some reverse cameras have built in circuitry to mirror the image so objects on the right of vehicle appear on the right and objects on the left appear on the left when looking at a standard monitor If your camera does not have this function then you can choose it in the SV 9155 menu You can set Normal Mirror imaging for CAM1 and CAM2 separat...

Page 6: ...ng any of the outside covers will expose you to electrical components which may cause injury Opening of any of the covers will also void the warranty of the mirror Refer to an authorized dealer for servicing DISCLAIMER Under no circumstances shall the manufacturer or distributor of the SV 9155 Mirror be held liable for consequential or incidental damages sustained in connection with the use of the...

Reviews: