background image

To install the TSW-UMB-70:

NOTE: 

If installing the TSW-UMB-70 into a wall with a shallow

mounting depth, remove the two 1 in. screws that hold the two halves
of the bracket together and replace them with the included 6-32 x 1/2
in. screws.

1. Place the included cutout template (40174) in the desired location on

the mounting surface and confirm it is level.

l

Place the template horizontally if installing a landscape touch
screen.

l

Place the template vertically if installing a portrait touch screen.

2. Trace an outline around the center cutout of the template.

3. Use the outline to cut an opening into the surface using an appropriate

drywall saw.

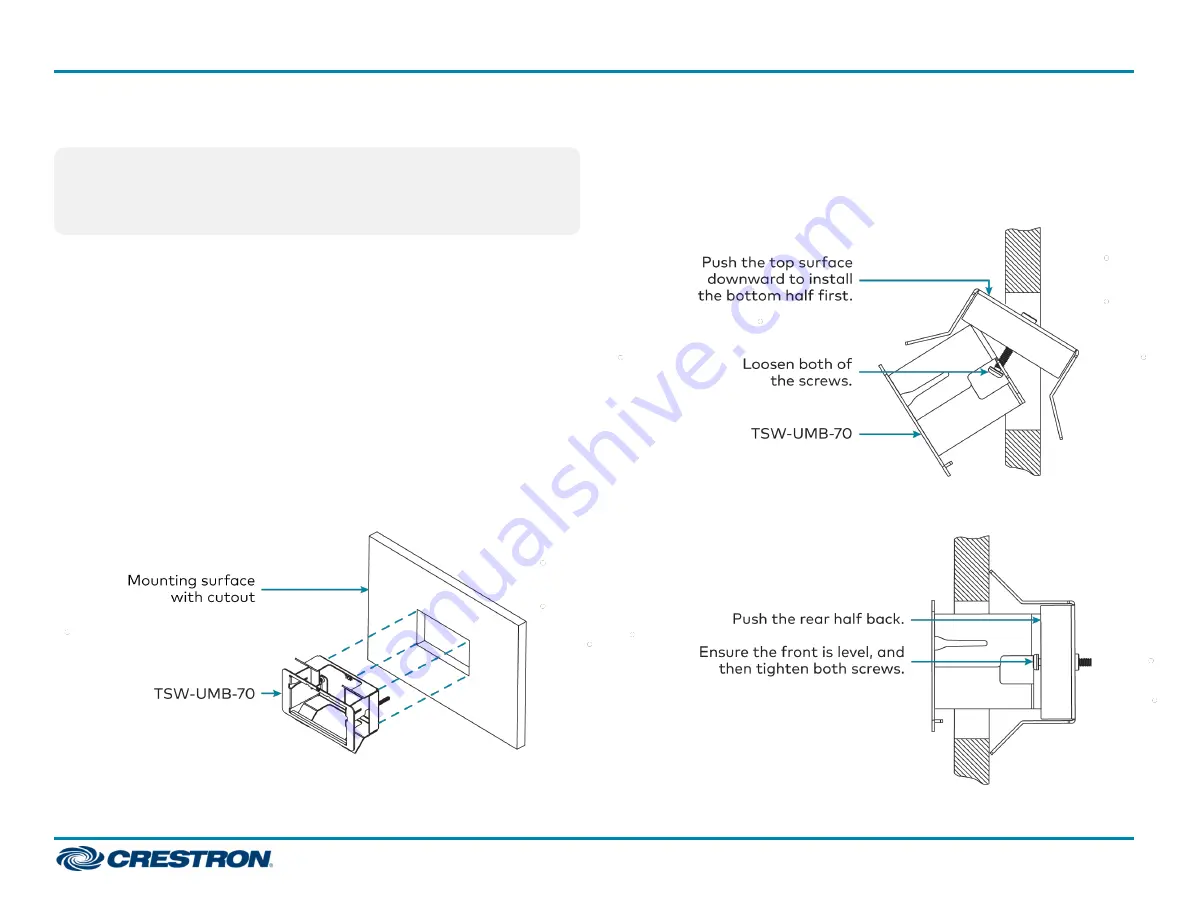
4. Loosen the two screws on the TSW-UMB-70 assembly, but do not

remove them.

5. Install the assembly into the opening, bottom first.

For portrait installations, install the assembly into the opening left side
first with the "TOP" text on the assembly to the right.

6. Reach into the assembly and push the rear half back so that it is

behind the mounting surface completely. Ensure the front of the
assembly is level.

For portrait installations, allow the assembly to angle into the opening
left side first before tightening the screws.

7. Tighten the two screws on the assembly to secure it to the surface. Do

not overtighten the screws.

2

TSW-UMB-70 Series

Quick Start

Mounting Brackets and Kits for TSW-70 Series

Summary of Contents for TSW-UMB-70 Series

Page 1: ...e same functionality as the TSW UMB 70 PMK for portrait TSW 70 series touch screens This document describes installation procedures for each listed model In the Box 1 TSW UMB 70 TSW UMB 70 PMK or TSW UMB 570P PMK Mounting Brackets and Kits Additional Items TSW UMB 70 Only 2 Screw 6 32 x 1 2 in Phillips 2007240 1 Template Cutout 4531683 Install the TSW UMB 70 Use the included cutout template to ens...

Page 2: ...ine to cut an opening into the surface using an appropriate drywall saw 4 Loosen the two screws on the TSW UMB 70 assembly but do not remove them 5 Install the assembly into the opening bottom first For portrait installations install the assembly into the opening left side first with the TOP text on the assembly to the right 6 Reach into the assembly and push the rear half back so that it is behin...

Page 3: ...d below the PMK to ensure proper heat dissipation For preconstruction applications use standard drywall nails or screws to attach the PMK to a wall stud as shown in the following illustrations Attach the TSW UMB 70 PMK Attach the TSW UMB 570P PMK For postconstruction applications 1 Use the PMK as a cutout template by turning it to face the mounting surface 2 Confirm the PMK is level then use finis...

Page 4: ...n com legal patents Certain Crestron products contain open source software For specific information visit www crestron com opensource Crestron and the Crestron logo are either trademarks or registered trademarks of Crestron Electronics Inc in the United States and or other countries Other trademarks registered trademarks and trade names may be used in this document to refer to either the entities ...

Reviews: