background image


8  

  HD-WP-4K-401-C:  4K Multi-Window Video Processor 

Supplemental Guide – DOC. 7901B 

o


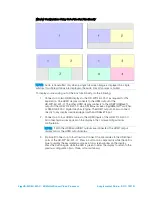
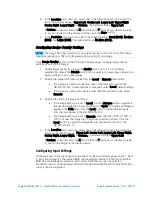
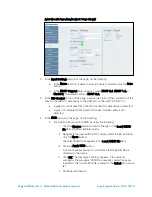
Displays two detected inputs as two equal-sized and vertically 

centered windows 

o


Displays one detected input as a full-screen image 


Full Screen:  Displays any single input as a full-screen image 

NOTE:  

Inputs 1 and 2 allow sources with resolutions up to DCI 4K to be 

displayed at the full resolution when in full-screen mode as long as the 

resolution is supported by the display device. Inputs 3 and 4 accept 
sources with a resolution up to DCI 4K; however, the full-screen output 
resolution for inputs 3 and 4 is automatically downscaled to 1080p.  


Picture-in-Picture (PIP):  Displays any single input as a full-screen image 
with any other input as a scalable inset window that can be positioned as 

desired (refer to step 5 below for information about PIP options) 


Side-by-Side:  Displays any two inputs as two equal-sized and vertically 
centered windows 


Quad View:  Displays four inputs as four equal-sized windows (two side-
by-side windows above two side-by-side windows) 

3.


(Applicable to all Layout modes except Automatic mode) In the Source Selection 
section of the page, select the desired source to be displayed in a window as 
applicable to the windowing layout. 

4.


In the Audio Selection drop-down list, select the source whose audio is to be 

unmuted or select Auto (default setting). If Auto is selected, audio is transmitted 
only when a single full-screen image is displayed in a single window or when the 

layout is in PIP mode. If multiple windows are displayed, the audio from all sources 

is muted. 

5.


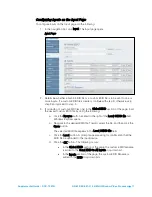
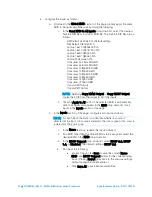
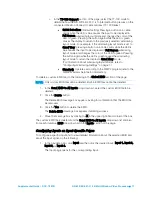
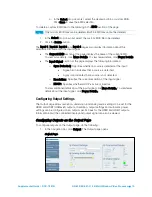
(Applicable only to Picture-in-Picture layout) In the PIP Options section of the 

page, do the following: 

a.


In the Location drop-down list, select one of the following options to 

position the smaller window within the larger window:  Upper Left, Center 

Left, Lower Left, Upper Right, Center Right, Lower Right, or Custom. 
The default setting is Upper Left. 

If Custom is selected, enter the X (horizontal) and Y (vertical) coordinates in 
pixels to position the smaller window, and then click the Save button. 

b.


In the Size drop-down list, select one of the following options to set the 
size of the smaller window within the larger window:  Small (10%), 
Medium (20%), Large (30%), or Custom. The default setting is Medium 

(20%). 

If Custom is selected, enter the X (horizontal) and Y (vertical) coordinates in 

pixels to set the size of the smaller window, and then click the Save button. 


Summary of Contents for HD-WP-4K-401-C

Page 1: ...HD WP 4K 401 C 4K Multi Window Video Processor with HDBaseT and HDMI Outputs Supplemental Guide Crestron Electronics Inc ...

Page 2: ...le Inc in the United States and or other countries HDBaseT is either a trademark or registered trademark of the HDBaseT Alliance in the United States and or other countries HDMI is either a trademark or registered trademark of HDMI Licensing LLC in the United States and or other countries Internet Explorer and Windows are either trademarks or registered trademarks of Microsoft Corporation in the U...

Page 3: ...nputs on Input Specific Pages 13 Configuring Output Settings 15 Configuring Outputs on the Output Page 15 Configuring Outputs on Output Specific Pages 17 Configuring Network Settings 21 Configuring Device Settings 23 Configuring Control System Connection Settings 23 Enabling or Disabling the Front Panel 24 Changing the Username and Password 24 Configuring RS232 Port Settings 25 Updating Firmware 2...

Page 4: ......
Page 5: ...ndow collaboration solution for huddle rooms and classrooms Easy setup and configuration of the HD WP 4K 401 C is enabled using a web browser or the front panel controls This guide provides information about the out of the box functionality of the HD WP 4K 401 C as well as configuration of the HD WP 4K 401 C using the web interface and the front panel OLED display For installation information refe...

Page 6: ... a DM 8G receiver DigitalMedia switcher or DM DGE 200 C Digital Graphics Engine The HDBT output can also connect directly to any display device equipped with an HDBaseT input 2 Connect up to four HDMI sources to the HDMI inputs of the HD WP 4K 401 C All connected sources appear on the display in the corresponding window configuration NOTE If both the HDMI and HDBT outputs are connected the HDBT ou...

Page 7: ...nd later Chrome web browser version 31 and later Android operating system Chrome web browser version 31 and later To access the web interface do either of the following Open a web browser directly Refer to Opening a Web Browser Directly for additional information Open a web browser within the Crestron Toolbox application Refer to Opening a Web Browser within the Crestron Toolbox Application for ad...

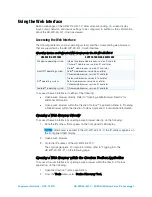
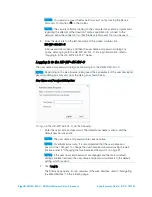
Page 8: ...sword dialog box allows login to the HD WP 4K 401 C NOTE Depending on the web browser being used the appearance of the user name and password dialog box may vary from the dialog box shown below User Name and Password Dialog Box To log in to the HD WP 4K 401 C do the following 1 Enter the user name and password The default user name is admin and the default password is admin NOTE The user name and ...

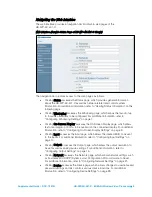
Page 9: ...the On Screen Display page which allows text or an image or both to be overlaid on the connected display For additional information refer to Configuring On Screen Display Settings on page 9 Clicking Input accesses the Input page which allows the desired EDID to be sent to the inputs For additional information refer to Configuring Input Settings on page 10 Clicking Output accesses the Output page w...

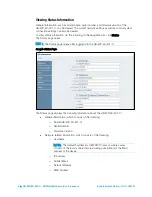
Page 10: ...k Status The Status page opens NOTE The Status page opens after logging in to the HD WP 4K 401 C Sample Status Page The Status page displays the following information about the HD WP 4K 401 C General information which consists of the following o Model HD WP 4K 401 C o Serial Number o Firmware Version Network related information which consists of the following o Hostname NOTE The default hostname i...

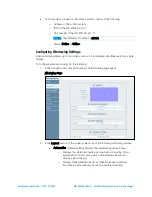
Page 11: ...urces to be displayed simultaneously on a single display To configure video windowing do the following 1 In the navigation bar click Windowing The Windowing page opens Windowing Page 2 In the Layout section of the screen select one of the following windowing modes Automatic Default setting Displays the detected inputs as follows o Displays four detected inputs as a quad view consisting of four equ...

Page 12: ... Source Selection section of the page select the desired source to be displayed in a window as applicable to the windowing layout 4 In the Audio Selection drop down list select the source whose audio is to be unmuted or select Auto default setting If Auto is selected audio is transmitted only when a single full screen image is displayed in a single window or when the layout is in PIP mode If multi...

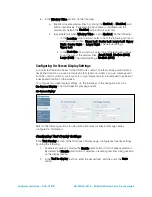
Page 13: ...ettings A custom text label can be set for the HDMI video output The text can be positioned at a designated location on screen to display a static label or a dynamic pop up message sent from the control system A custom photo or logo image can also be uploaded to appear at a designated location on the screen To configure on screen display settings do the following In the navigation bar click On Scr...

Page 14: ...he HD WP 4K 401 C web interface is accessed select Local default setting If the image is located on a device other than the local hard drive select Remote 3 Specify the path to the image as follows If the image path type is set to Local click the Browse button navigate to the desired image file bmp and then click Open The path and filename appear in the Path field Click the Load button to upload t...

Page 15: ...ection of the page load the desired custom EDID file by doing the following a Click the Browse button located to the right of the Load CEDID file field Windows Explorer opens b Navigate to the desired EDID file cedid select the file and then click the Open button The selected EDID file appears in the Load CEDID file field c Click the Load button A prompt appears asking for confirmation that the ED...

Page 16: ...t or Copy HDBT Output copies the EDID from the output to all of the inputs ii Click the Apply to All button The selected EDID is automatically sent to all inputs and appears in the EDID drop down list for all inputs in the Inputs section of the page b In the Inputs section of the page configure each input as follows NOTE For each input the Sync icon denotes whether a source is detected at the inpu...

Page 17: ...odes refer to Configuring Windowing Settings on page 7 Standard Operates according to the SIMPL program refer to the SIMPL Windows help file for information To delete a custom EDID file do the following in the Global EDID section of the page NOTE Only custom EDID files can be deleted Built in EDID files cannot be deleted 1 In the Send EDID to All inputs drop down list select the custom EDID file t...

Page 18: ...able caddy is detected A gray icon indicates that a Crestron Connect It cable caddy is not detected 4 In the EDID section of the page do the following a Optional Upload a custom EDID by doing the following i Click the Browse button located to the right of the Load CEDID file field Windows Explorer opens ii Navigate to the desired EDID file cedid select the file and then click the Open button The s...

Page 19: ...ys the following information o Sync Detected Specifies whether a source is detected at the input A green icon indicates that a source is detected A gray icon indicates that a source is not detected o Resolution Specifies the current resolution of the input signal o HDCP Specifies whether HDCP is active or inactive To view additional details about the input signal click More Details To view fewer d...

Page 20: ... RB 3840x2160 25 1280x960 60 3840x2160 30 1280x1024 60 4096x2160 24 1360x768 60 4096x2160 25 1366x768 60 4096x2160 30 1366x768 60 RB 1680x720 24 1400x1050 60 1680x720 25 1400x1050 60 RB 1680x720 30 1440x900 60 1680x720 50 1440x900 60 RB 1680x720 60 1600x900 60 RB 2560x1080p24 1600x1200 60 2560x1080p25 1680x1050 60 2560x1080p30 1680x1050 60 RB 2560x1080p50 1080i50 2560x1080p60 1080i60 1080p24 The d...

Page 21: ...play and output signal for both the HDMI and HDBT outputs The Connected Display section of the page displays the following o Sink Detected Specifies whether the HDMI and HDBT signal is detected by the connected display Yes or No o Manufacturer Specifies the name of the manufacturer of the connected display o Name Specifies the model name of the connected display o Serial Number Specifies the seria...

Page 22: ...gure HDBT output settings and to view information about the connected display and HDBT output signal do the following In the navigation bar click Output and then click HDBT Output The HDBT Output page opens HDBT Output Page Refer to the following sections for HDMI and HDBT output configuration information ...

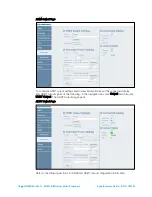
Page 23: ...off the output if an HDCP mismatch exists Configuring Automatic Power Settings In the Automatic Power Settings section of the HDMI Output page or HDBT Output page configure automatic power settings by doing the following 1 Enable or disable automatic power off and power on settings by selecting the Enable or Disable radio button respectively By default the Enable radio button is selected If Automa...

Page 24: ... feed The default setting is CR LF Select the Hex or Ascii radio button to specify the format of the command The default setting is Hex v Click the Save button to save the power off settings c In the Power On Sync Detected section do the following i Select one of the Send Command radio buttons to choose the interface to send a power on command when an HDMI input is detected None Does not send any ...

Page 25: ...s the name of the manufacturer of the connected display o Name Specifies the model name of the connected display o Serial Number Specifies the serial number of the connected display The Output Signal section of the page displays the following o Transmitting Specifies whether the output is transmitting a signal to the connected display A green icon indicates that the output is transmitting a signal...

Page 26: ...ws the IP address of the HD WP 4K 401 C to be automatically assigned by a DHCP server on the local area network LAN for a predetermined period of time NOTE If a DHCP server does not exist on the network and 45 seconds have elapsed since the HD WP 4K 401 C was powered on the IP address defaults to a link local address Refer to RFC 3927 for information about link local addressing o Use the following...

Page 27: ...K 401 C and a control system in the Control System Connection section of the Device page Device Page Sample Control System Connection To configure control system connection settings do the following 1 In the Address or Host Name text box enter the IP address or host name of the control system 2 In the IP ID text box enter the IP ID of the HD WP 4K 401 C Valid values range from 03 to FE in hexadeci...

Page 28: ... remains powered on and continues to function Enable or disable the front panel state and LEDs in the Front Panel section of the Device page Device Page Front Panel Using the Front Panel State radio buttons do either of the following To enable the OLED display and front panel push buttons click the Enabled radio button if it is not already selected To disable the front panel click the Disabled rad...

Page 29: ...onfigure RS232 port settings do the following 1 In the Baud drop down list select the number of bits to be transmitted per second Available values are as follows 300 9600 600 14400 1200 19200 1800 28800 2400 38400 3600 57600 4800 115200 7200 The default setting is 9600 bits per second bps 2 In the Data Bits drop down list select the number of data bits that are to be transmitted as a series Availa...

Page 30: ... select the desired firmware file bin and then click the Open button The Browse field displays the selected path and firmware filename 3 Click the Load button A prompt appears asking for confirmation that the firmware be updated 4 Click the OK button to update the firmware If the Use service port radio button is selected do the following 1 Using a USB mass storage device that contains only the fir...

Page 31: ... and to reboot the device Rebooting the HD WP 4K 401 C Reboot the HD WP 4K 401 C in the Device Management section of the Device page Device Page Device Management Reboot To reboot the HD WP 4K 401 C do the following 1 Click the Reboot button A message appears indicating that the device will reboot 2 Click OK to reboot the device Using the Front Panel OLED Display Menu When the HD WP 4K 401 C is po...

Page 32: ...nel of the HD WP 4K 401 C OLED Push Buttons and Navigation Pad To access the main menu of the OLED display press the MENU button The OLED main menu which displays two lines at a time appears as follows OLED Main Menu Main Menu Windowing Global EDID Input 1 Input 2 Input 3 Input 4 Main Menu Inputs Output 1 Output 2 Outputs Status DHCP DHCP Renew Displayed only if DHCP is ON IP Setup Displayed only ...

Page 33: ...etting press the Enter button on the navigation pad To go back to the previous level in a menu press the BACK button on the front panel To exit the menu of the OLED display press the EXIT button on the front panel Configuring Windowing Settings To configure video windowing settings do the following On the main menu select Windowing The Windowing submenu opens Windowing Submenu Windowing Layout Ava...

Page 34: ...as a scalable inset window that can be positioned as desired refer to Configuring Window Titles on page 31 for information about PIP options Side by Side Displays any two inputs as two equal sized and vertically centered windows Quad View Displays four inputs as four equal sized windows two side by side windows above two side by side windows An asterisk precedes the current setting If Full Screen ...

Page 35: ...tles Items on the Window Titles submenu are listed in the following table Refer to the table for configuration guidelines Window Titles Submenu Guidelines SUBMENU ITEM GUIDELINES Window Titles Controls whether the input name is to be displayed over the corresponding window Enable Default setting Allows window titles which display the input name over the corresponding window Disable Prevents the in...

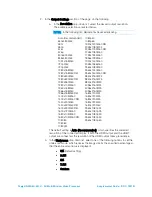
Page 36: ...EDID to All Inputs i Confirm the Global EDID selection by pressing the Enter button A list of EDID files is presented DM Default 4k 30Hz 2ch Default setting DM Default 1080p60 2ch Laptop 16x10 1280x800 2ch Laptop 16x10 1920x1200 2ch Laptop 16x9 1080P50 2ch Laptop 16x9 1080P60 2ch Laptop widescreen 2ch Consumer 4k 25Hz HBR 3D Consumer 4k 30Hz HBR 3D Consumer 1080P50 3D HBR Consumer 1080P50 HBR Cons...

Page 37: ...nput number in the Inputs submenu The Input Status and Configuration submenu opens for the selected input Input Status and Configuration Submenu Input 1 Shown Input 1 Status Items on the Input Status and Configuration submenu are listed in the following table Refer to the table for configuration guidelines Input Status and Configuration Submenu Guidelines SUBMENU ITEM GUIDELINES Status Read Only I...

Page 38: ... 4k 30Hz HBR 3D Consumer 1080P50 3D HBR Consumer 1080P50 HBR Consumer 1080P60 3D HBR Consumer 1080P60 HBR Consumer 720P50 HBR Consumer 720P60 HBR External EDID 1 External EDID 2 External EDID 3 External EDID 4 External EDID 5 External EDID 6 External EDID 7 External EDID 8 Copy Output 1 Copy Output 2 When an EDID is selected the Setting message is displayed NOTE In the list above External EDID 1 t...

Page 39: ...y If no display is connected the status is displayed as Inactive Name Allows renaming of an output To rename an output use the up and down buttons to enter capital letters lowercase letters numbers a plus sign a minus sign a left bracket and a right bracket To move the cursor to the left or right when renaming an output press the left or right button respectively To save the name press the Enter b...

Page 40: ... the IP address that is used as the network s gateway To enter an address use the navigation pad Press the up and down buttons as appropriate to enter each octet in an address To move to the previous octet in an address press the left button To move to the next octet in an address press the right button To save an address press the Enter button DNS Server 1 Enter the address of the primary DNS ser...

Page 41: ...NU push button for 3 seconds Firmware Update When Firmware Update is selected a prompt appears asking for confirmation that the firmware be updated Select Yes or No If Yes is selected insert a USB mass storage device containing the updated firmware file into the SERVICE port if the device is not already inserted The update process begins and the following message appears on the OLED display Upgrad...

Page 42: ...Crestron Electronics Inc Supplemental Guide DOC 7901B 15 Volvo Drive Rockleigh NJ 07647 2047790 Tel 888 CRESTRON 01 17 Fax 201 767 7576 Specifications subject to www crestron com change without notice ...

Reviews: