


KeyWin6 - KeyBox SC manual Version 1.0.1. All and copyright reserved by Creone AB
11
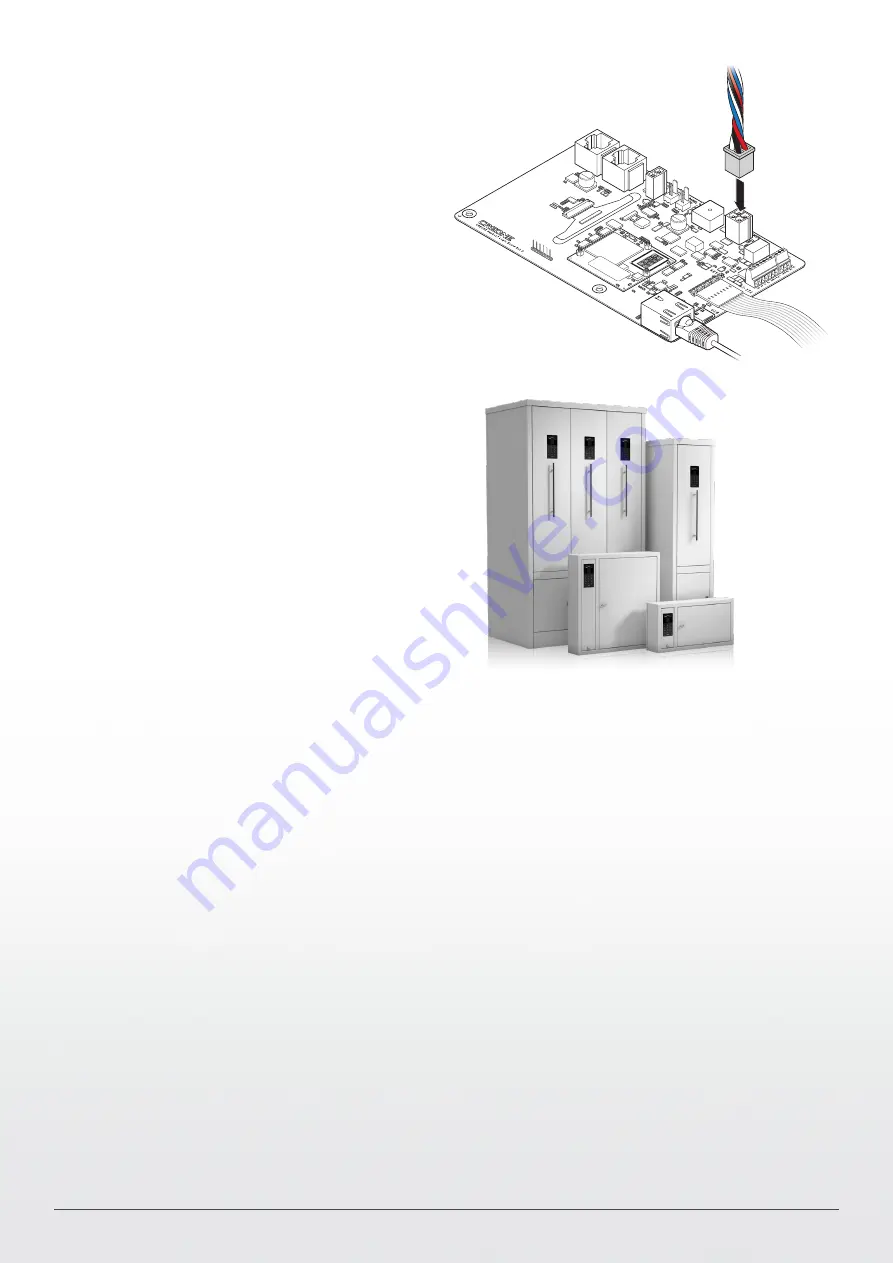
5.
If you purchased the Online IoT KeyWin6
: Connect the cable
to from the battery backup to the main board according to
the image to the right. Note that the KeyBox door must be
closed when starting.
The KeyBox will start up which is indicated in the
display,<Starting>. Next the KeyBox will initiate each strip,
<init list> will be shown. When the KeyBox is started the first
time the DHCP network setting is activated, if the network
setting preparations are already performed, the display will
show a IoT pairing code. This means the KeyBox is ready
to connect to your KeyWin6 online portal. If the neccessary
network preparations is still to be performed the KeyBox
display will show <Connecting...> until internet access. The
physical part of the installation is now completed.
1.
Enter service PIN 1234# to reach the konfiguration menu. Com-
plete description of this menu you find on the next page.
2.
If using static IP, scroll down and set DHCP to OFF (toggle with
arrow key).
3.
Set IP adress / Netmask / Gateway.
4.
Go to Reboot and start it by pressing #.
5.
The KeyBox will now reboot, then it will show <Uninitialized>
in the display, the KeyBox is ready to connect to the KeyWin6
portal.
6.
Login to KeyWin6 and go to settings->Cabinet overview.
7.
Press the + in the lower left corner to add a KeyBox.
8.
Enter the IP adress you used in the KeyBox.
9.
When the KeyBox display shows ”initialized” the KeyBox setup
is complete and the KeyBox is ready to use.
Configure KeyWin6 Offline KeyBox
1.
Enter service PIN 1234# to reach the konfiguration menu. A
Complete description of this menu you find on the next page.
2.
If using static IP, scroll down and set DHCP to OFF (toggle with
arrow key).
3.
Set IP adress / Netmask / Gateway / DNS.
4.
Go to Reboot and start it by pressing #.
5.
The KeyBox will now reboot and once completed it will show
the Pairing code in the display, the KeyBox is ready to connect
to the KeyWin6 portal.
6.
Login to KeyWin6 and go to settings->Cabinet overview.
7.
Press the + in the lower left corner to add a KeyBox.
8.
Add the Pairing code from the KeyBox display and add a
name. This name can be edited later on.
9.
The KeyBox will now synchronize, once the display shows the
chosen name the KeyBox registration is completed. Note this
synch can take a while, just wait until completed.
Configure KeyWin6 Online IoT KeyBox
6.
If you purchased the KeyWin6 offline:
Connect the cable from
the battery backup to the main board, according to the image
in the top right corner. Note that the KeyBox door must be
closed when starting.
The KeyBox will start up which is indicated in the display,
<Starting>. Next the KeyBox will initiate each strip, <init list>
will be shown, once that is compleated the display will show
<Uninitialized>.The physical part of the installation is now
completed.
For more information and instructions regarding the Keywin6 portal, see our Keywin6 manual.
Summary of Contents for KEYBOX 9400 SC
Page 1: ...KEYWIN6 Installation guide Keycontrol series...
Page 2: ......
Page 3: ......
Page 6: ...Delivery...
Page 8: ...Mounting KeyBox...
Page 12: ...Configuration Menu...
Page 14: ...Wiring Diagrams...
Page 21: ......
Page 22: ......


