Creative ZIISOUND T6 -, Manual
The Creative ZIISOUND T6 is a high-quality wireless speaker with immersive sound quality. Easily enhance your listening experience by downloading the user manual for free from manualshive.com. This manual provides all the information you need to make the most out of your new audio device.
Share
Download


Reviews:
No comments
Related manuals for ZIISOUND T6 -

HW-C450
Brand: Samsung Pages: 72
Neptune
Brand: MAJORITY Pages: 13

BTS43
Brand: Valore Pages: 4

A15 Series
Brand: L-Acoustics Pages: 98

iPBTS14
Brand: iWantit Pages: 32

00054880
Brand: Hama Pages: 122

CLLSPK20LTBL
Brand: Conceptronic Pages: 11

Grand Touring GTO428
Brand: JBL Pages: 2

VIP-120A-SA
Brand: Valcom Pages: 2

VERTRAG BT
Brand: Thonet & Vander Pages: 48

BS 85
Brand: Karma Pages: 12

JBL STUDIO 2 6IW
Brand: Harman Pages: 12

YX15
Brand: YORKVILLE Pages: 1
Elite VRS653
Brand: VR3 Pages: 1

AMPED Series
Brand: Wave Pages: 2

PARTY-BOX212
Brand: Party Light & Sound Pages: 21

CREATURE II
Brand: JBL Pages: 6
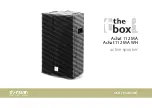
Achat 112 MA
Brand: thomann Pages: 28


