background image

3-1 Using Your SoundWorks 500DAB

3

Using Your SoundWorks 500DAB

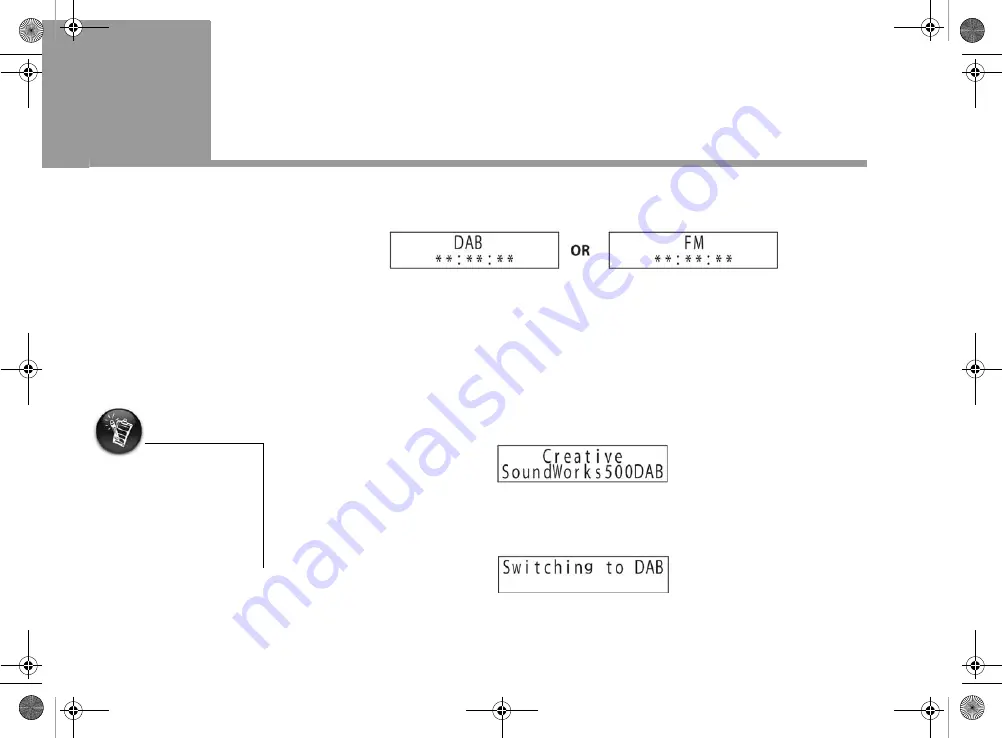
Creative SoundWorks 500DAB goes into Standby mode when it is connected to the power 
outlet. The radio displays the radio mode it is in, as shown in Figure 3-1. 

The radio displays the correct time in DAB and FM mode, after you perform a full scan in DAB 
mode for the first time. Your radio retrieves the time information from a DAB station.

DAB Mode

Selecting DAB mode

1. When the radio is in Standby mode, press the 

STANDBY

 button. The display below appears. 

When doing this step for the first time, the radio automatically performs a quick scan in DAB 
mode, as shown in Figure 3-6. 

2. If you are not in DAB mode, press the 

DAB/FM

 button. The display below appears, and the 

radio switches to DAB mode. 

While in 

DAB

 mode, you can select 

FM

 mode at anytime using step 2 above. 

Figure 3-1   

You may need to perform an 
automatic full scan (see 
“Scanning stations in DAB 
mode” on page 3-2) if you are 
not able to receive any signal 
during the automatic quick 
scan.

Figure 3-2   

Figure 3-3   

Nemo UG.book  Page 1  Monday, April 25, 2005  10:05 AM

Summary of Contents for SoundWorks 500DAB

Page 1: ...cognised as such All specifications are subject to change without notice Actual contents may differ slightly from those pictured Safety Regulatory Information Important Notice The serial number for your Creative SoundWorks 500DAB is located on the rear Please write this number down and keep it in a secure place This is for your security Compliance This product conforms to the following EMC Directi...

Page 2: ... As one blade is wider than the other this plug can only fit into the power outlet in one way If you cannot insert the plug fully into the outlet reverse the plug If the plug still fails to fit contact your electrician to replace your obsolete outlet Do not force the plug into the outlet Power cord Protection Arrange the power cord to minimise the risk of damage from traffic or other hazards Pay p...

Page 3: ...lecting FM mode 3 7 Adjusting the FM tuning step 3 8 Scanning stations in FM mode 3 8 Selecting audio mode Auto or Mono 3 9 4 Using Basic Functions Storing and recalling your stations 4 1 Setting the sleep timer 4 1 Checking the sleep timer setting 4 2 Setting the alarm 4 2 Resetting the radio 4 5 Viewing your radio s software version 4 5 Using the AUX IN jack 4 6 A Glossary B General Specificatio...

Page 4: ...erence To conveniently recall your favourite stations your radio stores up to 6 DAB and 6 FM stations The clock and date display on your radio are retrieved automatically through the DAB transmission The built in alarm clock wakes you to a radio broadcast or an alarm tone Connectors are provided for your headphones and your external audio devices such as CD MP3 or MiniDisc players To experience ra...

Page 5: ...evice such as a CD MP3 or MiniDisc player to this jack with a 3 5 mm stereo to stereo cable 5 Power connector Connect the power adapter to this connector 6 Antenna connector You may disconnect the provided telescopic antenna and install your outdoor antenna to this connector for better reception Consult your dealer for more information if necessary 2 3 4 This chapter describes and shows you the lo...

Page 6: ... your sleep delay timer This function turns off your radio after a preset period of time 6 VOLUME knob Turn to adjust the volume of your radio Turn the knob clockwise to increase the volume level and counterclockwise to decrease the volume level 7 BASS knob Turn to adjust the bass level of your radio 8 TREBLE knob Turn to adjust the treble level of your radio 9 PRESETS buttons Press to recall a st...

Page 7: ...e radio interference from electronic devices such as mobile phones computers and televisions including their cables when they are being used If you experience such interference increase the distance between the radio and such devices The power adapter supplied may vary in different regions and is intended for use with this radio only Disconnect the power adapter from the wall outlet if the radio i...

Page 8: ...the radio is in Standby mode press the STANDBY button The display below appears When doing this step for the first time the radio automatically performs a quick scan in DAB mode as shown in Figure 3 6 2 If you are not in DAB mode press the DAB FM button The display below appears and the radio switches to DAB mode While in DAB mode you can select FM mode at anytime using step 2 above Figure 3 1 You...

Page 9: ... TUNING knob until the name of another station appears 3 Press the TUNING knob to select and listen to the new station A group of stations being broadcasted on the same frequency or channel is called an ensemble The empty block indicates the minimum required level for reception and the filled blocks indicate current signal strength For more information on the display shown see Viewing additional i...

Page 10: ...o begin automatic scanning of available ensembles in your country or region This may take a few seconds during which you will see the displays in the sequence below When a station is detected it plays immediately When a station is not available or its signal is not present one of the messages similar to Figure 3 5 appears Figure 3 5 Figure 3 6 Nemo UG book Page 3 Monday April 25 2005 10 05 AM ...

Page 11: ...canning for ensembles randomly When an ensemble is detected its name and frequency appear and if supported a station from the ensemble plays If this ensemble is unsupported no station is played To scan in another ensemble see the next section 2 Press the TUNING knob to select the ensemble The name of the current station playing appears 3 To select another station turn the TUNING knob 4 To end manu...

Page 12: ... select another station turn the TUNING knob A display similar to Figure 3 11 appears 5 To end manual scanning press the TUNING knob MAN is replaced by DAB on the LCD In Manual tune mode you can only view the default INFO display Tuning to stations To turn Autoselect mode on or off Turn the TUNING knob to select a station and then press and hold the TUNING knob for two seconds A display similar to...

Page 13: ...ecalling your stations on page 4 1 Viewing additional information INFO display INFO displays contain useful information such as program type ensemble name and signal strength including radio services song titles and special announcements sent by your DAB provider To view additional information While playing a station press the INFO button Additional information appears at the bottom row of the dis...

Page 14: ...level 4Time and date are obtained automatically from a DAB transmission in your country or region Depending on the station s broadcast time is displayed in the 12 hour or 24 hour format 5Displays scrolling text messages such as song title artiste s name and traffic reports FM Mode Selecting FM mode 1 When the radio is in Standby mode press the STANDBY button The display below appears 2 If you are ...

Page 15: ...display press the INFO button Scanning stations in FM mode To switch radio modes see Selecting DAB mode on page 3 1 You can scan for FM stations manually or use the automatic scanning autotune method below Autotune To do an autoscan Press the AUTOTUNE button to scan for FM stations in ascending frequency To scan in descending frequency press and hold the AUTOTUNE button Automatic scanning for an F...

Page 16: ...on page 4 1 Selecting audio mode Auto or Mono Follow the steps below to set your radio s audio output to Auto or Mono During an FM station s broadcast press the TUNING button to select an audio mode In Auto mode the radio plays the program s default output stereo or mono In Mono mode the radio plays mono output only Some stations sound better in this mode because of their mode of transmission This...

Page 17: ...preset overrides an existing one when you store a new station over it 2 To recall a station press a PRESETS button If you select an empty preset the display shows Preset x empty where x is the preset number selected Setting the sleep timer This option turns the radio off automatically after a specified period Press the SLEEP button repeatedly to increase the specified period by 15 minutes to a max...

Page 18: ...alarm 1 To set your alarm in FM mode switch your radio to DAB mode first to obtain the correct time and then switch back to FM mode 2 When your radio is broadcasting or in Standby mode press and hold the ALARM button A display similar to Figure 4 3 appears The current time is shown on the left of the LCD The minute section of your alarm time flashes 3 Turn the TUNING knob to increase or decrease t...

Page 19: ...go to the Alarm Type submenu 7 Turn the TUNING knob to select BEEP or RADIO 8 Press the TUNING knob to confirm the selection The display similar to Figure 4 5 shows that the alarm has been activated When the alarm is activated an asterisk appears on the display when the radio is broadcasting or in Standby mode RADIO works only in Standby mode Figure 4 4 Figure 4 5 Figure 4 6 Standby mode Broadcast...

Page 20: ...ss the ALARM button The OFF alarm status appears The asterisk on the LCD disappears To stop the alarm after it rings Press the STANDBY or ALARM button To turn on the Snooze function Press the SNOOZE button A letter z appears before the asterisk as shown in Figure 4 9 The alarm rings five minutes later Figure 4 7 Figure 4 8 Figure 4 9 Nemo UG book Page 4 Monday April 25 2005 10 05 AM ...

Page 21: ...gs 1 Turn off and turn on the main power supply to your radio 2 Press and release the STANDY button and immediately press and hold the TUNING knob for two seconds A display similar to Figure 4 10 appears and the radio scans for a radio station Viewing your radio s software version You may need to do this if you need to contact Customer Support Services for assistance Press and hold the INFO button...

Page 22: ...FM Radio on page 1 1 After connecting the external audio device a display similar to Figure 4 12 appears Radio broadcasts are disabled until the external device is disconnected from your radio To listen to a radio station disconnect the external audio device from your radio To increase the radio volume you may need to adjust the volume on your external audio device Figure 4 12 Nemo UG book Page 6 ...

Page 23: ...roup of stations on the same frequency also known as ensemble The number of ensembles you can receive depends on your location and region There are 41 frequencies on BAND III identified from 5A to 13F see Band III Frequencies on page A 2 Table 1 Each of them is identified by a label or name DAB heightens your listening pleasure with near crystal clear CD quality sound without any annoying interfer...

Page 24: ...10D 215 072 MHz 6A 181 936 MHz 11A 216 928 MHz 6B 183 648 MHz 11N 217 088 MHz 6C 185 360 MHz 11B 218 640 MHz 6D 187 072 MHz 11C 220 352 MHz 7A 188 928 MHz 11D 222 064 MHz 7B 190 640 MHz 12A 223 936 MHz 7C 192 352 MHz 12N 224 096 MHz 7D 194 064 MHz 12B 225 648 MHz 8A 195 936 MHz 12C 227 360 MHz 8B 197 648 MHz 12D 229 072 MHz 8C 199 360 MHz 13A 230 784 MHz 8D 201 072 MHz 13B 232 496 MHz 9A 202 928 M...

Page 25: ...z 20 kHz Amplifier power Two 4 5 W RMS ch into 3 inch 76 mm full range speakers Antenna type RF F connector 75 ohms for antenna connection telescopic antenna attached LCD display 16 x 2 characters Blue backlight Input voltage 9 V AC Input connector 3 5 mm auxiliary input for portable players for example CD and MP3 players Output connector 3 5 mm for headphones Dimensions W x H x D 300 mm X 142 mm ...

Page 26: ...Nemo UG book Page 2 Monday April 25 2005 10 05 AM ...

Page 27: ...Nemo UG book Page 3 Monday April 25 2005 10 05 AM ...

Page 28: ...Nemo UG book Page 4 Monday April 25 2005 10 05 AM ...

Reviews: