background image


6

2-2 Specifications 


Lens: f=8.34mm 

Image Sensor: 1/2" CMOS with 3.0 mega pixels 

Focus: F / 3.0 

Sensitivity: ISO 100 

White Balance: White Balance: Auto, Sunny, Tungsten, 
Fluorescent. 

Shutter: Electrical 

Shutter Speed: 1/4 sec. ~ 1/2000 sec. 

Storage Medium: 16MB Internal Flash Memory 

SD Card Slot (support 32MB~512MB) 

 Image File Format: JPEG (Still Image) 

               AVI (Motion Image) 

 Image Resolution: Fine: 2976 x 2232 (Software 

Interpolation  

    2048 x 1536 

    1600 x 1200 

    1280 x 960 

 Digital Zoom: 10-Step 4X Digital Zoom 

 Focal Range 

 Standard: 1.2m ~ Infinity 

 Focal Range 

 Macro: 15 ~ 20cm 

 Self-timer: 10 sec. delay 

PC-CAM Mode: QVGA (320 x 240) Up to 20fps 

          VGA (640 x 480) Up to 10fps 

Flash Mode: Auto, Off 

PC Interface: USB (Ver. 1.1) 

Movie File: Recording movie files for 60 seconds 
continuously with (512 x 384) format 

(16MB internal memory) 

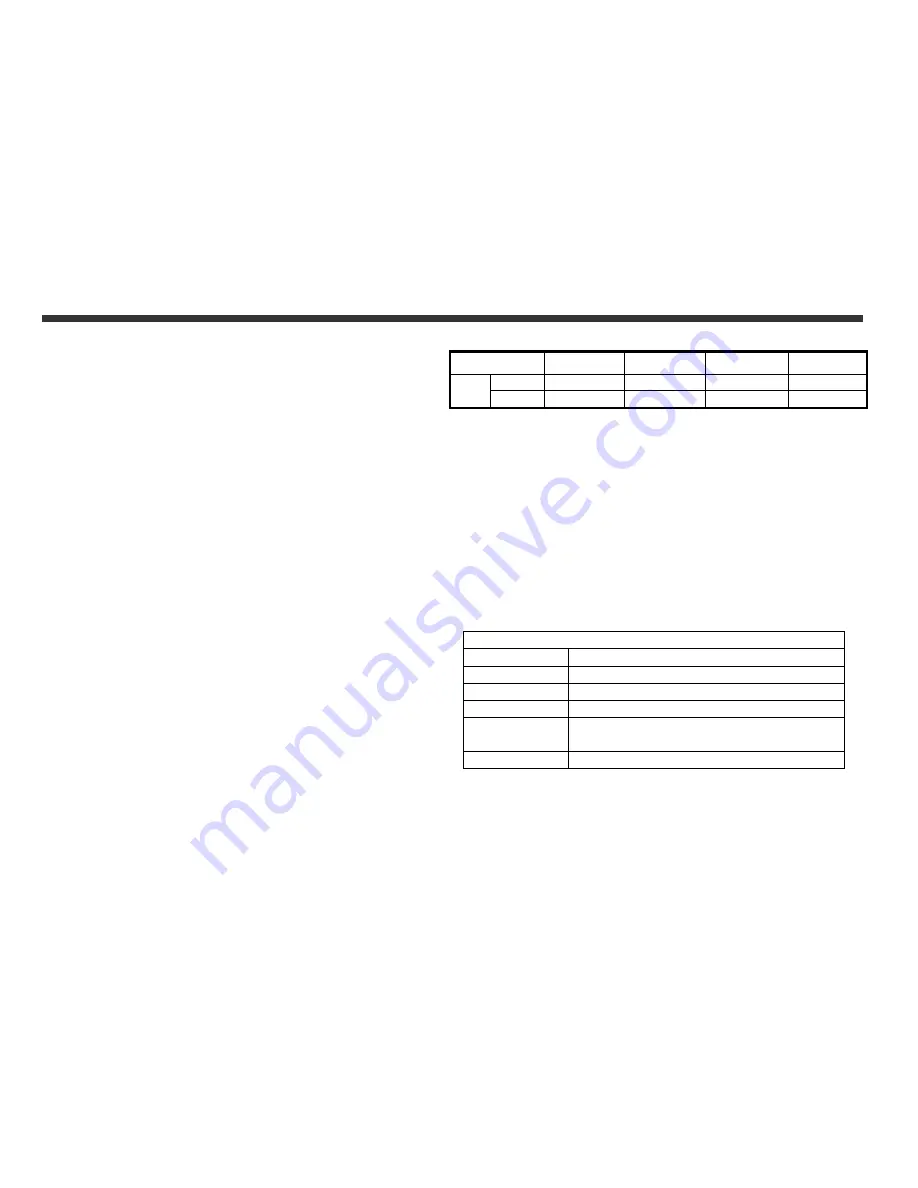
Recordable Image Numbers (16MB):  


1280x960 

1600x1200  2048x1536  2976x2232 

Fine 

41 

27 

16 

16MB 

Normal 

103 

68 

43 

21 


Power Supply: 2 x AAA Alkaline Batteries or supports  
USB 5V (PC-CAM Mode) 

Dimensions: 89 x 58 x 27 mm 

Weight: About 90g (batteries excluded) 


2-3 System Requirements 


When operating the digital camera, we strongly 

recommend you to use a better computer system for 
optimal performance. The minimal system requirement 

for digital camera is as follows:


System Requirement 

OS 

Microsoft Windows 98SE/Me/2000/XP 

CPU 

Intel Pentium 166MHz or higher 

Memory 

64 MB memory or above 

CD-ROM 

4X or above 

HDD 

Minimum 100MB free disk space on the 
hard drive 

Others 

One standard USB 1.1 or USB 2.0 port 


Summary of Contents for PC-CAM 935

Page 1: ...User s Manual ...

Page 2: ...n 9 3 8 Image Movie Play Button 9 3 9 Macro Button 10 Chapter 4 Navigating Modes and Menus 4 1 Record Mode 11 4 2 Playback Mode 12 4 3 Movie Mode 13 4 4 Setup Mode 14 4 5 PC Mode 16 Chapter 5 Preparing Your Camera 5 1 Attaching the Strap 17 5 2 Loading Batteries 17 5 3 Loading and Removing the Memory Card 18 5 4 Setting Up the OSD Language 19 5 5 Setting Up the Date Time 19 Chapter 6 Getting Start...

Page 3: ...right owner all the pictures taken with this digital camera cannot be used in violationof copyright law Moreover when No Photography restriction is placed on site one cannot record any live performance improvisation or exhibits even for personal purpose Any transfer of pictures or m em ory card with data must be conducted under the constraints of copyright law Notes on the LCD Liquid Crystal Displ...

Page 4: ...or is dirty please use lens brush or soft cloth to wipe clean insteadof touching the lens with you fingers 2 To avoid scratching the lens LCD monitor or viewfinder surface do not use any solid object to hit the camera 3 Do not use any detergent or volatile solution which will subject the camera case and the paint to solving or distortion Use soft cloth only 1 4 Package Contents Please check if the...

Page 5: ...4 2 1 Names of Parts Front View 2 Getting to Know Your Camera 1 Shutter 2 Power Switch 3 Self timer LED 4 Flash Light 5 Lens 6 Strap Holder 7 Battery Cover 8 Memory Card Slot 9 Tripod Socket ...

Page 6: ...5 Rear View 1 Macro LED 2 Status LED 3 Image Movie Play Button 4 Mode Button 5 Set Button 6 Function Key 7 Macro Button 8 USB Port 9 LCD Monitor ...

Page 7: ...lash Mode Auto Off PC Interface USB Ver 1 1 Movie File Recording movie files for 60 seconds continuously with 512 x 384 format 16MB internal memory Recordable Image Numbers 16MB 1280x960 1600x1200 2048x1536 2976x2232 Fine 41 27 16 8 16MB Normal 103 68 43 21 Power Supply 2 x AAA Alkaline Batteries or supports USB 5V PC CAM Mode Dimensions 89 x 58 x 27 mm Weight About 90g batteries excluded 2 3 Syst...

Page 8: ...nd side of the camera is switched to Macro mode Busy Right Red LED The red LED will be on when the camera is recording or when the batteries for the flash lights are charging The LED would blink every 10 seconds under normal standby mode 3 2 LCD Monitor Display 1 Current working mode 2 Memory Status 3 Possible number of shots 4 Remaining battery power 5 Zoom lever 6 Flash light status 3 Controls O...

Page 9: ...ff to prevent battery wear Please power on camera again The following features will automatically save the configuration before the camera is turned off unless the Reset Default has been selected to restore its factory anticipated settings 1 Resolution 2 Image Quality 3 Language 4 White balance 5 EV value 6 Frequency 7 PC MODE 3 4 Shutter Button This camera is designed for 2 step shutter function ...

Page 10: ...ent mode by using the Function Key e g select go up down and move 3 7 SET Button This key is used for SELECTION SET UP under selection menu This key is also flash button under record mode 3 8 Image Movie Play Button 1 Press this button you can change to the Playback Mode quick view Record Mode Playback Mode Record Mode 2 Press Shutter Key to play the video and Press again to pause the video play o...

Page 11: ...e and Movie mode by the switch on left side of the camera When you have selected the Macro mode the green LED will be on at the back of the camera If you have selected the Macro Mode when using the camera the flash off function will be enabled automatically Standard Mode Macro Mode ...

Page 12: ...11 4 1 Record Mode For more information please refer to the 3 2 LCD Monitor Display section on page 8 Index for Quick Menu 4 Navigation Modes and Menus Press MODE to enter Press Mode again to Exit ...

Page 13: ...hen printing images with DPOF Printing one image printing all images and the option of printing the recorded date or not DPOF function can only be operated when the printer settings of the memory card is inserted and not active with the internal memory of the camera If the memory card is not inserted the DPOF function is disabled even if there are images stored in the internal memory Start Auto Pl...

Page 14: ...13 4 3 Movie Mode 1 Movie Mode 2 Recorded Movie Time seconds 3 Recording 4 Remaining Battery Power 5 Time Date ...

Page 15: ...14 4 4 Setup Mode 1 Image Resolution 2976x2232 2048x1536 1280x960 1600x1200 2 Image Quality Fine Quality Basic Quality 3 White Balance Auto Sun Fluorescent Bult 4 EV Compensation ...

Page 16: ...quency Select the correct frequency type 50Hz or 60Hz according to your region 8 Format Media If the memory card has been inserted it would only format the memory card and not the internal memory 9 Reset to Default Factory Anticipated Settings ...

Page 17: ...16 4 5 PC Mode ...

Page 18: ... are fully charged If the batteries are low power please change the batteries as soon as possible to maintain operation normality If the battery power indicator only shows one black block the flash light would be disabled If lower than 1 8V when the battery power indicator turns red the camera would automatically turn off Slide the battery cover open in the directionindicated by the arrow Insert t...

Page 19: ... would be stored for approximately 3 minutes during battery change However double check the correct Date Time after the new batteries have been inserted 5 3 Loading and Removing the Memory Card Turn off the power of the camera first 1 Loading the Memory Card Memory card insertion diagram Insert the memory card according to the indicated arrow 2 Removing the Memory Card Press the memory card down g...

Page 20: ...n t take out SD card while shooting or playback images to avoid damage risk on SD card or camera If the memory card is inserted from the wrong direction it would not be fitted in Do not force the insertion to avoid memory card damage If the camera does not detect the memory card please gently wipe the metal interface of the card with a soft cloth and reload the card again 5 4 Setting Up the OSD La...

Page 21: ...tor 2 Press and hold the Shutter button down half way to select the photography location and a yellow will appear inthe center of the LCD monitor Select the AE and press the Shutter button down fully and release it to complete the recording 3 You can use to select two flash light modes when using the camera Auto and Off 4 Using the Mode Button to set the details settings for recording images e g I...

Page 22: ...enu 4 Use 5 and 6 of the Function key to go to previous and next of the picture display 5 You can select Delete Picture and Slideshowwhen using the Button to enter the function menu 6 Use 6 of the Function key to move between selections Use 5 to toggle between selections 7 Use Button to enter the menu 8 Use exit to end the function menu and return to Play Mode menu DPOF functioncan only be operate...

Page 23: ... button on the top to turn on the camera 3 Press Mode Button and use Function key to move to 4 You will see mass stroage and PC camera upon entering the menu screen when the Button is pressed 5 Please use the Function key to move to mass stroage and press Function key to confirm storage 6 Please connect the USB cable to the camera and the PC when the diagram USB Connection pops up the screen 7 A n...

Page 24: ... is pressed 5 Please use the Function key to move to PC camera and press Function key to confirm storage 6 Please connect the USB cable to the camera and the PC when the diagram USB Connection pops up the screen 7 You may operate the PC camera through the software that comes with the CD ROM or other software ...

Page 25: ...ort the auto run function please double click on the My Computer icon on the desktop Then double click the CD ROM drive icon and click the Driversetup Setup exe file in the root directory 3 Please select the desired language of setup program you want to install 4 Please click on the Driver Install the following screen will appear 5 Select the desired language and then press OK 6 Entering the appli...

Page 26: ...25 ...

Page 27: ...on please double click on the My Computer icon on the desktop Then double click the InstallMgr exe CD ROM drive icon and click the file in the root directory 3 Please select the desired language of setup program you want to install 4 Please click on the New Soft Video works Install the following screen will appear 5 Select the desired language and then press OK 6 Press Yes to accept the conditions...

Page 28: ...screen press Next to continue 9 Press Yes to accept the conditions of Software License Agreement and continue the installation 10 Please follow the installation wizard to select the folder location 11 Please select the program folder name ...

Page 29: ...reen will appear Press installation is complete to complete the application installation 13 After the Multimedia Software is complete the following screen will appear press Ok to continue 14 Entering DirectX9 setup screen press Ok afterthe content is confirmed ...

Reviews: