Setup of Jobs on the IQVu
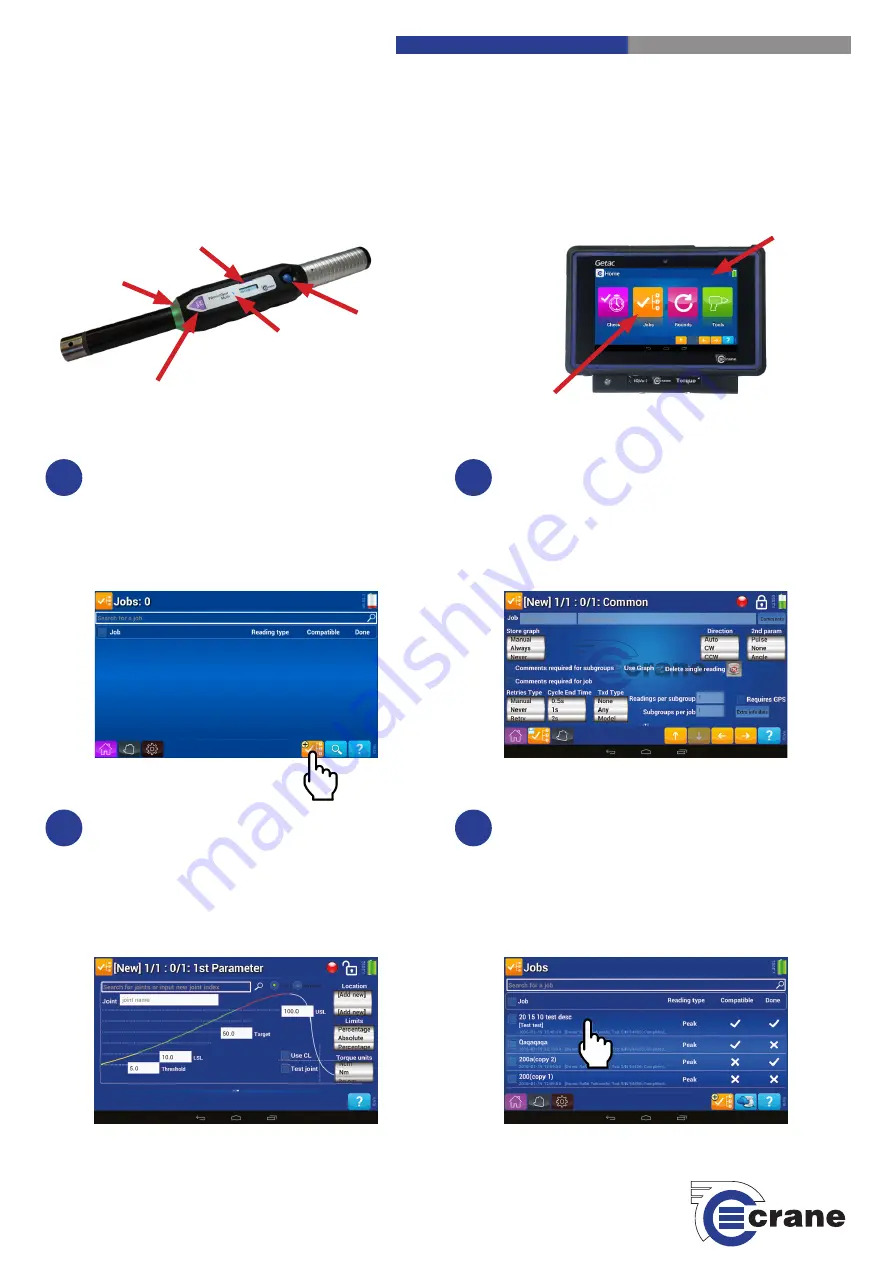
On the IQVu Home Screen, select the ‘Jobs’ icon. Then
click the ‘Add a Job’ icon and swipe screen to the left.
Please note. For more information about the initial setup of the
IQVu data collector, please refer to the IQVu Quick Start Guide.
1
Setup of Jobs on the IQVu cont.
You will see this screen. Unlock the padlock by clicking
it. Fill in the boxes at the top of the screen to add a Job
name and Job description. (For the keypad to disap-
pear press Done). Select the required settings (Store
graph, Direction, 2nd param etc.) and lock the padlock.
Click the ‘Save’ icon (at the bottom of IQVu screen).
2
Setup of Jobs on the IQVu cont.
You will be taken to the following screen. Press unlock
again and fill in the bar at the top (search for joints or
input new joint index). Enter values into USL, Target,
LSL and Threshold boxes relevant to your Wrench
size. (For keypad to disappear press Next or the down
arrow) Lock the padlock again and then click ‘Save’ to
take you to the main ‘Jobs’ screen.
3
WrenchStar Multi
IQVu
On/Off and
Pairing Button
WrenchStar Multi
Torque Limit
LED Display
Screen
IQVu Touch Screen
Pairing with an IQVu Data Collector
Select Job
On the ‘Jobs’ screen, select the job you previously
entered by pressing it. You then need to pair your
wrench to proceed the job.
4
LED Light
360
o
Status
Light Ring
Crane Electronics Ltd
The force in torque management
‘Jobs’ Icon


