background image

Summary of Contents for 917.272072

Page 1: ...ntly from previously built engines Before you start the en gine read and understand this Owner s Manual CAUTION _ Read and follow all Safety Rules and Instructions before operating this equipment For answers to your questions about this product Call 1 800 659 5917 Sears Craftsman Help Line 5 am 5 pm Mon Sat Sears Roebuck and Co Hoffman Estates II 60179 Visit our Craftsman website www sears com cra...

Page 2: ...ankshaft or over speeding the engine Repairs necessary because of operator negligence including but not limited to electrical and mechanical damage caused by improper storage failure to use the proper grade and amount of engine oil failure to keep the deck clear of flammable debris or the failure to maintain the equipment according to the instructions contained in the owner s manual Engine fuel sy...

Page 3: ...e 60 years and above are involved in a large percentage of riding mower related injuries These operators should evaluate their ability to operate the riding mower safely enough to protect themselves and others from serious injury II SLOPE OPERATION Slopes are a major factor related to loss of control and tipover accidents which can result in severe injury or death All slopes require extra caution ...

Page 4: ...eration regularly Keep machine free of grass leaves or other debris build up Clean oil or fuel spillage Allow machine to cool before storing Stop and inspect the equipment if you strike an object Repair if necessary before restarting Never make adjustments or repairs with the engine running Grass catcher components are subject to wear damage and deterioration which could expose moving parts or all...

Page 5: ...e where it cannot contact spark plug CAUTION Do not coast down a hill in neutral you may lose control of the tractor _ CAUTION Tow only the attachments that are recommended by and comply with specifications of the manufacturer of your tractor Use common sense when towing Operate only at the lowest possible speed when on a slope Too heavy of a _oad while on a slope is dangerous Tires can lose tract...

Page 6: ... to assemble and maintain your tractor properly Always observe the SAFETY RULES REPAIR AGREEMENT A Repair Agreement is available on this product Contact your nearest Sears store for detai_s CUSTOMER RESPONSIBILITIES Read and observe the safety rules Follow a regular schedule in maintain ing caring for and using your tractor Follow the instructions under Mainte nance and Storage sections of this ow...

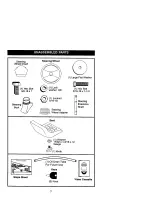
Page 7: ...oot _ Steering Wheel _ _ 1 Lock washer 3 8 1 Locknut 5 16 18 _ Steedng Wheel Adapter 1 Large Flat Washer 1 Hex Bolt 5 16 18 x 1 1 4 t St ierni igon Shaft Slope Sheet _Washer 17 32 x 1 3 16 x 12 Gauge _ 1 Knob For Future Use II z_ I Keys Video Cassette 2 Keys ...

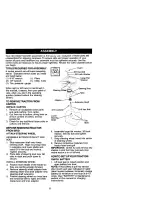
Page 8: ...EXTENSION SHAFT AND BOOT 1 Slide extension shaft onto lower steering shaft Align mounting holes in extension and lower shafts and install 5 16 hex bolt and Iocknut Tighten securely 2 Place tabs of steering boot over tab slots in dash and push down to secure INSTALL STEERING WHEEL 3 Position front wheels of the tractor so they are pointing straight forward 4 Remove steering wheel adapter from steer...

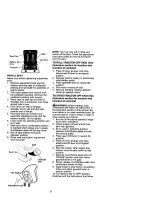
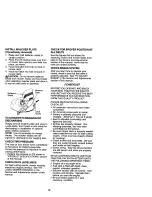
Page 9: ...attachment lift lever to its highest position 2 Release parking brake by depressing clutch brake pedal 3 Place gearshift lever in neutral N position 4 Roll tractor forward off skid 5 Remove banding holding deflector shield up against tractor TO DRIMETRACTOR OFF SKID See Operation section for location and function of controls _WARNING Before starting read understand and fellow all insfructions in t...

Page 10: ...n and mower blade drive belts in the Service and Adjustments section of this manual Verify that the belts are routed correctly CHECK BRAKE SYSTEM After you learn how to operate your tractor check to see that the brake is properly adjusted See TO ADJUST BRAKE in the Service and Adjustments section of this manual CHECKLIST BEFORE YOU OPERATE AND ENJOY YOUR NEW TRACTOR WE WISH TO ASSURE THAT YOU RECE...

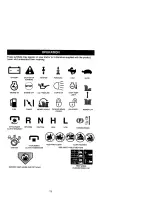
Page 11: ...RNING ENGINE ON ENGINE OFF OIL PRESSURE LIGHTS ON OVER TEMP LIGHT FUEL CHOKE MOWER HEIGHT PARKING BRAKE UNLOCKED LOCKED MOWER LIFT _ l R N H L SI ATTACHMENT REVERSE NEUTRAL HIGH LOW PARKING DRAKE CLUTCH ENGAGED e_ ATTACHMENT KEEP AREA CLEAR SLOPE HAZARDS IGNITION CLUTCH DISENGAGED SEE SAFETY RULES SECTION DANGER KEEPHANDSANDFEETAWAY FREE WHEEL A_omatic Modelsonly 11 ...

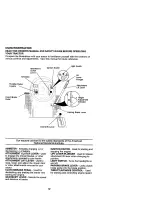
Page 12: ...AMMETER Indicates charging or discharging of battery ATTACHMENT CLUTCH LEVER Used to engage the mower blades or other attachments mounted to your tractor ATTACHMENT LIFT LEVER Used to raise lower and adjust the mower deck or other attachments mounted to your tractor CLUTCH BRAKE PEDAL Used for declutching and braking the tractor and starting the engine GEARSHIFT LEVER Selects the speed and directi...

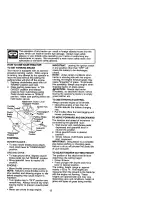
Page 13: ... Always remove key when leaving tractor to prevent unauthorized usa Never use choke to stop engine IMPORTANT Leaving the ignition switch in any position other than OFF will cause the battery to be discharged dead NOTE Under certain conditions when tractor is standing idle with the engine running hot engine exhaust gases may cause browning of grass To eliminate this possibility always stop engine w...

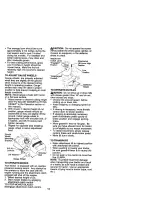
Page 14: ... seat with the engine running and the attachment clutch engaged will shut off the engine 1 Select desired height of cut 2 Start mower blades by engaging attachment clutch control TO STOP MOWER BLADES disengage attachment clutch contral 14 _qkCAUTION Do not operate the mower without either the entire grass catcher on mowers so equipped or the deflector shield in place Attachment Clutch Lever Attach...

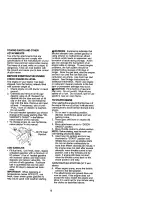
Page 15: ... and formation of acids during storage Acidic gas can damage the fuel system of an engine while in storage To avoid engine problems the fuel system should be emptied before storage of 30 days or longer Drain the gas tank start the engine and let it run until the fuel lines and carburetor are empty Use fresh fuel next season See Storage Instructions for additional information Never use engine or ca...

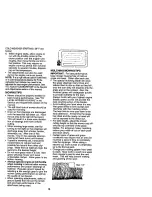
Page 16: ...fore mowing Always operate engine at fuU throttle when mowing to assure better mowing performance and proper discharge of material Regu ate ground speed by selecting a low enough gear to give the mower cutting performance as well as the quality of cut desired When operating attachments select a ground speed that will suit the terrain emd give best performance of the attachment being used 16 MULCHI...

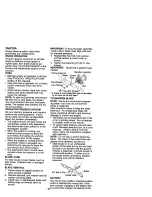
Page 17: ...ted in this manual Some adjustments will need to be made periodically to properly maintain your tractor All adjustments in the Service and Adjustments section of this manual should be checked at least once each season Once a year you should replace the spark plug clean or replace air filter and check blades and belts for wear A new spark plug and clean air filter assure proper air fuel mixture and...

Page 18: ...VAL 1 Raise mower to highest position to allow access to blades 2 Remove hex bolt lock washer and flat washer securing blade 3 Install new or resharpened blade with trailing edge up towards deck as shown IMPORTANT To ensure proper assembly center hole in blade must align with star on mandrel assembly 4 Reassemble hex bolt lock washer and flat washer in exact order as shown 5 Tighten bolt securely ...

Page 19: ...l cap dipstick securely each time you check the oil level TO CHANGE ENGINE OIL Determine temperature range expected before oil change All oil must meet API service classification SF SJ Be sure tractor is on level surface Oil will drain more freely when warm Catch oil in a suitable container 1 Remove oil fill cap dipstick Be careful not to allow dirt to enter the engine when changing oil 2 Remove c...

Page 20: ...eaner _ _ _ ol Base MUFFLER inspect and replace corroded muffler and spark attester if equipped as it could create a fire hazard and or damage SPARK PLUGS Replace spark plugs at the beginning of each mowing season or after every 100 hours of operation whichever occurs first Spark plug type and gap setting are shown in PRODUCT SPECIFICATIONS section of this manual ENGINE OIL FILTER Replace the engi...

Page 21: ...hment clutch in DISEN GAGED position 2 Move attachment lift lever forward to lower mower to its lowest position 3 Roll belt off engine pulley 4 Remove small retainer spring and lift clutch spring off pulley bolt 5 Remove large retainer spring slide collar off and push housing guide out of bracket 6 Disconnect anti swaybar from chassis bracket by removing retainer spring 7 Disconnect suspension arm...

Page 22: ...efore making any necessary adjust ments check that both front links are equal in length Both links should be approximately 10 3 8 If links are not equal in length adjust one link to same length as other link To lower front of mower loosen nut E on both front links an equal number of turns When distance D is 1 8 to 1 2 lower at front than rear tighten nuts F against trunnion on both front links To ...

Page 23: ...e distance between brake operating arm and nut A on brake rod 3 If distance is other than 1 1 2 loosen jam nut and turn nut A until distance becomes 1 1 2 Retighten jam nut against nut A 4 Road test tractor for proper stopping distance as stated above Readjust if necessary If stopping distance is still greater than six 6 feet in highest gear further maintenance is neces sary Contact a Sears or oth...

Page 24: ...and reassemble NOTE On rear wheels only align grooves in rear wheel hub and axle Insed square key 4 Replace washers and snap retaining dng securely in axle groove 5 Replace axle cover 24 NOTE To seal tire punctures and prevent flat tires due 1o stow leaks tire sea_ant may be purchased from your local parts dealer Tire sealant also prevents tire dry rot and corrosion Washers Retainin Axle Cover I S...

Page 25: ...nect BLACK grounding cable to negative terminal with remaining hex bolt and keps nut Tighten securely 6 Close battery box door Positive Red Cable Negative Black Cable TO REPLACE HEADLIGHT BULB 1 Raise hood 2 Pull bulb holder out of the hole in the backside of the grill 3 Replace bulb in holder and push bulb holder securely back into the hole in the backside of the grill 4 Close hood INTERLOCKS AND...

Page 26: ...he carberetoron thisengine _slow emission It is equipped withan idle fuel adjustingneedle with a limifercap which allowssome adjustmentwithinthe limits allowed by thecap Do not attemptto remove the limitercap The limiter cap cannot be removed without breaking the adjusting needle 1 Be sure you have a clean air filter and the throttle controlcable is adjusted properly see above 2 Start engine and a...

Page 27: ...ssential fue system parts such as carburetor fuel hose or tank during storage Also experiance indicates that alcohol blended fuels called gasohol or using ethanol or methanol can attract moisture which leads to separation and formation of acids during storage Acidic gas can damage the fuel system of and engine while in storage 1 Drain the fuel tank 2 Start the engine and let it run until the fuel ...

Page 28: ...or starter CORRECTION Fill fuel tank See TO START ENGINE in Operation section 3 Wait several minutes before attempting to start 4 Replace spark plug 5 Clean replace air filter _ Replace fuel filter Drain fuel tank and carburetor refill tank with fresh gasoline and replace fuel filter 8 Check all wiring 9 See To Adjust Carburetor in Service Adjustments section 1O Contact a Sears or other qualified ...

Page 29: ... 5 Clogged mower deck vent holes from buildup of grass leaves and trash around mandrels CORRECTION 1 Set in Higher Cut position reduce speed 2 Adjust throttle control Clean underside of mower housing Clean replace air filter Check oit level change oil Clean and regap or change spark plug Replace fuel filter Drain fuel tank and refill with fresh gasoline 9 Drain fuel tank and carbure tor refill tan...

Page 30: ...l mower deck 5 Check tires for proper air pressure 6 Replace sharpen blade Tighten blade bolt 7 Clean underside of mower housing 8 Replace mower drive belt 9 Reinstall blades sharp edge down 10 Replace with blades listed in this manual 11 Clean around mandrels to open vent holes Headlight e not 1 Switch is OFF 1 Turn switch ON working 2 Bulb s burned out 2 Replace bulb s ifsoequipped 3 Faulty ligh...

Page 31: ...MMETER OPTIONAL V _iT E IGNITION IGNITION SWITCH RELAY NON REMOVABLE REMOVABLE CONNECTIONS CONNECTIONS WIRING INSULATED CLIPS NOTE IF WIRING INSULATED CLIPS WERE REMOVED FOR SERVICING OF UNIT THEY SHOULD BE REPLACED TO PROPERLY SECURE YOUR WIRING 31 ...

Page 32: ...ELECTRICAL TRACTOR MODEL NUMBER 917 272072 ...

Page 33: ...147 Cable Battery 6 Ga w 16 wire red 26 175158 Fuse 27 73510400 Nut Keps Hex 1 4 20 Unc 28 42073 Cable Ground 6 Ga 12 black 29 160784 Switch Plunger Normal Op Olive 30 175566 Switch Ign 33 140403 Key Ign 40 17 _219 Harness Ign 41 71110408 Bolt B k Fin Hex 1 4 20 Unc x 1 2 42 131563 Cover Terminal Red 43 175141 Solenoid 45 122822X Ammeter Rectangular 15 Amp 52 141940 Protection Wire Loop 81 109748X...

Page 34: ...TRACTOR MODEL NUMBER 917 272072 CHASSIS ANDENCLOSURES 2O8 2_ 3 74 20e 34 ...

Page 35: ... 2 38 169834 Pivot Bracket Assembly Rear 39 174714 Bracket Pivot Laser Lt 58 150127 Duct Air Engine 60 72140606 Bblt Rdhd Sqnk 3 8 16 UNC x 1 64 154798 Dash Lower STLT 74 STD541437 NutCrowblock 3 8016 UNC 114 158112 Keeper Belt Rear Lh Sti P930 115 17060620 Screw 3 8 16 x 1 1 4 142 165867 Plate Reinforcement STLT 143 154966 Bracket Swaybar Chassis 144 154207 Bracket Pnt Fcotrest STLT 145 156524 Ro...

Page 36: ...TRACTOR MODEL NUMBER 917 272072 GROUND DRIVE 116 _ 202 50 _ L_15 O 120 _ 37 26 27 36 ...

Page 37: ... Degrees 29 71673 Cap Parking Brake 116 72140608 Belt Rdhd Sqneck 3 8 16 x 1 30 169592 Bracket Transaxle 120 73900600 Nut Lock Fig 3 8 16 Unc 32 STD523107 Bolt 145 74490540 Bolt Hex Flghd 5 16 18 Gr 5 34 175578 Shaft Assembly Foot Pedal 150 175456 SpacerRetainer 35 120183X Bearing Nylon 151 19133210 Washer 13 32 x 2 x 10 Ca 36 STD551062 Washer 156 166002 Washer Srrted 5 161D x 1 125 37 STD571810 R...

Page 38: ...TRACTOR MODEL NUMBER 917 272072 STEERING ASSEMBLY 4 37 i 38 ...

Page 39: ...561210 Pin Cotter 32 130465 Rod Tie 36 155099 Bushing Steedng 37 152927 Screw 3B 139769 Insert Steedng Wheel 39 19133812 Washer 13 32 x 2 3 B x 12 Gauge 40 STD541537 Nut Lock Center 3 8 24 Unt 41 100711L Adaptor Steedng Wheel 42 145054X428 Boot Steering Shaft 43 121749X Washer 25 32 x 1 1 4 x 16 Gauge 44 153720 Extension Shaft Steedng LR LT 46 121232X Cap Spindle 47 6855M Fgtlng Grease 51 STD54143...

Page 40: ...deICV490 27508 Muffler 45 17000612 Gasket 46 19091416 Tube Drain Oil Easy 77 19101216 Washer 80 74760508 SNeld Bm Dbr Guard 81 73510400 Arrestor Spark 101 M73030500 Tank Fuel 105 17120616 Cap Assembly Fuel Sears Vented Clamp Hose DESCRIPTION Line Fuel Plug Drain Oil Easy BUShing Snap Fuel Line Screw Hex Washer Head Thd Roll 1 4 20 x 3 4 Screw Hxwsh Thdr 3 6 16 x 3 4 Washer 9 32 x 7 8 x 16 Ga Washe...

Page 41: ... Cprsn 1 27 BIk Pnt 5 145006 Clip Push In Hinged 17 123976 Nut Lock 1 4 Lge Fig Gr 5 Zinc 6 STD541437 Nut Hex Lock w lns 3 6 16 Unc 21 171852 Bolt Shoulder 5 16 18 Unc 2A 7 124181X Spring Seat Cprsn 2 250 BIk Zi 22 STD541431 Nut Hex Lock w Ins 5 16 18 8 17000616 Screw 3 8 16 X 1 24 19171912 Washer 17Y32 X 1 3 16 X12Ga 9 19131614 Washer 13 32 X 1 X 14 Ga 25 127018X Bolt Shoulder 5 16 18 X 62 10 174...

Page 42: ...t Schematic 20 149516 Decal Battery Dngr Psn Eng 138311 Decal Lift Handle 165800X428 Pad Footrest LH STLT 165799X428 Pad Footrest RH STLT 178313 Owner s Man ual E nglish 178314 Owner s Manual Spanish WHEELS TIRES 5 11 4 10 11 KEY PART NO NO DESCRIPTION 1 59192 CapValueTire 2 65139 Stem Value 3 106222 Tire F TS 15 X 6 O 6 Service 4 59904 Tube Inner Front 35060 5 106732X427 Rim Asm 6 front White Ser...

Page 43: ...g Nylong 7 125631X Gdp Handle Fluted 8 122 365X Bufton Plunger Read 11 139865 Link Asm Lift L H 12 139866 Link Asm Lift R H KEY PART NO NO DESCRIPTION 13 ST _4008 Retainer Spdng 15 173288 Unk Front 16 7_ Nut Jan1 Hex 1 2 13 Unc 17 130171 Trunnion B_kZinc 18 _ Nut Lock w _ tsh 1 2 13 Unc 19 139868 Arm Suspension Mower 20 163552 Retainer Sprlng 31 1698_5 Beadng Pvt Lift 3_ 73540600 Nut Crowsiock 3 8...

Page 44: ...TRACTOR MODEL NUMBER 917 272072 MOWER DECK _116 44 ...

Page 45: ...hds _nas Tree 153 169674 36 131494 Pulley Idler Rat 154 169675 37 STE_51037 Washer 13 32x13 16x16Ga 155 169671 40 STD541437 NutCrownlock3 8 16UNC 156 169672 44 1400_8 Guard Mandrel L H 157 169669 45 STD624003 Retainer 158 17720410 46 137729 Screw Tlld Roll 1 4 20 x 5 8 159 72140614 48 133944 Washer Hardened 130794 49 174284 Roller Assemtsy Cam Follower 50 131340 Bblt Shoulder 10 24 Grade 5 169583 ...

Page 46: ...TRACTOR MODEL NUMBER 917 272072 PEERLESS TRANSAXLE MODEL NUMBER 206 545C 36 150 29 157 46 ...

Page 47: ...asher 627 ID x 031W 77 788078A 29A 780160 Thrust Washer 762 ID x O31W 79 792144 29B 780_51 Thrust Washer 762 ID x O31W 82 778333 29C 780199 AnU Rotatlon Washer 632 83 778338 30 780106 Cup Washer 1 127 ID x 032W 85 792154 31 780001 Flat Washer 750 ID x 056W 87 788089A Use AS Needed 150 788093A 31A 780195 FlatWasher 7501Dx 062W 157 788088A 32 7880_3 Oil Sea_ 5 8 180 73 _29A 34 780194 Bushthg 563 900...

Page 48: ...TRACTOR MODEL NUMBER 917 272072 KOHLER ENGINE MODEL NUMBER CV490 TYPE NUMBER 27508 YLtHDER HEAD VALVE ANO BREATHER I CRANKCASEJ 19 48 ...

Page 49: ... R black M6xl 0x34 2 12 422 07 S Shim camshaft A R white 12 12 089 01 S Spring valve 2 9 12 144 28 S Shaft balance 13 12 173 01 S Cap valve spring 2 10 12 874 07 S Piston w Ring Set Std 14 12 755 03 S Kit retainer 2 Includes 11 12 15 12 468 08 S Washer plain 13 32 12 874 11 S Piston w Ring Set 08 16 12 112 13 S Spacer head bolt exhaust 12 874 08 S Piston w Ring Set 25 port 12 874 09 S Piston w Rin...

Page 50: ...TRACTOR MODEL NUMBER 917 272072 K_HLER ENGINE MODEL NUMBER CV490 TYPE NUMBER 27508 IGNtTIONIELECTRICALI 13 t4 AIR INTAKE J tg I BLOWER HOUSING ANO BAFFLESJ 6 _7 10 50 ...

Page 51: ...ad white 36 18 gauge fully insulated push on tab and uninsulated socket terminals 2 3 4 5 6 7 8 9 M 545010 S 24 468 10 S 12 146 07 S M 550010 S 24 096 05 S 12 027 76 S 12 063 18 S 25 154 02 S 12 086 37 S 10 12 063 20 S 11 M 645016 S 12 12 063 19 S Screw hex flange M5xO 8xlO 6 Washer plain 1 4 Plate blower housing Screw hex flange M5xO 8xlO Cover pinion Housin_t blower Baffle intake side Clip mount...

Page 52: ...TRACTOR MODEL NUMBER 917 272072 K OHLERENGINE MODEL NUMBER CV490 TYPE NUMBER 27508 _TARTINO SYSTEM 1 I ENGINE CONTROLS t 11 2 3 IL PAN I LUBRICATION I 1 O_ 4 J r t_t0 1O _ 15 52 ...

Page 53: ...PTION 12 14 12 12 100 07 S Nut hex flange 1 4 20 52 211 04 S Bolt 1 4 20x1 1 12 O38 61 S Dipstick assembly Includes 13 2 3 14 12 090 28 S Lever governor 2 25 755 13 S Kit oil fill cap Includes 3 15 25 158 08 S Rushing throttle linkage 3 12 153 03 S O Ring oil fill cap 16 12 079 10 S Linkage throttle 4 12 153 02 S O Ring u er oll fill tube 17 25 158 11 S Bushing throttle linkage 5 12 123 04 S Tube ...

Page 54: ...TRACTOR MODEL NUMBER 917 272072 KOHLER ENGINE MODEL NUMBER CV490 TYPE NUMBER 27508 CRANKSHAFT II FUEL SYSTEM I EXHAUSTJ 6 t0 54 ...

Page 55: ... forming M5x0 Sxl0 X 22 11 S Washer lock 1 4 12 757 02 S Kit float 12 757 03 S Kit carburetor repair 12 041 01 S Gasket carburetor 12 041 02 S Gasket air cleaner 12 041 05 S Gasket bowl 12 041 06 S Gasket bowl screw 12 032 06 S Seal solenoid 12 757 33 S Kit solenoid repair 12 041 06 S Gasket bowl screw 12 454 03 S Tie cable 25 452 20 S Terminal 12 518 37 S Lead red 37 20 gauge insulated socket and...

Page 56: ...56 ...

Page 57: ...57 ...

Page 58: ...58 ...

Page 59: ...E UP AND DOWN HILL NOT ACROSS HILL _ _ Operate your Tractor up and down the face of slopes not I _U_ greater then 150 never across the face Make turns gradu I ally to prevent tipping or loss of control Exercise extreme I caution when changing direction on slopes i ...

Page 60: ...e day or night www seara com For the replacement parts accessories and owner s manuals that you need to do it yourself call Sears PartsDirectSM 1 800 366 PART 6a m 1_ p m CST 1 800 366 7278 7 days a week www sears condpartsdlrect To purchase or inquire about a Sears Service Agreement 1 800 827 6655 7 a rn 5 p m CST Mon Sat Para pedir servicio de reparacibn a damicilio y para ordenarplazas con antr...

Reviews: