background image

Summary of Contents for 31013

Page 1: ...on which if not avoided may result in minor injury moderate injury or property damage CAUTION Read and follow all Safety Rules and Operating Instructions before first use of this product DANGER _k DO NOT stand on this product You may fall which may cause personal injury DO NOT step in drawers You may fall which may cause personal injury USE THE BRAKES when not moving this product This will pre ven...

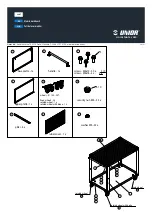
Page 2: ...e chest to the roll away Remove the chest _ CASTER INSTALLATION Items Needed 1 4 20 x 438 in HW Screw Qty 16 1 4 20 Hex Nuts Qty 16 Process NOTE Use adequate manpower for this operation Remove the bottom drawer See drawer removal instructions Lay the unit on its back use packaging material to protect the paint finish Attach the casters to unit using 4 1 4 20 x 438 in Screws and 4 1 4 20 Nuts per c...

Page 3: ... Secure using four10 16 x1 2sheet metal screws Wrench tighten Position thechest ontheriser Secure using four10 16 x 1 2 sheet metal screws Wrench tighten Wrench tighten therisers four 8 32 x 1 4 panhead screws and 8 32 hexnuts Lever Style Liftorlower depending ontheslide the release lever onboth sides this allows theslides toride over thestops Pull outtoremove Tab Style Depress therelease tabs onb...

Page 4: ...n drawer Push the drawer into the unit until the drawer fully engages slides Open drawer and reclose to ensure proper operation If stop does not engage slide lightly deflect the stop with screwdriver Slide To attach the slide Extend slide and locate lances within respective cutout in carrier Pull slide forward until slide locks back into place Reinstall drawer following drawer installation proce d...

Page 5: ...ERTENClA z_ indica una situaci6n peligrosa que de no evitarse podria producir lesiones graves o la muerte PRECAUClON se utiliza para indicar una situaci6n peligrosa que de no evitarse puede derivar en lesiones leves o moderadas o en dafio a la propiedad ATENClON Lea y siga todas las Normas de Seguridad y las Instrucciones de Funcionamiento antes de utilizar por primera vez este producto PELIGRO NO...

Page 6: ...nt 16 Destornillador punta de cruz Llave Inglesa de 3 8 in Llave de 10mm Proceso Acueste el carro sobre su parte trasera Proteja el acabado de la unidad con el material de embalaje Ver Secci6n de Operaci6n Secci6n B Instale las dos ruedecillas giratorias en el mismo lado de la unidad que la manija lateral Fije las ruedecillas usando 4 1 4 20 x 438 in tornillos y 4 1 4 x 20 tuercas en cada ruedecil...

Page 7: ... con la mano Coloca el ensamblado de la base sobre la pieza deslizante Fijala con cuatro tornillos para hojalata 10 16 de 12 7 mm Aprieta con una Ilave Monta el bael sobre la base Fijalo con cuatro tornillos para hojalata 10 16 de 12 7 mm Aprieta con una Ilave Aprieta los cuatro tornillos de cabeza plana biselada 8 32 de 2 5 mm y las tuercas hexagonales 8 32 de la base Estilo lengUeta Oprima las l...

Page 8: ...arar la corredera de la unidad Empuja el frente de la corredera hacia la parte trasera de la unidad Instalar la corredera Extiende la corredera y busca las lancetas en cada una de las ranuras de los rieles Empuja la corredera hacia adelante hasta que la corredera quede fija en su lugar Vuelve a colocar el caj6n correctamente segen las instruc ciones Ver secci6n B CERRAR EL BAUL Insertar la barra d...

Reviews: