background image

Summary of Contents for 137.224120

Page 1: ...37 224120 CAUTmON Before using this band saw read this manual and follow all its Safety Rules and Operating Instructions Safety instructions installation Operation o Maintenance Parts List Custemer Help Line t 8ee 843 1 82 Sears Roebuck and Coo Hoffman Estates JL 60179 USA Part No 137224120002 ...

Page 2: ...the rate for which it was designed 9 USE THE RIGHT TOOL Don t force the tool or the attachment to do a job for which it was not designed t0 USE PROPER EXTENSION CORD Make sure your extension cord is in good condition When using an extension cord be sure to use one heavy enough to carry the current your product will draw An undersized cord will result in a drop in line voltage and loss of power whi...

Page 3: ...e proper circuit protection Use a separate electrical circuit for your tools Your saw is wired at the factory for 120V operation Connect to a 120V 15 Amp circuit and use a I5 Amp time delay fuse or circuit breaker To avoid shock or fire if power cord is worn or cut or damaged in any way have it replaced immediately INSTALLED BY A QUALIFIED ELECTRICIAN The Canadian Electrical Code prohibits the use...

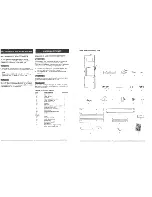
Page 4: ...saw 1 Carefully unpack the band saw and aU its parts and compare against the illustration on page 7 2 Place the saw on a secure surface and examine it carefully Although compact this saw is heavy To avoid back injury get help whenever you have to lift the saw If any part is missing or damaged do not plug the band saw in until the missing or damaged part is replaced and assembly is complete TABLE O...

Page 5: ...n WOODWORKING TERMS BEVEL CUT An angle cut made through the face of a workpiece COMPOUND CUT A simultaneous bevel and miter cut CROSSCUT A cut made across the width of the workpiece RELIEF CUT Removal of waste material by a cut from the outside edge allowing easier cutting of intricate curves F P M Feet per minute Used in reference to the surface speed of the saw blade FREEHAND Performing a cut wi...

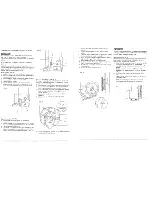
Page 6: ... 2 Tighten 5 Close the wheel cover 6 Thread a nut 7 onto the table stop bolt 8 and screw both into the rear tab 9 on the trunnion support bracket FIG 0 1 4 3 5 5 ASSEMBLE THE SAWDUST COLLECTION PORT FIG 0 I I Slide thehook I on theportassembly into thesquare hole 2 located on thebandsaw housing belowthe lowerbladeguides 2 Push the flat plate of the port against the outside of the band saw to align...

Page 7: ...avoid injury the blade tension tracking and upper and lowerguides and bearingsmust be properly adjustedbefore operating the bandsaw See ADJUSTMENT INSTRUCTIONS section MITER GAUGE FIG G A miter gauge I is supplied with your band saw to be used with the table 2 The table is equipped with a slot on the right side of the blade fo the miter gauge The miter gauge can be tilted 0 to 45 right or left A b...

Page 8: ...stments FIG K 7 6 5 RG L UPPER BLADE GUIDE ASSEMBLY F_G M To avoid injury turn the switch OFF and disconnect the saw from the power source before making ar_y adjustments NEVER make adjustments with the machine running 1 Loosen the lock knob 1 and move the blade guide assembly 2 up or down to 1 8 above the workpiece 2 Tighten the lock knob UPPER BLADE GUIDES AND BLADE SUPPORT BEARING FIG N O The bl...

Page 9: ...both pulleys 9 tf the side edges of the pulleys are not aligned loosen the motor pulley hex socket screw 8 10 Adjust the motor pulley in or out on the motor shaft to align the side edges of both pufteys 1t When aligned tighten the hex socket screw 12 Place the v belt on the motor pulley and saw pulley Check the belt tension and adjust t3 Move the idle wheel 9 to press the V belt by turning the han...

Page 10: ...e smallest diameter circle that can be cut is determined by the width of the blade For example a 1 4 wide blade will cut a minimum diameter of approximately 1 1 2 FIG V Minimum 2 1 Z D Circle Diameter Blade Width BLADE SELECTION FIG W CAUTION Blade teeth are sharp Use care whenhandling a saw blade For longest wear and best cutting results use the correct blade thickness width and temper for the ty...

Page 11: ... fire hazard Frequently blow out or vacuum up the sawdust Keep your band saw clean Remove the sawdust from the inside Vacuum or blow out frequently NOTE Put a thin coat of paste wax on the table so that the wood slides easily while cutting Do not allow filth to build up on the table the guides or the support bearings Clean them with Craftsman Gum and Pitch Remover NOTE Do not immerse the support b...

Page 12: ...ower Motor overheats Motor stalls or slows Frequent fuse or circuit breaker failure 2 3 4 5 6 1 Too many electrical machines 2 Incorrect fuse 3 Wheels do not rotate 4 Undersized extension cord 5 Short circuit 1 Low line voltage 2 Faulty motor or capacitor 2 St Not plugged into power outlet Switch and key not in ON 2 position Motor cord cut or abraded 3 Plug on cord is faulty 4 Fuse on circuit brea...

Page 13: ..._1f4 2 64 3AE06401 Fiatwasher 1f4 16 2 55 3AE0 8501 Hexscrew 114 518 2 66 3AE_O1 MotorWtlpowercord 120V60HZ 1 07 3AE0670I Flatkey 5 5 32 5 68 3AE0680t Motorpulley 50 76 2 Slot 1 69 3AE0690 Screw Headless M6 16 I 70 3AE07001 Flat washer 5116 18 4 7I ST054t031 Hexscrew 5118 4 KayNo PART NUMBER Description Size Qty 72 3AE07201 Idlewheel 1 73 3AE07301 Copperbeadng 12 t4 20L I 74 3AE0740t ShaftelidJewh...

Page 14: ...reate a HAZARD unless repair is done by a qualified service technician Repair service is available at your nearest Sears Service Center Order by PART NUMBER not by key number Key No PART NUMBER Description Size Qty 1 3AD30101 Stand Top Plate 1 2 3AD30201 Leg 4 3 3AD30301 Lower bracket short 2 4 3AD3040 Lower bracket long 2 5 3AD30501 Screw 32 6 3AD30601 Washer 32 7 3AD30701 Nut 1 4x5 8 32 8 3AD310...

Reviews: