background image

Page 6

For technical questions, please call 1-888-866-5797.

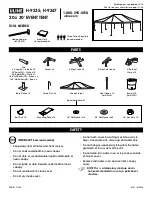
Item 62899

Take Down Instructions

Read the ENTIRE IMPORTANT SAFETY INFORMATION section at the 
beginning of this document including all text under subheadings therein 
before set up or use of this product.

1.  Remove anchors or sandbags from Legs.  

Remove tie downs (not included)
from corners of Roof, if used.

2.  Push in the Pins on the legs and lower 

the Inner Legs to lower the 
Canopy Frame.

3.  Disengage the Locking Button at each 

corner of the Frame and pull the Slider 
down slowly until the button is completely 
free of the Slider.

4.  Remove all the hook and loop tape from 

all parts of the Frame and remove 
the Canopy.

5.  With two people standing opposite each 

other, lift the Frame and push it together 
collapsing the Frame completely.

CAUTION!

 Be careful not to pinch fingers or hands 

while collapsing the Frame for storage.

6.  Slide the Frame into the Storage bag. 

Fold the Canopy and place 
in the Storage bag.

Locking 

Locking 

Button

Button

Summary of Contents for 62899

Page 1: ...rence 20e When unpacking make sure that the product is intact and undamaged If any parts are missing or broken please call 1 888 866 5797 as soon as possible Copyright 2015 by Harbor Freight Tools All rights reserved No portion of this manual or any artwork contained herein may be reproduced in any shape or form without the express written consent of Harbor Freight Tools Diagrams within this manua...

Page 2: ...Page 2 For technical questions please call 1 888 866 5797 Item 62899 Specifications Dimensions 10 FT x 10 FT at base 8 FT x 8 FT at canopy Canopy 150 Denier Polyester ...

Page 3: ... threatens 7 Do not use grill or any other type of fire under cover Cover may catch fire if exposed to heat rising from fire 8 Do not allow snow rainwater or debris to accumulate or pool on canopy 9 Use as intended only Do not use for long term shelter 10 Anchor securely to flat level solid surface able to support canopy according to manual instructions 11 Inspect before setup and every use do not...

Page 4: ... Place the Frame in the center of the desired location With two people standing opposite each other lift the Frame and pull it several feet apart CAUTION Be careful not to pinch fingers or hands as you pull the Frame into shape 2 Open the Frame completely and engage the Slider at each corner by pulling up on the Slider until it clicks into place 3 Place the Canopy over the Frame and secure the cor...

Page 5: ...place to raise the Canopy to its desired height 5 Attach the hook and loop strips to each corner and overhead Trusses 6 Secure the bottom of each Leg using sandbags not included or the included Ground Anchors 7 The four loops on the roof can be used to tie down the Canopy for added stability Tie downs ropes not included ...

Page 6: ...nd lower the Inner Legs to lower the Canopy Frame 3 Disengage the Locking Button at each corner of the Frame and pull the Slider down slowly until the button is completely free of the Slider 4 Remove all the hook and loop tape from all parts of the Frame and remove the Canopy 5 With two people standing opposite each other lift the Frame and push it together collapsing the Frame completely CAUTION ...

Page 7: ...Item 62899 Record Serial Number Here Note If product has no serial number record month and year of purchase instead Note Replacement parts are not available for this item Replacement bolts and nuts must be sized M6 bolts 13 16 or 1 long and be at least grade 5 ...

Page 8: ...damages so the above limitation of exclusion may not apply to you THIS WARRANTY IS EXPRESSLY IN LIEU OF ALL OTHER WARRANTIES EXPRESS OR IMPLIED INCLUDING THE WARRANTIES OF MERCHANTABILITY AND FITNESS To take advantage of this warranty the product or part must be returned to us with transportation charges prepaid Proof of purchase date and an explanation of the complaint must accompany the merchand...

Reviews: