


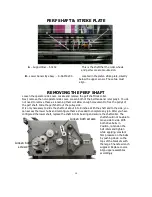


REPLACING THE FRICTION PLATE
The contact strip below the feed wheels is a consumable part. If this strip begins to
show excessive wear, or additional pressure with the feed wheels does not stop double
feeds from occurring, it may be time to replace the friction plate. To do so, begin by
removing all of the assemblies mounted on the perf assembly shaft. Use the T-handle
wrench to remove the 2 flat head socket screws on each side of the friction plate.
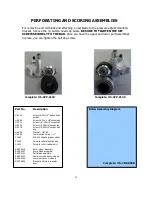
Once the screws are removed, slide the plate towards the front of the machine about 1
to 2 inches, lift the plate up on the contact strip side. With a smooth motion, slowly pull
the friction plate up and out over the feed wheels, toward the back of the machine.
To put the new plate in, simply reverse the procedure of removing.
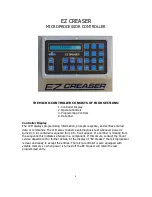
CHECKING THE SENSORS
1. Turn machine power on and allow startup count down mode to complete
2. At this time your display on your control board should read “EZ CREASER”
3. By placing a sheet or paper between the sensors your control board should read
“Sensor Blocked”.
4. By removing paper between sensors display should return to “EZ CREASER”
5. If all above steps work correctly sensor is working properly, if not, contact the Count
Machinery Company service department.
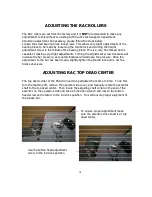
DRIVE CHAIN TENSION
The chain that drives the upper crease die in time will stretch. This is a common
occurrence in chains. The spring tensioner bracket will automatically adjust the tension.
It is important that this chain remain taught and free of any play. It is recommended to
check this periodically. If there is play in the chain drive, make sure the adjustment
spring is in the correct location.
13
Chain
Tensioner
Bracket