


41
Be sure that there is sufficient air circulation across the processor’s heat sink, and
CPU cooling FAN is working correctly; otherwise, it may cause the processor and
motherboard to overheat and damage. You may install an auxiliary cooling FAN, if
necessary.
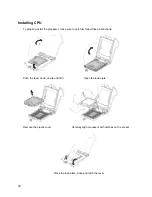
Installing HEAT SINK/FAN
The processors supported by the C23AX require the use of a heat sink/fan. Make sure to install it
properly, to avoid overheating. Recommended heat sink/fans require a screwdriver to attach it to a
metal bracket installed underneath (solder side) of the board.
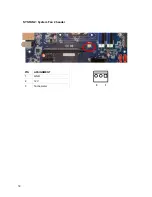
Installing FAN(s)
The CPUFAN header can control fans up to 0.75A, while the SYSFAN headers support fans of up to
1.5A, and can be configured for 3-pin or 4-pin operation. Connect the fan’s plug to CPUFAN and/or
SYSFAN, taking into consideration the polarity of connector.
3 pin FAN(s) will not be controllable when connected to the 4 pin CPUFAN header and will be on at
full speed. Connect the fan’s plug to the board observing the polarity of the connector.
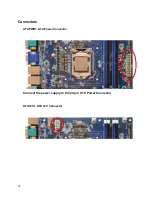
Installing Power Cables
The C23AX is powered through a standard 2x12 ATX connector, backwards compatible with 2x10
ATX connectors, and a 2x4 ATX12V. It is recommended to use a power supply with a 24 pin ATX
connector if a higher power PCI-E x16 video card is installed.
Summary of Contents for C236AX
Page 1: ... C236AX USER MANUAL Part Number C23AX ...
Page 12: ...12 Jumper Locations JRI1 JCMOS1 JRI2 JATATX1 ...
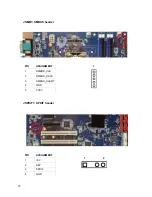
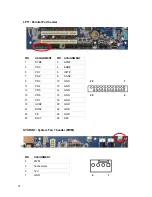
Page 32: ...32 SYSFAN2 System Fan 2 header PIN ASSIGNMENT 3 1 1 GND 2 12V 3 Tachometer ...
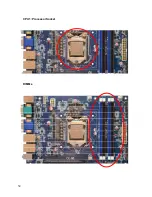
Page 34: ...34 CPU1 Processor Socket DIMMs ...
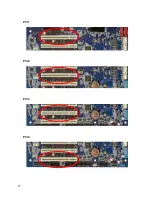
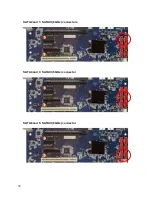
Page 36: ...36 NGFF1 M 2 Module Slot PCIE1 PCIE2 PCIE3 ...
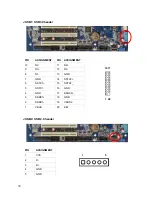
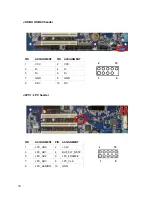
Page 37: ...37 PCI1 PCI2 PCI3 PCI4 ...
Page 81: ...MN C23AX 01 ...


