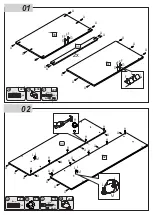


11
12
11
F
F
F
F
F
F
09
12
13
M
M
1ª
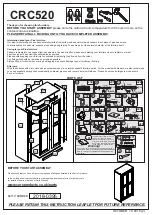
IMPORTANT NOTICE
Please avoid opening all drawers or doors simultaneously
as this could cause your furniture to fall forwards.
Where there is a risk of this occurring, especially in
environments with children or uneven floors
we recommend that this item of furniture is attached to your
wall using appropriate fixings (supplied).
X
x01
RED = PAINT
The RED sachet contains touch up
paint for your furniture. Please
retain for use should you require it
at any point in the future. Application
is best with a small paint brush which
can be cleaned in water after use.
Warning!
!
1ª
2ª
3ª
1ª
2ª
3ª
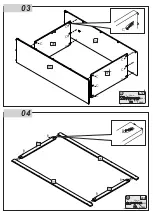
ADJUSTING HINGE
Ø3,0
16mm
F
x12
BLACK
P3
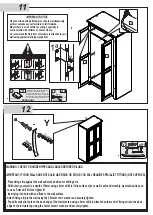
WARNING: CHECK FOR HIDDEN PIPES AND CABLES BEFORE DRILLING.
IMPORTANT: IF YOUR WALLS ARE NOT SOLID LIKE BRICK OR STONE, YOU WILL REQUIRE SPECIALIST FITTINGS (NOT SUPPLIED).
- Place fixing strip against the wall and mark position for drilling hole.
- Drill hole in your wall to a depth of 30mm using a 6mm drill bit. If the surface of your wall is soft and crumbly, we would advise you
to use a 5mm drill bit for a tighter fit.
- Insert plug into hole with end flush to the wall surface.
- Attach fixing strip to the wall using the 25mm screw + washer and securely tighten.
- Pre-drill small pilot hole on the back edge of the furniture top using a 2mm drill bit. Attach the other end of fixing strip to the back
edge of the furniture top using the 14mm screw + washer and securely tighten.
-
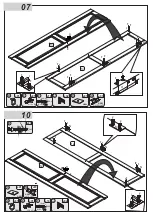
Y
Y
Y
x01
14mm
14mm
25mm