4. REVERSING THE DOORS (continued)
REVERSING THE DOOR SWING (continued)
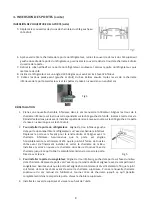
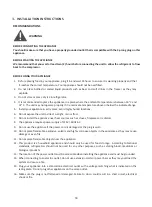
5. Move the hinge hole covers from left side to right side.
6. After removing the refrigerator door hinge, remove the screw cover from the upper left side of
refrigerator door frame, then insert the cover into the hinge hole on the right of door frame.
7. Remove the adhesive tape on refrigerator door, lift and take off the door then carefully set it aside.
8. Tilt the refrigerator on a 45-degree angle to have access to the bottom front.
9. Remove both left and right front feet from bottom. Then remove all screws on the bottom door hinge.
Set aside the screws and leveling legs in safe place.
Fig 4
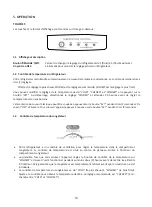
REINSTALLATION
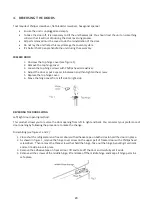
1.
Take a new bottom hinge from the user’s manual bag. Align the holes in the bottom hinge to the
corresponding holes on the left side of the cabinet. Insert and tighten the screws. Reinstall both front
feet. Install the short leveling leg on the left side and the long leveling leg on the right side.
2. To install the refrigerator door: Line up the left bottom hole of the refrigerator compartment door over
the bottom hinge pin. Move door forward to make sure it is straight and aligned with the bottom hinge.
Ensure the door is aligned horizontally and vertically so that the seal is closed on all sides before finally
installing and tightening the middle hinge. Install and tighten the middle hinge again and turn the hinge
axle until it completely enters the door body. Secure it with the screws.
Fig 5
3. To install freezer door: Line up the left bottom hole of the door over the center hinge’s middle pin. Move
door forward to make sure it is straight and aligned with the freezer compartment. Ensure the door is
aligned horizontally and vertically so that the seal is closed on all sides before finally tightening the top
hinge. Take the new upper hinge from the user’s manual bag, turn the hinge axle until it completely
enters the door body. Screw the top hinge.
4. Install the top cover and screw it to the top of unit.
21
Summary of Contents for ELLIPSE ERTM116W
Page 26: ... 3 ...


