background image

Page 8

Lamp replacement

Unplug the appliance from the mains supply.

To release the shade from the lamp housing, clip
the shade out from the thermostat housing
(Figure 11).

Unscrew the lamp anti-clockwise for removing and
clockwise for installing.

Replace the lamp with one of the same type (E14
SES 15W. Replacement lamps must not exceed
15W).

Replace the shade by clipping it back into the lamp
housing.

FIGURE 17

Maintenance and cleaning

It is recommended to clean and wipe out the fridge
regularly or after any spillage inside or outside the
appliance.

Use a teaspoonful of bicarbonate of soda diluted in
a pint of warm water. Wipe the internal surfaces
and shelving to remove food residues. Leave to dry
before reloading food.

Beware of the back wall inside the fridge as this
may be cold to the touch.

Wipe the outside casing from time to time in order
to remove dirt and dust from ventilation vents etc.

Keep water away from the thermostat housing.

Clean the door seals.

External cleaning

Keep the condensing tubes free from dust to
maintain optimum efficiency. Use a soft brush or
vacuum cleaner to remove the dust taking care not
to damage the pipes and wiring. Also remove dust
from the compressor motor housing which is
situated at the rear of the appliance casing.

The external casing can be cleaned with warm
soapy water. Do not use scouring powders which
can scratch the surface.

When not in use

If the appliance is to be emptied and turned off for
a long period it is advisable to:

O

Disconnect the unit from the mains supply.

O

Empty the fridge of food.

O

Clean and dry the interior.

O

Leave the door open – do not close.

IMPORTANT

The fridge must be turned off at the mains before maintaining or cleaning.

Defrosting the fridge

The refrigerator is designed for automatic
defrosting. Frost forms on the back wall, then melts
and drains via the outlet pipe in the back wall of
the fridge. It then evaporates into a container
positioned above the compressor motor.

The water collected in the container is evaporated
away by the heat generated by the compressor.

Periodically, using the cleaning tip, remove any
residue that has formed in and around the outlet
pipe (Figure 18).

FIGURE 18

DRAINAGE
HOLE

DRAINAGE
CHANNEL

CLEANING
TIP

Summary of Contents for CZ51037IFR

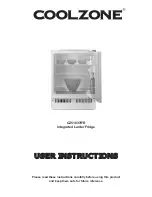
Page 1: ...CZ51037IFR Integrated Larder Fridge U US SE ER R I IN NS ST TR RU UC CT TI IO ON NS S Please read these instructions carefully before using this product and keep them safe for future reference...

Page 2: ...10 Specification 11 Safety measures 11 After sales service 11 O Do read these instructions thoroughly before using this appliance O Do install the appliance only in the vertical position O Do stand f...

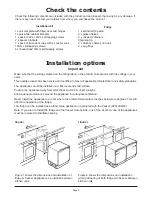
Page 3: ...tall the fridge and the freezer side by side one of the doors on one of the appliances must be reversed to facilitate opening FIGURE 1 FIGURE 2 Figure 1 shows the dimensions and installation of fridge...

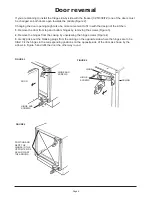
Page 4: ...moving the screws Figure 3 2 Remove the hinges from the casing by unscrewing the hinge screws Figure 4 3 Gently prise out the blanking plugs from the casing on the opposite side where the hinges are t...

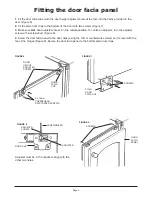
Page 5: ...the adjuster screw with a screwdriver Figure 8 4 Screw the door facia panel to the door clips using the 12mm countersunk screws so it is level with the top of the hinges Figure 9 Secure the door faci...

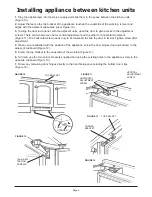
Page 6: ...orizontal screw needs only to be loosened to slide the door in its slot Tighten screw after adjustment 4 When you are satisfied with the position of the appliance screw the door hinges top and bottom...

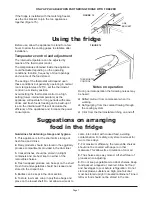
Page 7: ...esh food and drinks 2 Dairy products should be stored in the egg dairy produce compartments provided in the door liner 3 Cooked dishes should be stored in airtight containers and are best kept on eith...

Page 8: ...free from dust to maintain optimum efficiency Use a soft brush or vacuum cleaner to remove the dust taking care not to damage the pipes and wiring Also remove dust from the compressor motor housing w...

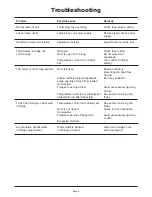
Page 9: ...thing is preventing the door from closing Airflow restricted around appliance Improve ventilation Large quantity of fresh food loaded Hot weather Frequent opening of door Avoid unnecessary opening of...

Page 10: ...accordance with the following code Figure 20 GREEN YELLOW EARTH E BLUE NEUTRAL N BROWN LIVE L This product must be earthed As the colours of the wires in the mains lead may not correspond with the co...

Page 11: ...off the mains lead and remove any door locks to ensure the appliance is beyond further use The appliance must be delivered to an authorised collection centre This appliance is guaranteed for a period...

Page 12: ...wise be caused by inappropriate waste handling of this product The symbol on the product or on the documents accompanying the product the Crossed Out Wheelie Bin symbol indicates that this appliance f...

Reviews: