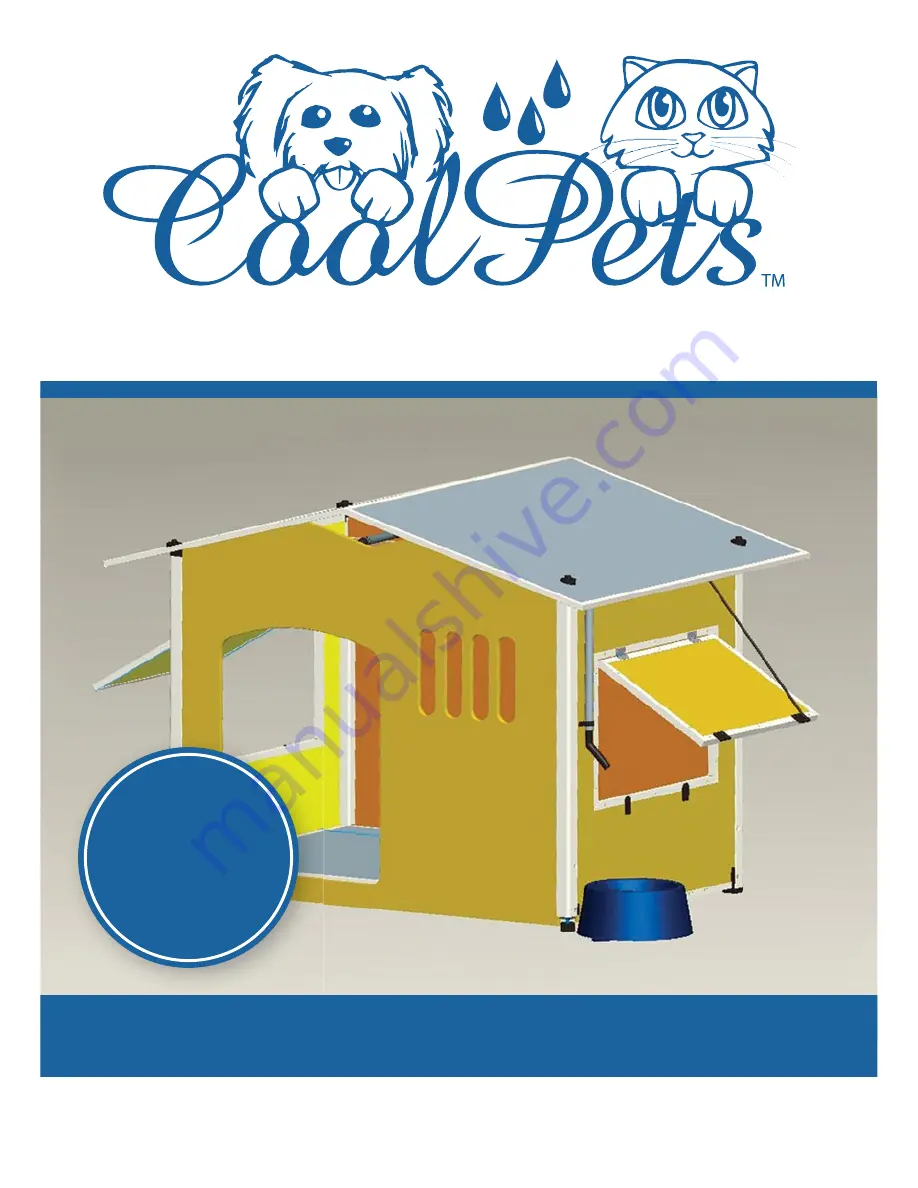
WaTER COOLEd dOG hOUSE
PLEaSE REad aLL INSTRUCTIONS CaREFULLY BEFORE aNd dURING aSSEMBLY.
RETaIN ThIS LEaFLET FOR FUTURE REFERENCE.
FEATURES
TOP &
BOTT
OM
COOLING
BLOCK
aSSEMBLY INSTRUCTIONS
Two side opening option shown.
Page 1: ...OLEd dOG hOUSE PLEaSE REad aLL INSTRUCTIONS CaREFULLY BEFORE aNd dURING aSSEMBLY RETaIN ThIS LEaFLET FOR FUTURE REFERENCE FEATURES TOP BOTTOM COOLING BLOCK aSSEMBLY INSTRUCTIONS Two side opening optio...
Page 2: ...length 1 Height Adjustor 1 Corner Post Screws small 8 Post Connectors 4 Roof Panels 2 Roof Caps 4 Roofing Bolts 4 Roof Centre Alloy Strip 1 Water Tube Lengths Standard Dog House 1500mm 620mm 250mm 2x8...
Page 3: ...3 PARTS LIST Feet Roof Bolts Hose Connector Height Adjustor Roof Centre Alloy Strip Post Connector Roof Caps Spout 90o Water Connector Support Blocks Corner Posts Water Bowl...
Page 4: ...new location It can however be dragged a short distance without coming apart Assembly is not complicated provided the instructions are followed however it is considerably easier if two people are pres...
Page 5: ...nderside and at the back of the dog house Refer Fig 3 5 Slide corner post assemblies into position The short post should be on the front right hand side of the Dog House Ensure the remaining posts are...
Page 6: ...e hole in the top of the back wall panel and attach to the water inlet on the top cooling block Using 90 connectors join the 620mm 705mm water tube to the top and bottom cooling block Refer Fig 9 13 P...
Page 7: ...this is easier Your assembled dog house should look like Fig 13 16 Finally affix dog bowl into position Refer Fig 14 You are now ready to test the water cooling feature WARNING Strong water pressure w...
Page 8: ...ly for CoolPets Pty Ltd Designed and imported by CoolPets Pty Ltd USA and Australia Patents Filed Visit our online store for more products and information www coolpets com au Assembly Instructions for...