Figure 11 — Handle Placement
CONE MOUNTING
Page 6
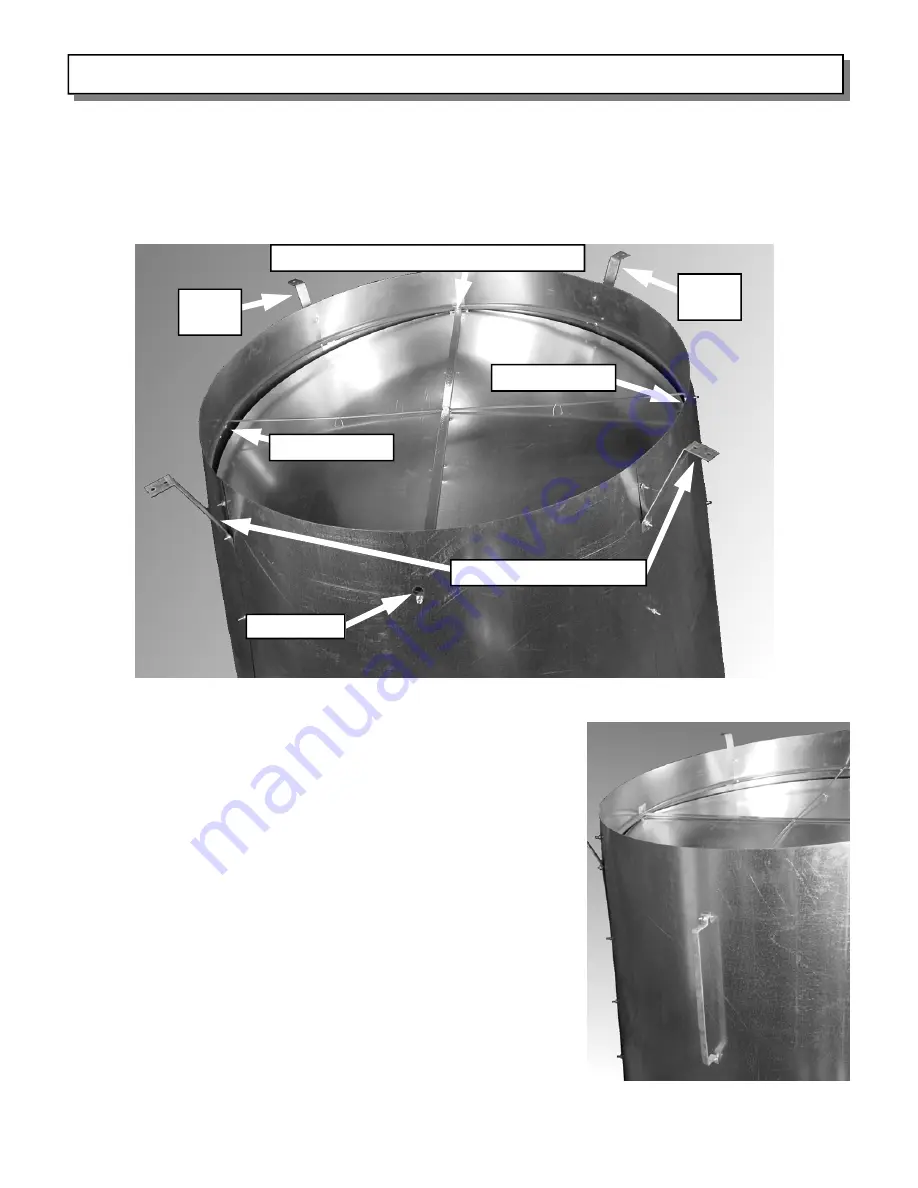
After the ring has been secured, the cone gussets will be placed on the cone. NOTE: there are two sets of two
gussets. The longer set will have a notch on the end with two holes. The longer set should be placed on either side
of the cone drain hole (cone bottom). The shorter set of gussets should be placed opposite the drain hole (cone
top). To attach a gusset, align the single hole in the gusset flange with the hole in the assembly ring and in the cone
at the 45° angles. Push a 1/4” X 1-1/4” bolt through the assembly ring, through the cone, and through the gusset.
Fasten the bolt with a 1/4” whiz-lock nut. Repeat this process for the three other gussets. Refer to Figure 10 for
details. Caulk around the damper door ring to prevent light and wind blown rain water leakage.
To aid in cone mounting, a set of handles is included with each order of
fans. To mount the handle, place one end on the Handle Mounting Studs
(described on Page 5) on one of the side sheets, and place the other end
on the 3 or 6 o’clock ring mounting bolt. Repeat this process on the
opposite side for the other handle. Figure 11 shows the handle placement.
To mount the cone assembly, pick the assembly up by the handles and
place the top of the smaller end over the fan panel orifice. Make sure that
the drain hole in the cone is at the bottom. Fasten the top cone gussets to
the fan panel using 1/4” X 1-1/4” bolts and 1/4” flat washers. Next, slide
the rest of the cone over the orifice. This process may be aided by gently
tapping the sides and bottom of the cone with a rubber mallet or dead-blow
hammer from the inside of the building to allow it to slip over the orifice.
Once the cone is in place, fasten the bottom cone gussets to the fan panel
using 1/4” X 1-1/4” bolts and 1/4” flat washers.
Once the cone assembly is secured in place, cut and remove both the
rubber band holding the cable in place, and the wires holding the doors in
place. Also, complete the cone assembly by placing the 1 or 2 remaining
bolts in the overlapping cone panel holes and fasten with 1/4” whiz-lock
nuts. At this time, tighten all 1/4” hardware securely, including the cone
bolts nearest the fan panel.
Figure 10 — Damper Door Ring Assembled in Cone
Door-Restraining Cable End (Top of Cone)
3-O’Clock Hole
9-O’Clock Hole
Long (Notched) Gussets
Drain Hole
Short
Gusset
Short
Gusset


