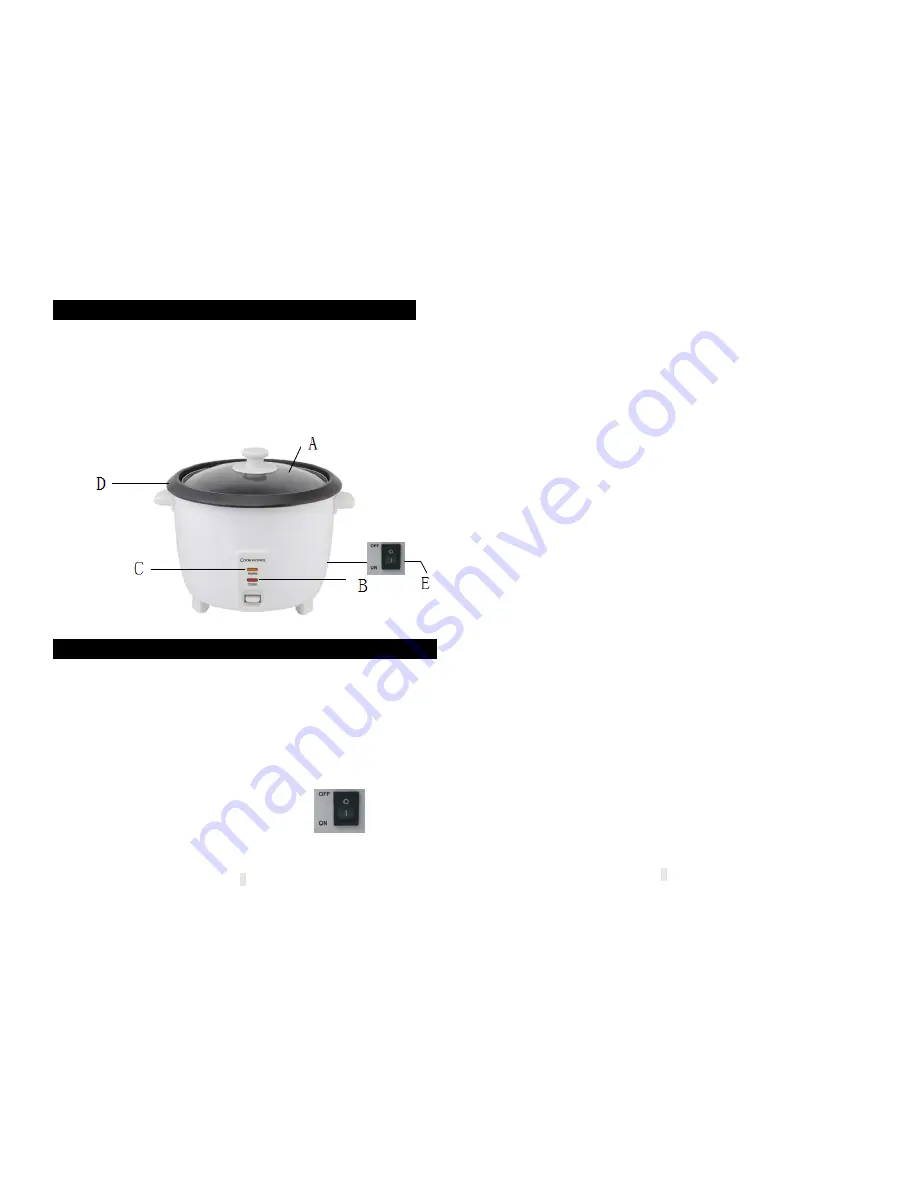
2.LOCATION OF CONTROLS
·
Toughened Glass Lid(A)
·
Cook Indicator Light(B)
·
Keep Warm Indicator Light(C)
·
Non-Stick Removable Easy to Clean Rice Bowl(D)
·
On/Off Switch(E)
3.OPERATING INSTRUCTIONS
Please read these instructions carefully before using the appliance.
CAUTIONS TO NOTE BEFORE USING RICE COOKER:
1. Only use this product with the correct AC voltage outlet. (For correct
rated voltage, see box and label at the bottom of rice cooker.)
2. Be sure to press the power switch Off “O” and unplug AC cord when
rice bowl (D) is not in cooker, or when cooker is not being used.
Remember the “KEEP WARM” feature operates whenever the cord
is plugged in and the power switch is On “I”.
3. Place the rice bowl inside the cooker before operating. Turn the rice
bowl
2
gently to right and left to ensure it is fully seated inside the cooker.
4. If the switch button is difficult to press to the “cook” position, do not
try to force it down. This difficulty usually occurs when the rice bowl
is not fully inserted into the cooker or when cooking has just finished.
5. Place the lid onto your rice bowl while cooking; keep the lid in place
after serving to prevent your rice from drying out or discolouring.
6. Keep bottom of rice bowl and surface of heater plate free of foreign
matter to prevent operating malfunctions.
HOW TO USE
Note: A scale for water level, based on the number of cups of rice used,
is provided on the side of the rice bowl for the timesaving addition of
water direct from the tap or large jug. This will require only use of the
supplied cup for the rice measurement, although for 2 cups and below it
is recommended to use the cup for the water as better accuracy will be
obtained.
1. Using the measuring cup provided in the package, measure and
add rice to the rice bowl.
2. Add the correct amount to water to the rice inside the rice bowl
according to the following table, using either the supplied cup or
filling to the scale marked on the rice bowl. The exact amount of
water can be varied depending on the result required.
Cups of Raw Rice
Water
1 cup
1 – 1 1/4 cups
2 cups
2 – 2 1/2 cups
4 cups
4 – 5 cups
6 cups
6 – 7 1/2 cups
3. Place rice bowl into cooker. Turn rice bowl gently to right and left to
ensure it is fully seated inside the cooker. Fit the lid (A) securely.
4. Plug in power cord. Do not plug in until ready to cook otherwise rice
may be spoiled. If the rice bowl is not in the cooker, cooking will not
begin.
5. Press the power switch next to the power cord to the “
On”
position
(I).
Press the “COOK” switch on the front of the cooker. The indicator
illuminates when cooking has started.
3
Summary of Contents for RC-8A
Page 5: ......


