background image


Before first use 


Remove all packaging and dispose of correctly. 


Clean all the accessories with hot, soapy water and dry thoroughly. 


Place on a flat level surface.  

Instructions for use 
 

1.


Place the unit on a flat level surface. 

2.


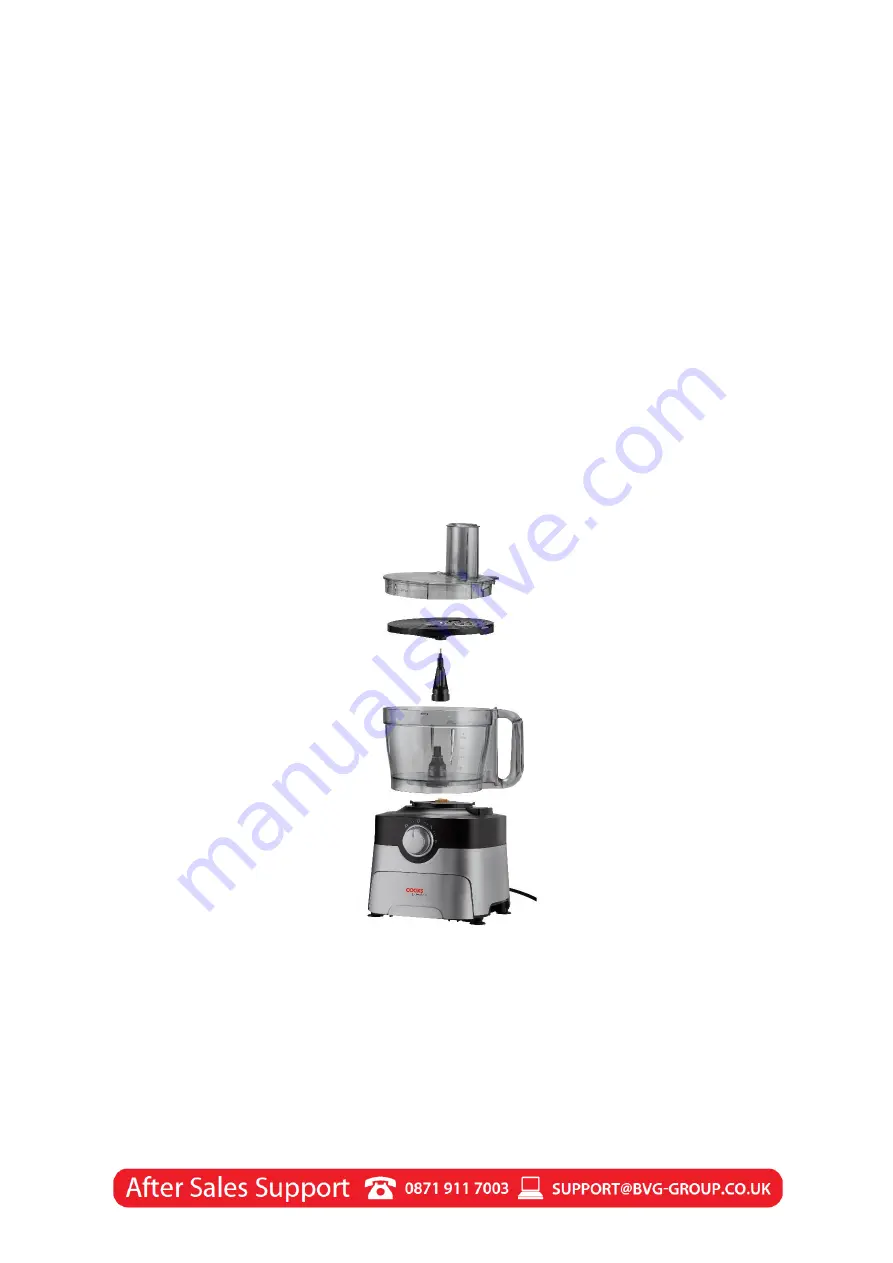
Place the mixing bowl on to the unit and turn it gently until it locks into 
place. 

3.


Insert the drive shaft. 

4.


Select the attachment you wish to use, this could be the chopping 
blade which may be positioned directly over the drive shaft or one of 
the blades which need to be secured to the blade adaptor disk before 
positioning the drive shaft. Ensure this is fitted securely.  

5.


Attach the lid to the bowl and lock into place.  


6.


Place the plug into the mains power supply and switch on at the 
socket. 

7.


Select a speed using the control dial. 

8.


Feed your ingredients into the bowl using the feeding tube, never use 
your fingers to push the food into the tube, always use the food pusher 
without exerting too much pressure. 

9.


Once you have completed the chosen action, turn off at the control 
dial and switch off at the mains power supply socket. 

Summary of Contents for G3483

Page 1: ...l 0871 911 7003 Email w support bvg group co uk www clifford james co uk Product Code G3483 G3484 G3485 Thank you for purchasing this product which has been made to demanding high quality standards an...

Page 2: ...satisfied with your purchase so this Cooks Professional product is backed by our full 12 month manufacturer s guarantee and an outstanding after sales service through our dedicated Helpline Register...

Page 3: ...fore cleaning unplug the appliance from the mains power supply Always avoid contact with moving parts Do not operate any appliance with a damaged cord or plug or if the appliance shows any indication...

Page 4: ...use time 1 min Blender KB maximum continuous use time 1 min Cleaning and maintenance Always unplug the food processor from the mains power supply prior to any cleaning and maintenance All non electric...

Page 5: ...blade 3 Blender lid with access hole 11 Spatula 4 Blender jug 12 Blade adaptor disc 5 Thick slicing blade 13 Coarse grating blade 6 French fry blade 14 Drive shaft 7 Fine grating blade 15 Control dia...

Page 6: ...directly over the drive shaft or one of the blades which need to be secured to the blade adaptor disk before positioning the drive shaft Ensure this is fitted securely 5 Attach the lid to the bowl an...

Page 7: ...cure the lid 5 Turn the speed control dial to desired speed 6 While blending you can open the access hole cap and add water or additional ingredients 7 Once you have completed blending turn off at the...

Page 8: ...s are coloured as follows Brown Live Blue Neutral Yellow Green Earth If the appliance is fitted with a 2 core cable it is double insulated and will not have the yellow and green earth wire IT IS ESSEN...

Page 9: ...rial or workmanship during this period please return it to the place of purchase Normal wear and tear is not covered under the guarantee Any guarantee is invalid if the product has been misused or sub...

Reviews: