


(
Jack on bottom of unit
)
(
Jack on bottom of unit
)
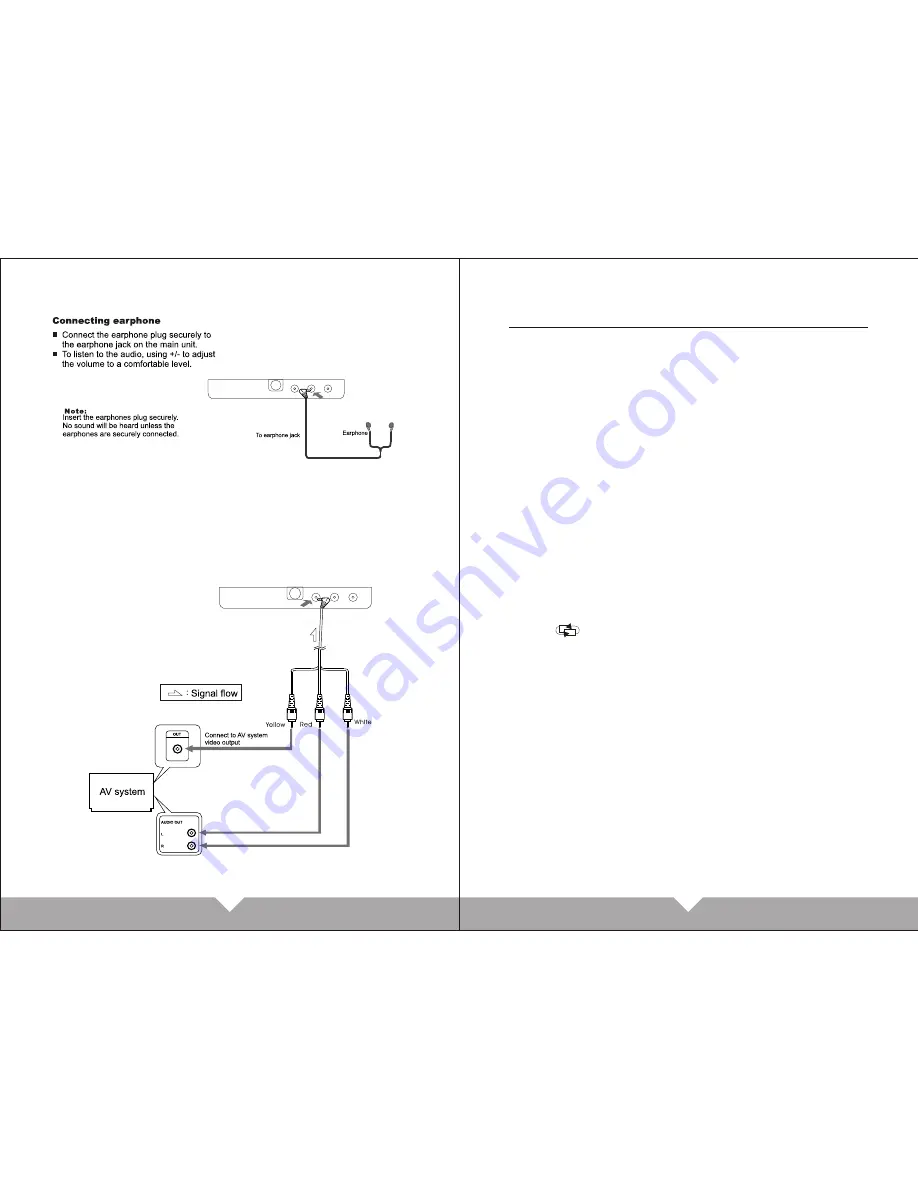
AV input connection
Please connect the AV signal inputaccording to the picture
showing. After connection, then setting the unit in AV mode, then
will display the clearly picture.
1. Picture setting
1.1 Bright
1.2 Contrast
1.3 Color
Press the “AV/TV ” button on unit ,or “CH+ , CH-“ on remote
control to choose adjusted item. Then press “CH+ , CH-“
button on unit or “V+ , V-“ on remote control to adjust the
picture effect.
2. Audio setting
Volume adjustment
Press “vol+””vol-“on unit or “v+ , v-“ on remote control to
adjust the volume.
3. Function setting
3.1
3.2 zoom
3.3 language
3.4 Input
Press “CH+” “ CH-” on the unit or remote control to choose
the different function that you need to switch. Then Press
“VOL+,VOL-“ button on unit or “V+” “ V- ” to adjust that you
need.
4. System setting
1). S-roloc
Press “v+” “ v- ” on the unit or remote control to choose the
auto ,pal ,nest,secam system that you need to adjusting.
Turn on the unit, then press “AV/TV” to choose the display
mode.
5. Operating Instructions
If connect to the VCD or DVD correctly, then will show picture
normally. If not connect to the VCD, DVD or no signal, then
will be show the character of AV on the top left corner, and
also show “no signal”
AV MODE
5. Clock
5.1 Sleep
5.2 Time
5.3 Off-time
5.4 On-time
03
04


