

DAILY USE
1. Turn On the Trilogy by pressing the Power Button.
2. When both devices are charged, you’re ready to
connect. Locate the Control Bionics application on
the desktop and open the NeuroNode Controller
Application.
3. Shake-to-Wake can be used to bring the
NeuroNode
3
out of standby mode once it’s
removed from the charger. Gently shake the
NeuroNode
3
and it will transition out of standby;
this will be indicated by a series of lights shown on
the NeuroNode
3
signal indicator.
4. From the NeuroNode Controller Application, select
“Connect to NeuroNode.” Once connected you will
see the Graph Screen.
5. When you’re ready to end the session, go to the
NeuroNode Controller Application and select
the Main Menu. From the Main Menu, select the
Standby Icon which will put the NeuroNode
3
into Standby as indicated by a solid light on the
NeuroNode
3
signal indicator. Place the NeuroNode
3
on the charger until you’re ready to connect again.
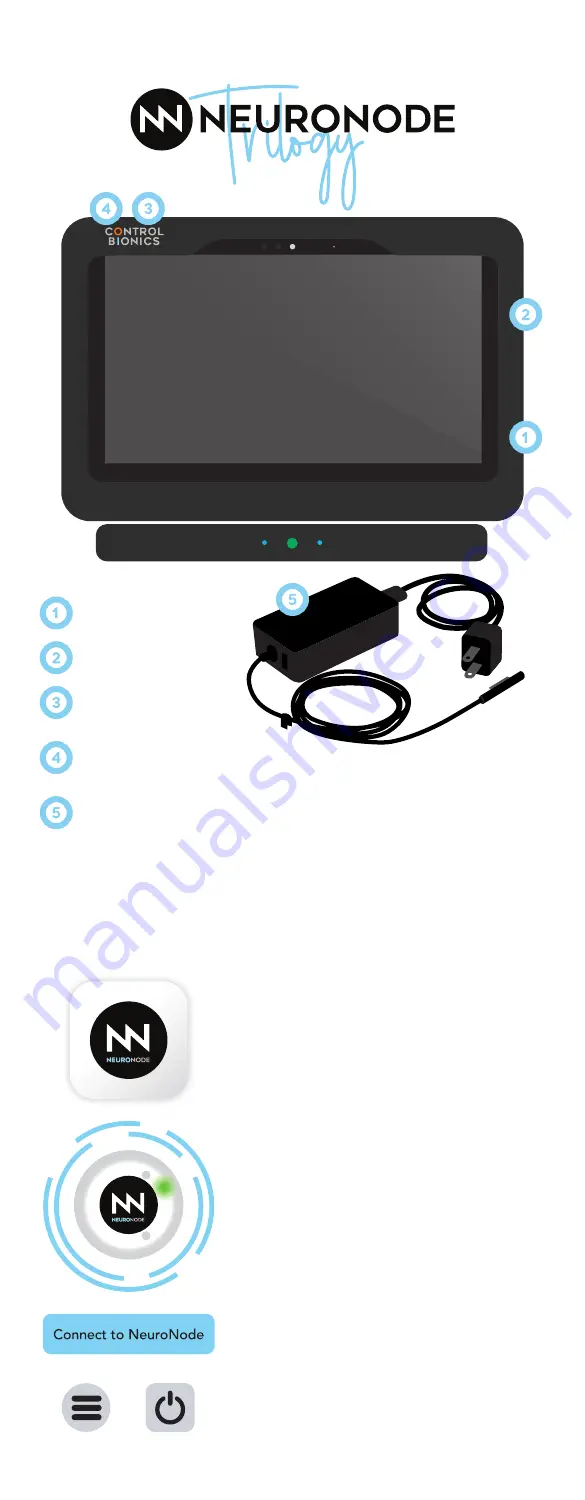
M A I N M E N U
S TA N D B Y
CHARGING
PORT
USB-A
POWER
BUTTON
VOLUME
CONTROL
POWER
SUPPLY
QUICK START GUIDE
Charging your
TRILOGY:
1. On the right side of the Trilogy, beneath the USB
port, you will see a magnetic port to connect the
charging cable.
2. When the charging cable is correctly placed,
you will see a white light indicating the device is
charging.


