background image

24

25

C

ontour

®

n

ext

 GEN blood glucose monitoring system

TESTING

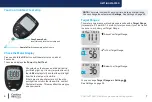
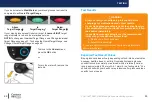
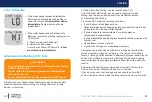
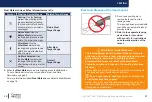
LO or HI Results

10 45

4 26 20

l0

•  If the meter beeps twice and displays the 

LO screen, your blood glucose reading is 

under 0.6 mmol/L. Follow medical advice 

immediately. Contact your health care 

professional.

10 45

4 26 20

hi

•  If the meter beeps once and displays the  

HI screen, your blood glucose reading is over 

33.3 mmol/L:

1. Wash and dry your hands well.

2. Retest with a new strip.

If results are still over 33.3 mmol/L, follow 

medical advice immediately

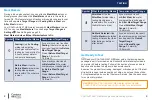
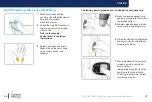
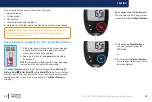
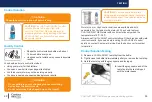
Alternative Site Testing (AST): Palm

Always wash your hands with antibacterial soap and water and dry 

them well before and after testing or handling the meter, lancing 

device, or test strips.

 WARNING

•  Ask your health care professional if Alternative Site Testing 

(AST) is right for you.

•  Do not calibrate a continuous glucose monitoring device 

from an AST result.

•  Do not calculate an insulin dose based on an AST result.

For Alternative Site Testing, use the clear endcap. Your 

C

ontour

 n

ext

 GEN meter can be used for fingertip or palm  

testing. See the lancing device insert for detailed instructions  

on Alternative Site Testing.

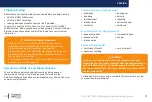
Do not use AST under the following conditions:

•  If you think your blood glucose is low.

•  When blood glucose is changing rapidly, such as after a meal, after 

an insulin dose, or during or after exercise.

•  If you are unable to feel symptoms of low blood glucose 

(hypoglycemic unawareness).

•  If you get alternative site blood glucose results that do not agree with 

how you feel.

•  During illness or times of stress.

•  If you will be driving a car or operating machinery.
Alternative site results may be different from fingertip results when 

glucose levels are changing rapidly (e.g., after a meal, after taking 

insulin, or during or after exercise). Additionally, glucose levels may not 

rise as high or fall as low as levels in the fingertip. As such, fingertip 

results may identify hypoglycemic levels sooner than alternative site 

results.
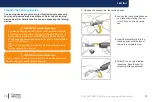
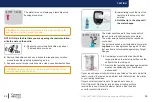
Alternative Site Testing is recommended only when it is more than 

2 hours after a meal, diabetes medication, or exercise.

If you do not have a clear lancing device endcap to perform AST, 

contact Customer Service. See the back cover for contact information.

Summary of Contents for GEN

Page 1: ...45 4 26 20 52 USER GUIDE Uses only Contour Next blood glucose test strips Works with the Contour Diabetes app available for download from the App StoreSM or on Google PlayTM Blood Glucose Monitoring System ...

Page 2: ...ofessionals in monitoring the effectiveness of the patient s diabetes control The Contour Next GEN blood glucose monitoring system is intended for self testing by persons with diabetes and health care professionals for use on a single patient in venous blood and fresh capillary whole blood drawn from the fingertip or palm The Contour Next GEN blood glucose monitoring system is intended for self te...

Page 3: ...r missing damaged or broken parts If the test strip bottle is open inside a new box of strips do not use those strips For replacement parts contact Customer Service See the back cover for contact information Your Contour Next GEN meter works ONLY with Contour Next test strips and Contour Next control solution Always keep the Contour Next test strips in their original bottle Tightly close the bottl...

Page 4: ...on The Contour Next GEN blood glucose monitoring system has a measuring range of 0 6 mmol L to 33 3 mmol L For results under 0 6 mmol L or over 33 3 mmol L If your blood glucose reading is under 0 6 mmol L the meter displays the LO screen Contact your health care professional immediately If your blood glucose reading is over 33 3 mmol L the meter displays the HI screen Wash your hands or the test ...

Page 5: ... mark All other trademarks are properties of their respective owners and are used solely for informative purposes No relationship or endorsement should be inferred or implied Table of Contents INTENDED USE i IMPORTANT SAFETY INFORMATION ii Your Meter Features vi GETTING STARTED Your Contour Next GEN meter 3 Check the Meter Display 6 Target Ranges 7 Meal Markers 8 TESTING Get Ready to Test 9 Sympto...

Page 6: ... allow you to scroll through the options You can hold the or button to scroll continuously through a list Press the OK button to accept a selection To exit from the Logbook or Averages and return to the Home screen press the OK button NOTE When a symbol is blinking you can select it The Contour Diabetes app for Your Contour Next GEN meter 51 Download the Contour Diabetes app 52 Pairing Mode 52 HEL...

Page 7: ...est result is below 0 6 mmol L Your Logbook Meter Settings Symbol What the Symbol Means Fasting marker Before Meal marker After Meal marker No marker selected A Target Range or Target Range setting smartLIGHTTM target range indicator setting Meter is ready to test Add more blood to same test strip Control solution test result Bluetooth symbol indicates the Bluetooth wireless setting is On the mete...

Page 8: ...t from the test strip port is visible If there are missing characters or if the strip port light is a colour other than white contact Customer Service This may affect the way you see your results NOTE Your meter comes with a pre set time date and target range You can change these features in Settings See Settings on page 38 Target Ranges The meter compares your blood glucose results with a Target ...

Page 9: ...against the Before Meal Target Range Pre set Before Meal Target Range 3 9 mmol L 7 2 mmol L Symbol What the Symbol Means Comparison Target Range After Meal Use the After Meal marker when testing blood glucose levels within 2 hours after the first bite of a meal If you mark your result as After Meal the meter compares the result against the After Meal Target Range Pre set After Meal Target Range 3 ...

Page 10: ...iseases even after you have performed cleaning and disinfection see page 55 Always wash your hands with antibacterial soap and water and dry them well before and after testing or handling the meter lancing device or test strips For complete instructions on cleaning and disinfecting your meter and lancing device see page 55 Low blood glucose Hypoglycemia shakiness sweating fast heartbeat blurred vi...

Page 11: ...r at health care provision sites and should never be shared with anyone else even a family member due to risk of infection Do not reuse lancets Used lancets are not sterile Use a new lancet each time you test WARNING Potential Biohazard Always dispose of used test strips and lancets as medical waste or as advised by your health care professional 1 Remove the endcap from the lancing device 2 Loosen...

Page 12: ...est materials 3 Hold the test strip with the grey square end facing toward the meter 4 Insert the grey square end firmly into the test strip port until the meter beeps 10 45 4 26 20 The screen displays the blinking blood drop indicating it is ready to test a blood drop NOTE After you insert the test strip apply blood to the test strip within 3 minutes or the meter turns off Remove the test strip a...

Page 13: ...inst the skin or place the blood on top of the test strip These actions could lead to inaccurate results or errors 5 Hold the tip of the test strip in the blood drop until the meter beeps NOTE If the Meal Marker feature is On do not remove the test strip until you select a Meal Marker Second Chance sampling Apply More Blood 00 60 1 If the meter beeps twice and the screen displays a blinking blood ...

Page 14: ...on the time of day and the meal period breakfast lunch dinner or overnight For more information about Meal Markers see page 8 Example 65 Do not press the OK button or remove the test strip yet You can select the blinking marker or choose a different Meal Marker To turn Meal Markers On see Set Meal Markers on page 44 65 1 If the blinking Meal Marker is the one you want press the OK button or 2 To s...

Page 15: ... the OK button h 2 3 To scroll from 2 hours to 0 5 hours by half hour intervals press the or button 4 To set the Reminder press the OK button 10 45 4 26 20 61 The screen returns to the Before Meal reading The Reminder symbol displays to confirm the Reminder is set Blood glucose test is complete smartLIGHT target range indicator When your blood glucose test is complete the meter displays your resul...

Page 16: ...ood glucose values will vary depending on food intake medication dosages health stress or activity Nondiabetic plasma glucose concentrations are normally maintained within a relatively narrow range approximately 3 9 mmol L 6 1 mmol L in a fasting state 4 You should consult with your health care professional for glucose values specific to your needs WARNING Always consult your health care professio...

Page 17: ...N meter can be used for fingertip or palm testing See the lancing device insert for detailed instructions on Alternative Site Testing Do not use AST under the following conditions If you think your blood glucose is low When blood glucose is changing rapidly such as after a meal after an insulin dose or during or after exercise If you are unable to feel symptoms of low blood glucose hypoglycemic un...

Page 18: ...te from a fleshy area on the palm Avoid veins moles bones and tendons The lancing device graphics are for illustration purposes only 4 Press the lancing device firmly against puncture site then press the release button 5 Maintain steady pressure until a small round blood drop forms 6 Lift the lancing device straight up and away from the skin without smearing the blood 7 Test immediately after you ...

Page 19: ...n E 1 error message remove the strip and start with a new strip If the Meal Marker feature is On the meter suggests a Fasting Before Meal After Meal or No Mark marker for your blood glucose result This is based on the time of day and the meal period fasting breakfast lunch dinner or overnight The Meal Marker is blinking CAUTION Do not press the test strip tip against the skin or place the blood on...

Page 20: ... For more information about Meal Markers see Select a Meal Marker on page 18 Eject and Dispose of the Used Lancet 1 Do not use your fingers to remove the lancet from the lancing device The lancing device provided with your kit has an automatic lancet ejection feature 2 Refer to the separate lancing device insert if provided with your kit for instructions on automatic ejection of the lancet WARNING...

Page 21: ... monitoring device from the control result Do not calculate a bolus based on a control result CAUTION Do not use expired materials Using expired material can cause inaccurate results Always check the expiration dates on your test materials Normal Low or High control solutions are available and sold separately if not included in the meter kit You should test your Contour Next GEN meter with control...

Page 22: ...solution 9 Hold the tip in the drop until the meter beeps 10 45 4 26 20 72 The meter counts down for 5 seconds before the control test result displays on the meter The meter automatically marks the result as a control test Control test results are not included in your meter Logbook or in blood glucose Averages Control test results are not evaluated against any Target Ranges 10 Compare your control...

Page 23: ...e Logbook press the button 10 45 4 26 20 63 4 To scroll through your test results press the or button To scroll faster press and hold the or button end If you scroll past the oldest entry the meter displays the End screen If you see a LO or HI test result go to LO or HI Results on page 24 for more information 5 To go back to the beginning to review entries press the OK button to go to the Home scr...

Page 24: ...press the OK button to enter Settings 4 Press the or button to navigate to the setting you want to change 5 Press the OK button when the setting you want to change is blinking 10 45 4 26 20 6 To exit from the Settings menu and return to the Home screen press the or button until the Settings symbol is blinking 7 Press the OK button NOTE If you are in a setting such as Date and you need to exit pres...

Page 25: ...M or PM as needed then press the OK button The meter returns to the Home screen Change the Date 1 Press and hold the OK button until the meter turns on The Home screen has 2 options Logbook and Settings 10 45 4 26 20 2 To highlight the Settings symbol press the button 3 When the Settings symbol is blinking press the OK button to enter Settings 4 Press the button until the current date is blinking ...

Page 26: ... button 3 When the Settings symbol is blinking press the OK button to enter Settings 4 Press the button repeatedly until the Sound symbol is blinking on the Settings screen then press the OK button 0n or Off Sound Symbol Your meter comes with the Sound turned On Certain error messages override any Sound setting When Sound is On One long beep indicates a confirmation Two beeps indicate an error or ...

Page 27: ...OTE When the Meal Marker feature is On you can select a Meal Marker during a blood glucose test Set Reminder Feature When Meal Markers are On you can set a Reminder to test your blood glucose after you mark a reading as Before Meal If Meal Markers are Off see Set Meal Markers on page 44 1 Press and hold the OK button until the meter turns on The Home screen has 2 options Logbook and Settings 10 45...

Page 28: ...d press the OK button WARNING Discuss your Target Range settings with your health care professional 39 1 00 100 7 To change the blinking High end of the Overall Target Range press the or button 8 To set the High end press the OK button The meter returns to the Home screen Change Individual Target Ranges When the Meal Marker feature is On you have 2 Target Ranges on your meter a Before Meal Target ...

Page 29: ...eading marked as Fasting Change After Meal Target Range 39 1 00 100 9 To change the blinking High end of the After Meal Target Range press the or button 10 To set the High end press the OK button The meter returns to the Home screen Set smartLIGHT target range indicator Your meter comes with the smartLIGHT feature turned On When the smartLIGHT target range indicator is On the test strip port displ...

Page 30: ...reen The Contour Diabetes app for Your Contour Next GEN meter Your Contour Next GEN meter is designed to work with the Contour Diabetes app and your compatible smartphone or tablet You can do the following things with your Contour Diabetes app Add Notes after testing that help to explain your results List meals containing carbs Note changes in medication Add photos of your meal Log an increase or ...

Page 31: ... button until the meter turns on The Home screen displays CAUTION There is a remote possibility that a computer specialist could listen in on your wireless communications when you pair the blood glucose meter and would then be able to read your blood glucose readings from your meter If you believe this is a risk pair your blood glucose meter far away from other people After you pair your device yo...

Page 32: ...amage by a disinfectant that is effective against common microbial and viral pathogens You should call Customer Service for assistance if your device malfunctions for any reason or if you notice any changes in the external meter case or display Cleaning and Disinfection Clean and disinfect your Contour Next GEN meter once a week Use only Clorox Healthcare Bleach Germicidal Wipes containing 0 55 so...

Page 33: ... allow cleaning solution to run into the meter through open areas such as around the buttons or the meter s test strip or USB port 1 Before disinfecting clean the meter as described in Cleaning Your Meter 2 Using a new germicidal wipe carefully wipe all outer surfaces of your meter until wet NOTE For proper disinfection you must keep all meter surfaces wet for 60 seconds Buttons Test Strip Port 3 ...

Page 34: ...s symbol you can only test about 10 more times at a frequency of 3 tests per day before the batteries are dead CAUTION Do not attempt to perform a blood glucose test when the Contour Next GEN meter is connected to a computer CAUTION Use only approved equipment from the manufacturer or certified body such as UL CSA TUV or CE 10 45 4 26 20 The meter operates normally displaying the Low Batteries sym...

Page 35: ...hildren Many types of batteries are poisonous If swallowed immediately contact your poison control center Error Code What It Means What to Do Strip Errors E 1 Too Little Blood Remove the strip Repeat the test with a new strip E 2 Used Test Strip Remove the strip Repeat the test with a new strip E 3 Strip Upside Down Remove the strip and insert it correctly E 4 Wrong Strip Inserted Remove the strip...

Page 36: ...ice See the back cover for contact information Two 3 volt CR2032 or DL2032 coin cell batteries Contour Next GEN user guide Contour Next GEN quick reference guide Contour Next test strips Contour Next normal control solution Contour Next low control solution Contour Next high control solution Lancing device as in your kit if provided Lancets as in your kit if provided Technical Information Accuracy...

Page 37: ...rement procedure at glucose concentrations 5 55 mmol L or within 15 at glucose concentrations 5 55 mmol L User Accuracy A study evaluating glucose values from fingertip capillary blood samples obtained by 324 lay persons showed the following results 100 within 0 83 mmol L of the medical laboratory values at glucose concentrations 5 55 mmol L and 98 60 within 15 of the medical laboratory glucose co...

Page 38: ... 2 23 0 06 0 058 0 068 2 8 4 36 0 07 0 067 0 079 1 7 7 63 0 11 0 102 0 121 1 5 11 80 0 18 0 170 0 202 1 6 18 94 0 24 0 223 0 264 1 3 Intermediate measurement precision which includes variability across multiple days was evaluated using control solutions at 3 glucose levels With each control solution each of 3 lots of Contour Next test strips was tested once on each of 10 instruments on 10 separate...

Page 39: ...Next GEN meter complies with the electromagnetic requirements specified in ISO 15197 2013 Electromagnetic emissions are low and unlikely to interfere with other nearby electronic equipment nor are emissions from nearby electronic equipment likely to interfere with the Contour Next GEN meter The Contour Next GEN meter meets the requirements of IEC 61000 4 2 for immunity to electrostatic discharge A...

Page 40: ... After the reaction time the glucose concentration in the sample is displayed No calculation by the user is required Comparison Options The Contour Next GEN system is designed for use with capillary and venous whole blood Comparison with a laboratory method must be done simultaneously with aliquots of the same sample NOTE Glucose concentrations drop rapidly due to glycolysis approximately 5 7 per ...

Page 41: ...abetes Care reserves the right to make changes in the design of this instrument without obligation to incorporate such changes into previously manufactured instruments 4 Ascensia Diabetes Care has no knowledge of the performance of the Contour Next GEN blood glucose meter when used with any test strips other than Contour Next test strips and therefore does not warrant the performance of the Contou...

Page 42: ...de 52 Reminder Feature 20 45 Second Chance sampling vi 17 28 Settings 20 38 39 41 42 44 45 49 50 Bluetooth wireless functionality 50 Date 41 Meal Markers 44 Reminder Feature 20 45 smartLIGHT target range indicator 49 Sound 42 Time 39 smartLIGHT target range indicator 21 49 Specifications 68 Symptoms of High or Low Blood Glucose 10 Target Ranges Before Meal After Meal Overall 7 38 46 47 48 Target S...

Page 43: ...e the Second Chance sampling logo Smartcolour and Smartlight are trademarks and or registered trademarks of Ascensia Diabetes Care Holdings AG TM see www ascensiadiabetes ca tm mc Apple and the Apple logo are trademarks of Apple Inc registered in the U S and other countries App Store is a service mark of Apple Inc The Bluetooth word mark and logos are registered trademarks owned by Bluetooth SIG I...

Reviews: