All water and electrical connections shall be made by a competent person. © Continental Underfloor 2018. All rights reserved.
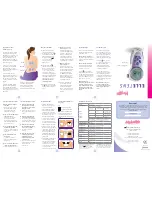
HeatMax™
RF dial room thermostat
c/w NSB
34041
Installation & User Guide
Description / Overview
The HeatMax™ RF dial thermostat is an
electronic thermostat designed for use
with warm water underfloor heating
systems.
��
Comfort operating mode (Day time
use)
��
Reduced operating mode (Night
setback)
��
Automatic
Night
setback (in
conjunction with HeatMax™ RF night
set back timer module)
��
Maximum
and
minimum
temperature settings limited by
movable pins
How it works
The HeatMax™ RF dial thermostat is a
state of the art, silent thermostat with a
clear readable dial that lets you control the
way you like your home heated.
If the room air temperature is below the
current set temperature, it “calls for
heat”,and this output is sent to the UFH
wiring centre, which controls the pump
and the boiler.
Similarly, once the room has been heated
and the set temperature is reached, this
output ends and the corresponding
heating zone valve will close. If all
thermostats on the system are satisfied,
both the pump and boiler will shut down.
An LED indicator tells you the thermostats
status.
Installation
Tools required
1.
Phillips Screwdriver (for cover removal
or replacement)
2.
Slotted Screwdriver with a 2.5mm or
3.0mm blade (for receiver terminal
connections)
3.
Screwdriver to suit mounting screws
(not supplied)
Step by step guide
1.
Remove battery protection strips
2.
Configure thermostat with receiver
(see section following)
3.
Note position of dial before removing.
Gently lever off the dial of the
thermostat from its shaft
4.
Using the Phillips screwdriver undo
the screw located in the central hole
5.
The two parts of the thermostat can
now be separated
6.
Mount the backing plate on the wall at
your selected thermostat position
7.
Replace the face of the thermostat on
to the mounting plate and secure with
the screw
8.
Replace the dial on to the shaft in the
original position and press gently to
the face of the thermostat.
NOTE:
Ensure that the thermostat
✓
Is not higher than 1.5m from
the floor
✓
Is at least 200mm away from
the edge of a door
✓
Not in direct sunlight
✓
Not next to a window
✓
Not over a heat source
Set-up / Commissioning
Radio Configuration Mode
Install and wire in the receiver, set the RF
Initiation mode. (You have 30 seconds to
execute the next step)
To assign a HeatMax™ RF dial thermostat
to the receiver put the switch from the
OFF position to the
Comfort position.
The HeatMax™ RF dial thermostat will send
a configuration address by radio signal to
the receiver.
Verify that radio signals are correctly
received. On the receiver the Green LED will
blink at each radio signal received from the
thermostat.
When the thermostat is configured. Set
the receiver to Auto mode.
Calibration of thermostat:
o
This is only to be carried out if
recalibration
is
required.
The
thermostats
are
set
during
manufacturing.
o
Remove the dial and divide parts (2) &
(3)
o
Put the bottom part (2) back on the
shaft
o
Turn the part (2) until you have the led
shining in limit position. (Check with
external thermometer)
o
Then put the dial (3) back in correct
position
o
Pins (1) can be used to set the
minimum
and
maximum
temperature using the holes around
(2)
NOTE:
✓
While setting the thermostat
should be near the receiver
1
2
3


