2. Setup
18
RRY-16C(PCI)H, RRY-32(PCI)H
Step 3 Installing the Hardware
For using an expansion board under Windows, you have to let the OS detect the I/O addresses and IRQ to
be used by the board. The process is referred to as installing the hardware.
In the case of using two or more boards, make sure you install one by one with the Add New Hardware
Wizard.
Turning on the PC
Turn on the power to your PC.
CAUTION
-
The board cannot be properly installed unless the resources (I/O addresses and interrupt level) for
the board can be allocated. Before attempting to install the board, first determine what PC resources
are free to use.
-
The resources used by each board do not depend on the location of the PCI bus slot or the board itself.
If you remove two or more boards that have already been installed and then remount one of them on
the computer, it is unknown that which one of the sets of resources previously assigned to the two
boards is assigned to the remounted board. In this case, you must check the resource settings.
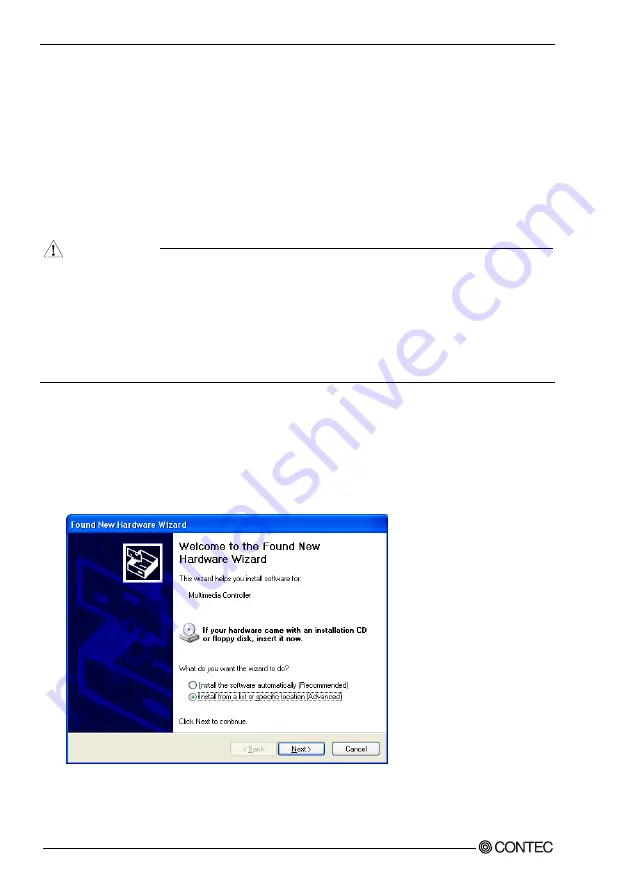
Setting with the Found New Hardware Wizard
(1) The “Found New Hardware Wizard” will be started.
Select “Install from a list or specific location (Advanced)”, then click on the [Next] button.
If you are using Windows NT 4.0, the “Found New Hardware Wizard” is not started.
Go to Step 4 “Initializing the Software”.
Summary of Contents for RRY-16C(PCI)H
Page 7: ...vi RRY 16C PCI H RRY 32 PCI H ...
Page 15: ...1 Before Using the Product 8 RRY 16C PCI H RRY 32 PCI H ...
Page 39: ...3 External Connection 32 RRY 16C PCI H RRY 32 PCI H ...
Page 41: ...4 Function 34 RRY 16C PCI H RRY 32 PCI H ...
Page 49: ...5 About Software 42 RRY 16C PCI H RRY 32 PCI H ...


