background image

88

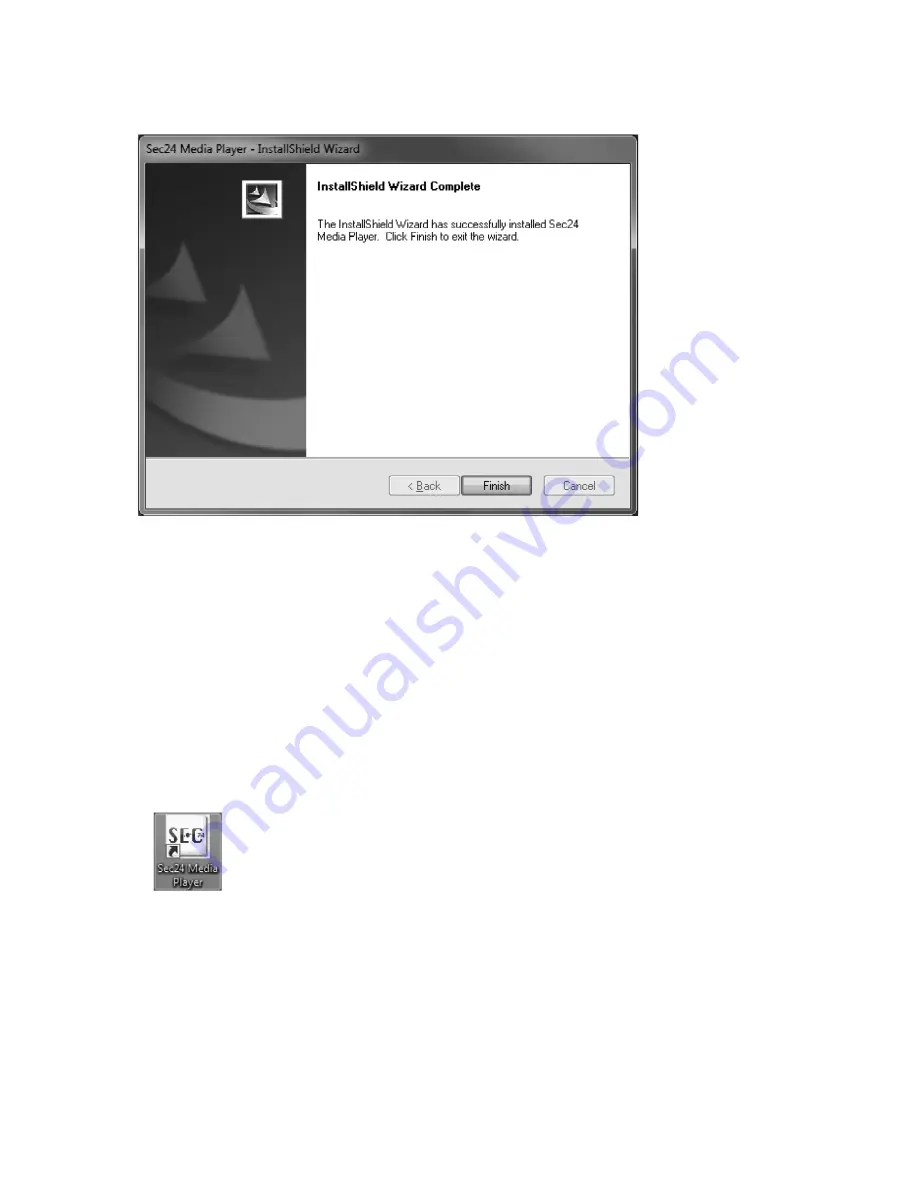
C. Once installation has been completed, the following message appears on the screen. Click "Finish" or

"Beenden" to close the window.

c) Play Back File(s) with Video Recordings on the PC

1. Take the MicroSD memory card from the slot of the indoor unit of your video surveillance system and

insert the memory card in the corresponding card reader of your PC.

If your PC has no MicroSD slot, insert the MicroSD memory card in the concluded SD
adapter and then push it into the corresponding card reader of your PC. 

Your PC recognises the memory card automatically and assigns it a drive letter (e.g. "E") and shows
it as removable medium in the drive list in Windows.

2. Double-click the Sec24-icon on your Windows Desktop with the left mouse button to start the Media-

Player software.

Summary of Contents for 754270

Page 1: ...Digital Radio DVR Set RT Page 48 93 Set RT DVR num rique sans fil 2 4 GHz Page 94 139 2 4 GHz draadloze digitale DVR set RT Pagina 140 185 Best Nr Item no N de commande Bestelnr 75 42 70 BEDIENUNGSANL...

Page 2: ...Systemfunktionen 13 a Die Bedeutung der Symbole auf dem Display 13 b Men struktur der Inneneinheit 15 10 Bedienung des Systems 16 a System Men 16 b CAMERA SETUP berwachungskamera Setup 17 PAIRING Verb...

Page 3: ...berschreiben 38 11 Wiedergabe Software Sec24 Media Player 39 a Die Bedienelemente des Sec24 Media Player 39 b Installation des Sec24 Media Players MS Windows 40 c Datei en mit Videoaufzeichnungen auf...

Page 4: ...habung Achten Sie hierauf auch wenn Sie dieses Pro dukt an Dritte weitergeben Heben Sie deshalb diese Bedienungsanleitung zum Nachlesen auf Alle enthaltenen Firmennamen und Produktbezeichnungen sind W...

Page 5: ...ie fremde Personen ohne deren Wissen und Einverst ndnis mit dieser berwachungskamera beobachten Beachten Sie die Bestimmungen und Vor schriften des Landes in dem Sie die berwachungskamera einsetzen Le...

Page 6: ...ht einsch tzen Die berwachungskamera ist zur Montage und zum Betrieb im Au enbereich geeignet IP66 Das zugeh rige Steckernetzteil darf nur im Innenbereich verwendet werden Die Inneneinheit DVR und die...

Page 7: ...e Batterie nicht gro er Hitze aus Betreiben Sie das Produkt nur in gem igtem Klima nicht in tropischem Klima In gewerblichen Einrichtungen sind die Unfallverh tungsvorschriften des Verbandes der gewer...

Page 8: ...nicht direkt zur Sonne hin aus oder auf B ume B sche und ste die sich im Wind bewegen und so ungewollt ber die Bewegungserkennung eine Videoaufzeich nung ausl sen k nnten Das System bietet eine Masken...

Page 9: ...kamera mit den beigef gten Schrauben so an der Wand dass Sie das Kabel f r die Stromversorgung der berwa chungskamera durch das Wand loch ziehen k nnen Es empfiehlt sich alle Kabel im Au enbereich dur...

Page 10: ...ngang f r Videosignal Hier Stromversorgung einschalten INNENEINHEIT DVR EMPF NGER Steckernetzteil zur Stromversorgung der berwachungskamera Steckernetzteil f r die Stromversorgung der Inneneinheit ber...

Page 11: ...alls erforderlich die Ausrichtung der berwachungskamera optimieren g Einstellen des berwachungskamera Kanals optional Alle drahtlosen berwachungskameras f r dieses System sind ab Werk auf Kanal 1 vore...

Page 12: ...tromversor gungsanzeige 3 berwachungskamera Pfeiltaste Vorspulen Kanal wechseln NACH OBEN 4 LAUTST RKE Pfeiltaste LAUTST RKE verringern VOL verringern VOL Zwischen ber wachungskamera Kan len wechseln...

Page 13: ...eige f r den aktivierten Aufnahme Modus 4 Anzeige Audio Kanal 5 Display Modus QUAD Display 4 Kameras gleichzeitig SCAN Display Anzeige der Bilder der angeschlossenen Kameras in regelm igem Wechsel SIN...

Page 14: ...zuladen Das System schaltet sich von selbst ab wenn nicht mehr gen gend Energie zur Verf gung steht Akku 100 geladen bzw Steckernetzteil angeschlossen Akku zu 70 geladen Akku zu 50 geladen Akku zu 20...

Page 15: ...15 b Men struktur der Inneneinheit...

Page 16: ...der Infrarot Fernbedienung die MENU Taste 6 um das Hauptmen aufzurufen Im Hauptmen ist zun chst standardm ig die Funktion EVENT LIST markiert Falls Sie keine weite ren Eingaben vornehmen zeigt das Sys...

Page 17: ...en des berwachungskamera Setups zu gelangen Nutzen Sie die Pfeiltasten 3 und 7 um die berwachungskamera 1 4 auszuw hlen die Sie konfigurieren m chten Nutzen Sie die Pfeiltaste 5 um die folgenden Einst...

Page 18: ...en berwachungskamera und Inneneinheit Pairing zu starten Dr cken Sie anschlie end die Pairing Taste am Ende des Kamerakabels Diese befindet sich auf dem Verbindungsst ck zum Steckernetzteil Dabei blin...

Page 19: ...ivierung Deaktivierung einer berwachungskamera Markieren Sie mit der Pfeiltaste 5 den Men punkt ACTIVATE OR DEACTIVATE zumAktivieren oder Deaktivieren der ausgew hlten berwachungskamera Mit den Pfeilt...

Page 20: ...r den Start der Videoaufzeichnung und dr cken Sie anschlie end einmal oder mehrmals die MENU Taste 6 um die Aufzeichnungsoptionen durchzuschalten M MOTION Aufzeichnung wird nur gestartet wenn das Sys...

Page 21: ...eich nung manuell beendet wurde Die Aufzeichnung muss beendet werden bevor Sie das Hauptmen aufrufen k nnen Erfolgt 2 Minuten lang keine weitere Eingabe wechselt das System automatisch in den QUAD Mod...

Page 22: ...P und dr cken Sie die MENU Taste 6 Benutzen Sie die Pfeiltasten 3 und 7 um am linken Rand den Men punkt SETUP MAS KING AREA f r die Festlegung des Masken Bereichs anzuw hlen Nutzen Sie die Pfeiltasten...

Page 23: ...D TIME f r die Festlegung der Dauer einer Videoaufzeichnung anzuw hlen Nutzen Sie die Pfeiltasten 4 5 um die gew nschte Aufzeichnungsdauer pro gespeicherter Datei zu markieren 2 MINUTES PER FILE 5 MIN...

Page 24: ...zuw hlen von dem Sie sich die gespeicherten Videoauf nahmen ansehen wollen Das Datum wird auf den Ordnern wie folgt dargestellt Jahr Monat Tag Dr cken Sie die MENU Taste 6 um Ihre Auswahl zu best tige...

Page 25: ...zeichnung von berwachungskamera Kanal 1 ist im SCHEDULE Modus S planm ige kon tinuierliche Aufzeichnung aufgenommen worden Die Aufzeichnung von berwachungskamera Kanal 1 ist im MOTION Modus M Bewegung...

Page 26: ...nschten berwachungskamera Kanal aus und best tigen Sie Ihre Auswahl mit der MENU Taste 6 Die Kanalanzeige am linken unteren Bildschirmrand informiert Sie welcher Kanal gerade aktiv ist Kanal 1 in Vol...

Page 27: ...inken Bildschirmrand DATE AND TIME Datum und Uhrzeit und dr cken die MENU Taste 6 W hlen Sie mit den Pfeiltasten 4 5 nacheinander die Einstellungen f r YYYY Jahr MM Monat DD Tag PM bzw AM Uhrzeit Stun...

Page 28: ...7 den Men punkt SYSTEM SETUP rechts oben Dr cken Sie erneut die MENU Taste 6 um Ihre Auswahl zu best tigen Mit den Pfeiltasten 3 und 7 markieren Sie im Auswahlmen am linken Bildschirmrand TV OUTPUT un...

Page 29: ...rechts oben Dr cken Sie erneut die MENU Taste 6 um Ihre Auswahl zu best tigen Mit den Pfeiltasten 3 und 7 markieren Sie im Auswahlmen am linken Bildschirmrand POWER SAVING und dr cken die MENU Taste 6...

Page 30: ...ch aus wenn 10 Minuten lang keine Eingabe erfolgt ist Der Bildschirm bleibt dauernd aktiviert Dr cken die MENU Taste 6 zur Best tigung Ihrer Eingabe Dr cken Sie die ESC Taste 8 um die Einstellungen zu...

Page 31: ...st Dr cken Sie die MENU Taste 6 und markieren Sie im Hauptmen mit den Pfeiltasten 4 5 3 und 7 den Men punkt SYSTEM SETUP rechts oben Dr cken Sie erneut die MENU Taste 5 um Ihre Auswahl zu best tigen M...

Page 32: ...chungskameras im SCAN Modus nacheinander immer wieder im Wechsel jeweils 5 Sekunden lang dargestellt Auf dem Monitor werden die Bilder der angeschlossenen berwachungskameras im SCAN Modus nacheinander...

Page 33: ...welchen Kan len im Ruhezustand Bilder auf dem Monitor dargestellt werden EinAudio Kanal ist jeweils im QUAD Modus standardm ig ist Kanal 1 bzw der n chste ver f gbare Kanal mit einer angeschlossenen u...

Page 34: ...Dr cken Sie erneut die MENU Taste 6 um Ihre Auswahl zu best tigen Mit den Pfeiltasten 3 und 7 markieren Sie im Auswahlmen am linken Bildschirmrand DEFAULT und dr cken die MENU Taste 6 Mit Hilfe der P...

Page 35: ...m Hauptmen mit den Pfeiltasten 4 5 3 und 7 den Men punkt ALARM BUZZER links unten Registriert die berwachungskamera ein sich bewegendes Objekt wird vom Monitor standardm ig ein Alarmton ausgegeben Dur...

Page 36: ...uf dem Display der Inneneinheit dargestellte Bildaus schnitt ver ndern Dr cken Sie im PAN TILT ZOOM Modus erneut die MENU Taste 6 um f r das Bild der gew hlten berwachungskamera die zweite Zoom Stufe...

Page 37: ...ervallen die aktuellen Bilder der aktivierten berwachungskameras durch Die ON OFF Einstellungen mit denen Sie im CAMERA SETUP des Hauptmen s die angeschlossenen berwachungskameras aktiviert oder deakt...

Page 38: ...ARD OVERWRITE und dr cken Sie erneut die MENU Taste 6 um das berschreiben der Daten auf der Speicherkarte einzuschalten ON oder auszuschalten OFF Bei eingelegter Speicherkarte wird der verbleibende Sp...

Page 39: ...orsichtsma nahme die dazu beitr gt Ihre Daten und Ihre Privatsph re zu sch tzen a Die Bedienelemente des Sec24 Media Player 1 berwachungskamera Kanal 1 Wiedergabebereich 2 berwachungskamera Kanal 2 Wi...

Page 40: ...Versionsnummer des Programms mit enthalten Folgen Sie nun den Anweisungen auf dem Bildschirm um die Installation durchzuf hren A F hren Sie einen Doppelklick auf das Dateisymbol aus um die Installati...

Page 41: ...41 Bei einem erfolgreichen Start der Installation erscheint folgende Meldung auf dem Bildschirm B Klicken Sie auf Next bzw Weiter um den Installationsprozess fortzusetzen...

Page 42: ...einen entsprechenden Kartenleser Ihres PCs Sollte Ihr PC ber keinen MicroSD Einschub verf gen schieben Sie die MicroSD Spei cherkarte bitte in den mitgelieferten SD Adapter und stecken diesen anschli...

Page 43: ...erksliste zun chst die Speicherkarte z B Wechseldaten tr ger E aus und klicken Sie doppelt auf das Symbol um sich die gespeicherten Video Dateien mit der Endung SNX anzeigen zu lassen Markieren Sie di...

Page 44: ...r berwachungskamera Kan le und der Audiokanal aktiv Bei Bedarf k nnen Sie einzelne Kan le gezielt manuell deaktivieren Entfernen Sie dazu jeweils mit einem Linksklick die H kchen aus den entsprechende...

Page 45: ...Sie keine aggressiven Reinigungsmittel dadurch kommt es zu Verf rbungen des Geh uses Dr cken Sie nicht zu stark auf das Display der Inneneinheit da es andern falls zu Kratzspuren oder zu einer Besch d...

Page 46: ...chnungen f r das ausschlaggebende Schwermetall sind Cd Cadmium Hg Quecksilber Pb Blei Bezeichnung steht auf den Batterien Akkus z B unter dem links abgebildeten M lltonnen Symbol Ihre verbrauchten Bat...

Page 47: ...A Stromverbrauch 220 20 mA Integrierter Kartenleser microSD microSDHC max 32 GB Eingebauter Akku N A Abmessungen 113 x 113 x 26 mm c Steckernetzteil Stromversorgung 100 240 V AC 50 60 Hz Ausgang 5 V...

Page 48: ...nfrared Remote Control 58 9 System Functions 59 a Meaning of the Icons on the Display 59 b Menu Structure of the Indoor Unit 61 10 System Operation 62 a System Menu 62 b CAMERA SETUP Surveillance Came...

Page 49: ...Software Sec24 Media Player 85 a The Operating Elements of the Sec24 Media Player 85 b Installation of the Sec24 Media Player MS Windows 86 c Play Back File s with Video Recordings on the PC 88 d Act...

Page 50: ...They contain important notes on commissioning and handling Also consider this if you pass on the product to any third party Therefore retain these operating instructions for reference All company nam...

Page 51: ...trangers with this surveillance camera without their knowing and consent Observe the provisions and regulations of the country in which you use the sur veillance camera Read these operating instructio...

Page 52: ...hen handling elec trical devices The surveillance camera is suitable for installation and operation in an outdoor area IP66 The associated plug in mains adapter must only be used indoors The indoor un...

Page 53: ...evices to high temperatures The product is only suitable for use in temperate not tropical climates In commercial institutions the accident prevention regulations of the Employer s Liability Insurance...

Page 54: ...int the surveillance camera s directly at the son or at trees bushes and branches that move in the wind and may trigger video recording unintentionally via the motion detection The system offers a mas...

Page 55: ...e wall with the included screws so that you can pull the power supply cable of the surveillance camera through the hole in the wall It is recommended that you protect all cables in the outdoor area ag...

Page 56: ...Input for video signal Switch on power supply here INDOOR UNIT DVR RECEIVER Plug in mains adapter for power supply of the surveillance camera Plug in mains adap ter for power supply to the indoor unit...

Page 57: ...mise the alignment of the surveillance camera if required g Setting of the Surveillance Camera Channel Optional All wireless surveillance cameras for this system are pre set to channel 1 ex works If y...

Page 58: ...io connection display 2 Power supply display 3 Surveillance camera Arrow button Fast forward Switch channel UP 4 Reduce VOLUME VOL Arrow Reduce VOLUME VOL Switch between surveillance camera channels C...

Page 59: ...elected 3 Display for the activated recording mode 4 Display audio channel 5 Display mode QUAD display 4 cameras at once SCAN display display of the pictures of the connected cameras changes at interv...

Page 60: ...he mains The system switches off on its own if there is no longer enough energy available Rechargeable battery 100 charged or plug in mains adapter connected Battery charged at 70 Battery charged at 5...

Page 61: ...61 b Menu Structure of the Indoor Unit...

Page 62: ...n the indoor unit or the infrared remote control to call the main menu The function EVENT LIST is highlighted by default in the main menu If you do not make any other input the system will now show th...

Page 63: ...to get to the submenu of the surveillance camera setup Use the arrows 3 and 7 to select the surveillance camera 1 4 you want to configure Use the arrow 5 to select the following settings PAIRING regis...

Page 64: ...start pairing between the surveil lance camera and the indoor unit Then push the pairing button at the end of the camera cable It is on the connection piece to the plug in mains adapter The pair LED...

Page 65: ...g Deactivating a Surveillance Camera Use the arrow 5 to select the menu item ACTIVATE OR DEACTIVATE to activate or deactivate the selected surveillance camera Use the arrows 3 and 7 to activate ON or...

Page 66: ...n 6 once or repeatedly to switch through the recording op tions M MOTION recording is only started when the system registers movement S SCHEDULE planned continuous recording C MANUAL manual recording...

Page 67: ...ted The recording must be stopped before you can call the main menu If no other input is made for 2 minutes the system automatically switches back to QUAD mode MOTION DETECTION SENSITIVITY Setting the...

Page 68: ...o select the function RECORDER SETUP in the main menu and push the MENU button 6 Use the arrows 3 and 7 to select the menu item SETUP MASKING AREA at the left edge to determine the masking area Use th...

Page 69: ...3 and 7 to select the menu item RECORD TIMEAREA at the left edge to determine duration of a video recording Use the arrows 4 5 select the desired recording duration per file saved 2 MINUTES PER FILE 5...

Page 70: ...date for which you want to view saved video recordings from the list DATE The date is presented as follows in the folders year month day Push the MENU button 6 to confirm your selection and open the...

Page 71: ...2 5 or 10 minutes 2 Recording mode The recorded video of surveillance camera channel 1 was recorded in the SCHEDULE mode S planned continuous recording The recorded video of surveillance camera channe...

Page 72: ...sur veillance camera channel and confirm the selection with the MENU button 6 The channel display at the lower left screen edge tells you which channel is currently active Channel 1 in full screen dis...

Page 73: ...and 7 to select DATE AND TIME on the left edge of the screen and push the MENU button 6 Use the arrows 4 5 to select the settings for YYYY year MM month DD day PM or AM time hour and MM time minute a...

Page 74: ...n the main menu with the arrows 4 5 3 and 7 Push the MENU button 6 again to confirm your selection Use the arrows 3 and 7 to select TV OUTPUT in the selection menu at the left edge of the screen and p...

Page 75: ...th the arrows 4 5 3 and 7 Push the MENU button 6 again to confirm your selection Use the arrows 3 and 7 to select POWER SAVING in the selection menu at the left edge of the screen and push the MENU bu...

Page 76: ...screen is deactivated if no input was made for 10 minutes The screen remains active at all times Press the MENU 6 button to confirm your input Push the ESC button 8 to save the settings and leave the...

Page 77: ...rently active Push the MENU button 6 and select the menu item SYSTEM SETUP upper right in the main menu with the arrows 4 5 3 and 7 Push the MENU button 5 again to confirm your selection Use the arrow...

Page 78: ...es of the connected surveillance cameras are displayed for 5 seconds each alternatingly in SCAN mode The pictures of the connected surveillance cameras are displayed for 10 seconds each alternatingly...

Page 79: ...annels for which pictures are shown on the screen in idle mode An audio channel is available in QUAD mode by default channel 1 or the next available channel with a connected and coupled surveillance c...

Page 80: ...arrows 4 5 3 and 7 Push the MENU button 6 again to confirm your selection Use the arrows 3 and 7 to select DEFAULT in the selection menu at the left edge of the screen and push the MENU button 6 Use t...

Page 81: ...d select the menu item ALARM BUZZER lower left in the main menu with the arrows 4 5 3 and 7 When the surveillance camera registers a moving object the monitor will emit an alarm by default Pushing the...

Page 82: ...LT ZOOM only changes the picture section displayed on the indoor unit Push the MENU button 6 again in PAN TILT ZOOM mode to activate the second zoom stage for the picture of the selected monitoring ca...

Page 83: ...activated surveillance cameras at regular intervals on the indoor unit s display The ON OFF settings with which you have activated or deactivated the connected sur veillance cameras in the main menu s...

Page 84: ...in the main menu and push the MENU button 6 again to activate ON or deactivate OFF the data on the memory card With the memory card inserted the remaining memory space is displayed e g 1 89 GB space a...

Page 85: ...edia Player this is a cautionary method to protect your data and privacy a The Operating Elements of the Sec24 Media Player 1 Surveillance camera channel 1 playback area 2 Surveillance camera channel...

Page 86: ...is called Sec24 Media Player The file name may also include the current version number of the programme Follow the instructions on the screen for installation A Double click the file icon to start ins...

Page 87: ...87 If the installation starts successfully the following message is displayed B Click Next or Weiter to continue installation...

Page 88: ...insert the memory card in the corresponding card reader of your PC If your PC has no MicroSD slot insert the MicroSD memory card in the concluded SD adapter and then push it into the corresponding car...

Page 89: ...gs 4 Select the memory card e g removable medium E from the displayed drive list and double click the icon to display the saved video files extension SNX Select the desired SNX file with a mouse click...

Page 90: ...channels and the audio channel are active by default for playback On demand individual channels can be deactivated manually Remove the checkmark from the corresponding box by left clicking Audio 1 Vid...

Page 91: ...Do not use aggressive detergents as these will cause discoloration of the casing Do not push too hard on the display of the indoor unit This may cause scratches and damage the display 14 Troubleshoot...

Page 92: ...ptions for the respective heavy metal are Cd cadmium Hg mercury Pb lead the names are indicated on the battery rechargeable battery e g below the rubbish bin symbol shown to the left You may return us...

Page 93: ...1 A Current consumption 220 20 mA Integrated card reader microSD microSDHC max 32 GB Integrated rechargeable battery N A Dimensions 113 x 113 x 26 mm c Mains Adapter Power supply 100 240 V AC 50 60 Hz...

Page 94: ...tions syst me 105 a La signification des symboles sur l cran 105 b Structure du menu de l unit int rieure 107 10 Utilisation du syst me 108 a Menu du syst me 108 b CAMERA SETUP setup de la cam ra de s...

Page 95: ...iciel de lecture lecteur multim dia Sec24 131 a Les l ments de commande du lecteur multim dia Sec24 131 b Installation du lecteur multim dia Sec24 MS Windows 132 c Lecture des fichiers d enregistremen...

Page 96: ...e en service et la manipulation du produit Tenez compte de ces remarques m me en cas de cession de ce produit un tiers Conservez le pr sent mode d emploi afin de pouvoir le consulter tout moment Tous...

Page 97: ...t vous pouvez faire l objet de poursuites en justice Observez les dispositions et consignes en vigueur dans le pays d utilisation de la cam ra de surveillance Lisez int gralement et attentivement le p...

Page 98: ...urveillance a t con ue pour un montage et une utilisation en plein air IP66 Le bloc d alimentation correspondant doit uniquement tre utilis l int rieur L unit int rieure DVR et les blocs d alimentatio...

Page 99: ...produit dans les r gions climat mod r pas dans les r gions climat tropical Dans les installations industrielles il convient d observer les consignes de pr vention des accidents relatives aux installa...

Page 100: ...surveillance vers le soleil ou vers les arbres les buissons et branches qui se d placent avec le vent la d tection des mouvements pourrait sinon acci dentellement d clencher un enregistrement vid o L...

Page 101: ...m ra de surveillance sur le mur l aide des vis fournies en veillant pouvoir tirer le c ble d alimentation lectri que de la cam ra de surveillance Il est recommand de prot ger tous les c bles en plein...

Page 102: ...our le signal vid o Allumer ici l alimenta tion lectrique UNIT INT RIEURE DVR R CEPTEUR Bloc d alimentation pour l alimentation lectrique de la cam ra de surveillance Bloc d alimentation pour l alimen...

Page 103: ...ouvez le cas ch ant optimiser l orientation de la cam ra de surveillance g R glage du canal de la cam ra de surveillance en option Toutes les cam ras de surveillance sans fil pour ce syst me sont pr r...

Page 104: ...rique 3 Cam ra de surveillance Touche fl ch e D filement avant Changement de canal VERS LE HAUT 4 R duction du VOLUME Touche fl ch e R duction du VOLUME VOL VOL Changement des canaux de la cam ra de s...

Page 105: ...ra de surveillance 3 Affichage de l activation du mode d enregistrement 4 Affichage du canal audio 5 Mode d affichage cran QUAD 4 cam ras simultan ment Mode SCAN affichage en alternance des images des...

Page 106: ...alimentation au r seau lectrique Le syst me se d connecte automatiquement d s que l nergie disponible est insuffisante Batterie recharg e 100 ou bloc d alimentation raccord Batterie recharg e 70 Batte...

Page 107: ...107 b Structure du menu de l unit int rieure...

Page 108: ...unit int rieure ou de la t l commande infrarouge pour affi cher le menu principal La fonction EVENT LIST est s lectionn e par d faut dans le menu principal Si vous n effectuez aucune saisie le syst m...

Page 109: ...tup de la cam ra de surveillance Utilisez les touches fl ch es 3 et 7 pour s lectionner la cam ra de surveillance 1 4 que vous souhaitez configurer Utilisez la touche fl ch e 5 pour s lectionner les r...

Page 110: ...de connexion entre la cam ra de surveillance et l unit int rieure appairage Appuyez ensuite sur la touche PAIRING l extr mit du c ble de la cam ra Cette touche se trouve sur le raccord du bloc d alim...

Page 111: ...d sactivation de la cam ra de surveillance l aide de la touche fl ch e 5 s lectionnez la rubrique ACTIVATE OR DEACTIVATE dans le menu pour activer ou d sactiver la cam ra de surveillance s lectionn e...

Page 112: ...marrage de l enregistrement vid o et appuyez ensuite une ou plusieurs fois sur la touche MENU 6 pour faire d filer les options d enregistrement M MOTION l enregistrement d marre uniquement lorsque le...

Page 113: ...anuel de l enregistrement Le menu principal ne peut pas tre affich tant que l enregistrement n est pas termin En l absence de saisie pendant 2 minutes le syst me retourne automatiquement en mode QUAD...

Page 114: ...SETUP dans le menu principal puis appuyez sur la touche MENU 6 l aide des touches fl ch es 3 et 7 s lectionnez la rubrique SETUP MASKING AREA du menu afin de d finir les zones de camouflage Utilisez l...

Page 115: ...RECORD TIME du menu afin de d finir la dur e de l enregistrement vid o Utilisez les touches fl ch es 4 5 pour s lectionner la dur e d enregistrement souhait e pour chaque fichier cr 2 MINUTES PER FILE...

Page 116: ...e et dont vous souhaitez consulter les enregistre ments vid o La date est indiqu e dans les dossiers de la mani re suivante Ann e Mois Jour Appuyez sur la touche MENU 6 pour valider votre s lection et...

Page 117: ...gistrement L enregistrement du canal de la cam ra de surveillance 1 a t r alis en mode SCHEDULE S enregistrement r gulier continu L enregistrement du canal de la cam ra de surveillance 1 a t r alis en...

Page 118: ...am ra de surveillance correspondante puis validez votre s lection l aide de la touche MENU 6 Le clignotement de l indicateur du canal sur le bord gauche de l cran vous indique le canal actuellement ac...

Page 119: ...et heure dans le menu de s lection sur le bord gauche de l cran puis appuyez sur la touche MENU 6 l aide des touches fl ch es 4 5 s lectionnez successivement les r glages pour YYYY ann e MM mois DD jo...

Page 120: ...s fl ch es 4 5 3 et 7 Appuyez encore une fois sur la touche MENU 6 pour valider votre s lection l aide des touches fl ch es 3 et 7 s lectionnez TV OUTPUT dans le menu de s lection sur le bord gauche d...

Page 121: ...ch es 4 5 3 et 7 Appuyez encore une fois sur la touche MENU 6 pour valider votre s lection l aide des touches fl ch es 3 et 7 s lectionnez POWER SAVING dans le menu de s lection sur le bord gauche de...

Page 122: ...s teint en l absence de saisie pendant 10 minutes L cran reste toujours allum Appuyez sur la touche MENU 6 pour valider votre saisie Appuyez sur la touche ESC 8 pour enregistrer les r glages et quitt...

Page 123: ...rubrique SYSTEM SETUP dans le menu principal en haut droite l aide des touches fl ch es 4 5 3 et 7 Appuyez encore une fois sur la touche MENU 5 pour valider votre s lection l aide des touches fl ch e...

Page 124: ...tes cam ras de surveillance raccord es sont affich es successivement en alternance pendant 5 secondes En mode SCAN les images des diff rentes cam ras de surveillance raccord es sont affich es successi...

Page 125: ...icher sur le moniteur en veille Un canal audio est respectivement disponible en mode QUAD le canal 1 ou le prochain canal disponible avec une cam ra de surveillance raccord e et connect e appairage so...

Page 126: ...encore une fois sur la touche MENU 6 pour valider votre s lection l aide des touches fl ch es 3 et 7 s lectionnez DEFAULT dans le menu de s lection sur le bord gauche de l cran puis appuyez sur la tou...

Page 127: ...ubrique ALARM BUZZER dans le menu principal en bas gauche l aide des touches fl ch es 4 5 3 et 7 Si la cam ra de surveillance d tecte un objet mouvant le moniteur met par d faut une tonalit d alar me...

Page 128: ...section de l image affich e sur l cran de l unit int rieure En mode PAN TILT ZOOM appuyez encore une fois sur la touche MENU 6 pour activer le second niveau de zoom pour l image de la cam ra de surve...

Page 129: ...des cam ras de sur veillance activ es sur l cran de l unit int rieure Les r glages ON OFF dans le menu principal CAMERA SETUP avec les quels vous avez activ ou d sactiv les cam ras de surveillance ra...

Page 130: ...ez sur la touche MENU 6 pour activer ON ou d sactiver OFF l crasement des donn es sur la carte m moire Lorsque la carte m moire est ins r e la capacit restante est affich e par ex 1 89 GB space availa...

Page 131: ...qui permet de contribuer la protection de vos informations et de votre vie priv e a Les l ments de commande du lecteur multim dia Sec24 1 Canal de la cam ra de surveillance 1 plage de lecture 2 Canal...

Page 132: ...alement contenir le num ro de la ver sion du programme Suivez les instructions sur l cran pour l installation A Double cliquez sur le symbole des fichiers pour d marrer l installation 1 Si le syst me...

Page 133: ...133 Si l installation d marre correctement le message suivant s affiche sur l cran B Cliquez sur Next ou Suivant pour poursuivre la proc dure d installation...

Page 134: ...le de votre ordinateur Si votre ordinateur n est pas quip d une baie MicroSD ins rez la carte m moire MicroSD dans l adaptateur SD fourni puis ins rez ce dernier dans le lecteur de cartes de votre ord...

Page 135: ...ffiche s lectionnez d abord la carte m moire par ex support de don n es interchangeable E puis double cliquez sur le symbole pour afficher les fichiers vid o enregis tr s avec l extension SNX S lectio...

Page 136: ...aux des cam ras de surveillance et le canal audio sont activ s par d faut Le cas ch ant vous pouvez d sactiver manuellement les canaux correspondants Pour ce faire d cocher les cases en effectuant un...

Page 137: ...pas la rayer N utilisez pas de d tergents agressifs ils risqueraient de d colorer le bo tier N appuyez pas trop fort sur l cran de l unit int rieure Vous risqueriez sinon de le rayer ou de l endom mag...

Page 138: ...ations pour le m tal lourd pr pond rant sont Cd cadmium Hg mercure Pb plomb vous trouverez la d signation sur la pile ou la batterie par ex au dessous des symboles de poubelles figurant gauche Vous po...

Page 139: ...5 V CC 1 A Consommation de courant 220 20 mA Lecteur de cartes int gr microSD microSDHC max 32 Go Batterie int gr e N A Dimensions 113 x 113 x 26 mm c Bloc d alimentation Alimentation lectrique 100 24...

Page 140: ...en de infrarood afstandsbediening 150 9 Systeemfuncties 151 a Betekenis van de symbolen op het scherm 151 b Menustructuur van de binneneenheid 153 10 Bediening van het systeem 154 a Systeemmenu 154 b...

Page 141: ...verschrijven 176 11 Weergavesoftware Sec24 Media Player 177 a Bedieningselementen van de Sec24 Media Player 177 b Sec24 Media Player MS Windows installeren 178 c Bestand en met video opnames op de PC...

Page 142: ...ongevaarlijke werking te garanderen Deze gebruiksaanwijzing hoort bij dit product Deze bevat belangrijke instructies voor de ingebruikname en bediening Let hierop ook wanneer u dit product aan der de...

Page 143: ...hun medeweten en toestemming met deze bewakingscamera te observeren Houd rekening met de bepalingen en voorschriften van het land waarin u de bewakingscamera gebruikt Lees deze gebruiksaanwijzing vol...

Page 144: ...chatten welke gevaren aan het gebruik van elektrische apparatuur zijn verbonden De bewakingscamera is voor montage en gebruik in het buitenbereik geschikt IP66 Het bijhorend netdeel mag uitsluitend bi...

Page 145: ...de batterij niet aan grote hitte bloot Gebruik het apparaat uitsluitend in een gematigd klimaat niet in een tropisch klimaat In industri le omgevingen dienen de Arbo voorschriften ter voorkoming van...

Page 146: ...het zonlicht of naar bomen struikgewas en takken die in de wind bewegen en zo ongewild aan de hand van de bewegingsherkenning een video opname kunnen veroorzaken Het systeem bevat een masker functie...

Page 147: ...amera met de meegelever de schroeven zodanig aan de muur vast dat u de kabel voor de stroomtoevoer van de bewakings camera door het gat kunt trekken Het is aangewezen om alle buitenkabels door een kab...

Page 148: ...camera vast Ingang voor videosignaal Hier stroomtoevoer inschakelen BINNENEENHEID DVR ONTVANGER Netdeel voor de stroomtoevoer van de bewakingscamera Netdeel voor de stroomtoevoer met de binneneenheid...

Page 149: ...econtroleerd kunt u indien nodig de afstelling van de bewakingscamera optimaliseren g Instellen van het bewakingscamerakanaal optioneel Alle draadloze bewakingscamera s voor dit systeem zijn af fabrie...

Page 150: ...2 Stroomtoevoerindi cator 3 Bewakingscamera Pijltoets Vooruitspoelen kanaal veranderen NAAR BOVEN 4 VOLUME verminderen Pijltoets VOLUME verminderen VOL VOL tussen bewakingscamera kanalen wisselen CH...

Page 151: ...anaal 3 Weergave van de geactiveerde opnamemodus 4 Weergave audiokanaal 5 Display modus QUAD display 4 camera s tegelijk SCAN Display weergave van de beelden van de aangesloten camera s met regelmatig...

Page 152: ...t aan te sluiten Het systeem schakelt zichzelf automatisch uit als er niet meer voldoende energie beschikbaar is Accu 100 opgeladen of netdeel aangesloten Accu 70 opgeladen Accu 50 opgeladen Accu 20 o...

Page 153: ...153 b Menustructuur van de binneneenheid...

Page 154: ...eenheid of op de infrarood afstandsbediening om het hoofdmenu op te roepen In het hoofdmenu is standaard eerst de functie EVENT LIST gemarkeerd Als u geen verdere ingave uitvoert toont het systeem 2 m...

Page 155: ...submenu van de bewakingscameraset up te gaan Gebruik de pijltoetsen 3 en 7 om de bewakingscamera 1 4 te selecteren die u wilt confi gureren Gebruik de pijltoets 5 om de volgende instellingen te select...

Page 156: ...ngscamera en binneneenheid pairing te starten Druk vervolgens op de pairing toets op het einde van de camerakabel Deze bevindt zich op het verbin dingsstuk tot het netdeel Daarbij knippert de pair LED...

Page 157: ...ATE bewakingscamera activeren deactiveren Markeer met de pijltoets 5 het menupunt ACTIVATE OR DEACTIVATE om de geselecteerde bewa kingscamera te activeren of te deactiveren Met de pijltoetsen 3 en 7 a...

Page 158: ...an de video opname en druk aansluitend eenmaal of meerdere malen op de MENU toets 6 om door de opnameopties te bladeren M MOTION opname wordt alleen gestart als het systeem een beweging registreert S...

Page 159: ...als de opname hand matig werd be indigd De opname moet worden be indigd voor u het hoofdmenu kunt oproepen Als er 2 minuten lag geen invoer gebeurt keert het systeem automatisch naar de QUAD modus te...

Page 160: ...hoofdmenu en druk op de MENU toets 6 Gebruik de pijltoetsen 3 en 7 om aan de linkerzijde het menupunt SETUP MASKING AREA te selecteren om het maskeerbereik op te slaan Gebruik de pijltoetsen 4 5 om d...

Page 161: ...RECORD TIME te selecteren om de duur van een video opname te selecteren Gebruik de pijltoetsen 4 5 om de gewenste opnameduur per opgeslagen bestand te marke ren 2 MINUTES PER FILE 5 MINUTES PER FILE 1...

Page 162: ...ap te selecteren met de gewenste opnamedatum waarvan u de opgeslagen video opnamen wenst te zien De datum wordt als volgt op de bestanden weergegeven jaar maand dag Druk op de toets MENU 6 om uw keuze...

Page 163: ...0 minuten 2 Opnamemodus De opname van bewakingscamerakanaal 1 is in de SCHEDULE modus S geplande permanente opname opgenomen De opname van bewakingscamerakanaal 1 is in de MOTION modus M bewegingsherk...

Page 164: ...ewakingscamerakanaal en bevestig uw keuze met de MENU toets 6 De kanaalaanduiding linksonder het beeldscherm vertelt u welk kanaal op dit moment actief is kanaal 25 40 mm volledige schermweergave kana...

Page 165: ...u aan de linkerrand van het beeld scherm DATE AND TIME datum en tijd en drukt u op de MENU toets 6 Selecteer met de pijltoetsen 4 5 na elkaar de instellingen voor YYYY jaar MM maand DD dag PM of AM ti...

Page 166: ...et menupunt SYSTEM SETUP rechtsboven Druk opnieuw op de MENU toets 6 om uw keuze te bevestigen Met de pijltoetsen 3 en 7 markeert u in het keuzemenu aan de linkerrand van het beeld scherm TV OUTPUT en...

Page 167: ...en Druk opnieuw op de MENU toets 6 om uw keuze te bevestigen Met de pijltoetsen 3 en 7 markeert u in het keuzemenu aan de linkerrand van het beeld scherm POWER SAVING en drukt u op de MENU toets 6 Met...

Page 168: ...hzelf uit wanneer er 10 minuten lang geen invoer is gebeurd Het beeldscherm blijft permanent geactiveerd Druk op de MENU toets 6 om uw invoer te bevestigen Druk op de toets ESC toets 8 om de instellin...

Page 169: ...MENU toets 6 en markeer in het hoofdmenu met de pijltoetsen 4 5 3 en 7 het menupunt SYSTEM SETUP rechtsboven Druk opnieuw op de MENU toets 5 om uw keuze te bevestigen Met de pijltoetsen 3 en 7 markee...

Page 170: ...akingscamera s in de SCAN modus altijd opnieuw afwisselend na elkaar gedurende 5 seconden weergegeven Op de monitor worden de beelden van de aangesloten bewakingscamera s in de SCAN modus altijd opnie...

Page 171: ...alen in de ruststand beelden op de monitor worden weergegeven Een audiokanaal is telkens beschikbaar in de QUAD modus standaard is kanaal 1 of het vol gende beschikbare kanaal met een aangesloten en g...

Page 172: ...n Druk opnieuw op de MENU toets 6 om uw keuze te bevestigen Met de pijltoetsen 3 en 7 markeert u in het keuzemenu aan de linkerrand van het beeld scherm DEFAULT en drukt u op de MENU toets 6 Met behul...

Page 173: ...in het hoofdmenu met de pijltoetsen 4 5 3 en 7 het menupunt ALARM BUZZER linksonder Als de bewakingscamera een bewegend object registreert zendt de monitor standaard een alarmsig naal uit Door op de M...

Page 174: ...n de binneneenheid weergegeven beeldfragment worden gewijzigd Druk in de PAN TILT ZOOM modus opnieuw op de MENU toets 6 om voor het beeld van de gese lecteerde bewakingscamera het tweede zoomniveau te...

Page 175: ...actuele beelden van de geactiveerde bewakingscamera s De ON OFF instellingen waarmee u in CAMERA SETUP van het hoofdmenu de aan gesloten bewakingscamera s hebt geactiveerd of gedeactiveerd be nvloeden...

Page 176: ...druk opnieuw op de MENU toets 6 om het overschrijven van gegevens op de geheugenkaart in ON of uit OFF te schakelen Als een geheugenkaart wordt geplaatst wordt de resterende geheugenruimte weergegeve...

Page 177: ...igheidsmaatregel die bijdraagt tot de bescherming van uw gegevens en privacy a Bedieningselementen van de Sec24 Media Player 1 Bewakingscamerakanaal 1 weergavebereik 2 Bewakingscamerakanaal 2 weergave...

Page 178: ...et huidig versienummer van het pro gramma inbegrepen Volg de aanwijzingen op het scherm om de installatie uit te voeren A Dubbelklik op het bestandsymbool om de installatie te starten 1 Als u het best...

Page 179: ...179 Bij een succesvolle start van de installatie verschijnt de volgende melding op het beelscherm B Klik op Next of Volgende om het installatieproces voort te zetten...

Page 180: ...enkaart in een overeenkomstige kaartlezer van uw PC Als uw PC niet over een micro SD gleuf beschikt schuift u de micro SD geheugenkaart in de meegeleverde SD adapter en steekt u deze vervolgens in de...

Page 181: ...weergegeven stationslijst eerst de geheugenkaart vb verwisselbaar schijf E en dubbelklik op het symbool om de opgeslagen videobestanden met de extensie SNX weer te geven Markeer het gewenste SNX best...

Page 182: ...ingscamerakanalen en het audiokanaal actief Indien nodig kunt u afzonderlijke kanalen opzettelijk handmatig deactiveren Verwijder daarom telkens met een klik op de linkermuisknop de haakjes uit het ov...

Page 183: ...ag geen agressieve schoonmaakmiddelen gebruiken hierdoor verkleurt de behuizing Druk niet te hard op het scherm van de binneneenheid aangezien dit kan leiden tot krassen of schade aan het scherm 14 Ve...

Page 184: ...t huisvuil mogen worden afgevoerd De aanduidingen voor irriterend werkende zware metalen zijn Cd cadmium Hg kwik Pb lood aanduiding staat op batterijen accu s vb onder het links afgebeelde vuilcontai...

Page 185: ...troomverbruik 220 20 mA Ge ntegreerde kaartlezer micro SD micro SDHC max 32 GB Ingebouwde accu N A Afmetingen 113 x 113 x 26 mm c Netadapter Stroomvoorziening 100 240 V AC 50 60 Hz Output 5 V DC 1 A d...

Page 186: ...186...

Page 187: ...187...

Page 188: ...in technology and equipment reserved Copyright 2012 by Conrad Electronic SE Information l gales Ce mode d emploi est une publication de la soci t Conrad Electronic SE Klaus Conrad Str 1 D 92240 Hirsc...

Reviews: