


b) Selecting the operating mode
You can choose the operating mode with the small DIP switch “SW4” located at the edge of the board.
DIP switch SW4
RAID mode
Description
1
2
3
GUI
This version does not allow software configuration;
do not use this setting!
OFF
ON
ON
PM
Port multiplier, each M.2 SSD operates as a single
drive
ON
OFF
OFF
RAID 0
“Striping“; Speed increase by allocating the data on
both M.2 SSDs
ON
ON
OFF
RAID 1
“Mirroring“; Data is mirrored on both M.2 SSDs
ON
OFF
ON
SPAN
“Spanning“; both M.2 SSDs are combined to one
single drive
ON
ON
ON
Mode “PM“
The installed M.2 SSDs operate separately; i.e. you can format and partition each of the two M.2 SSDs
individually.
With this mode you can install and use any two M.2 SSDs (different capacity, different manufacturers).
Mode “RAID 0“
This mode is often referred to as “FAST” or “STRIPING”. When writing the data is split between both M.2
SSDs; the two M.2 SSDs are combined into one. This speeds up the reading and writing process. From the
outside, it looks as if there is only one single M.2 SSD.
Two M.2 SSDs with the same capacity (if possible, same type and manufacturer) must be used
(e.g., 25 250GByte = 500GByte). Otherwise, the capacity of the smaller M.2 SSD will
be doubled (e.g., 20 300GByte = 400GByte) and you are losing the remaining space
on the larger M.2 SSD.
If you remove one of the M.2 SSDs or if one is broken, the data on the other M.2 SSD is also lost.
Mode “RAID 1“
This mode is often referred to as “SAFE” or “MIRRORING”. Data is saved on both M.2 SSDs simultaneously,
therefore the data is protected against a mechanical/ electronic defect of one of the two M.2 SSDs.
Due to simultaneously saving data, only half of the capacity of the M.2 SSDs is available instead
of the total (e.g., 30 300GByte = 300GByte).
When two M.2 SSDs of different sizes are used, the total storage capacity is that of the smaller
M.2 SSD (e.g., 20 300GByte = 200GByte).
Please note:
This mode does not protect against viruses or deleting data, but rather protects against technical
damage to one of the two M.2 SSDs (data is preserved on the other M.2 SSDs).
Mode “SPAN“
This mode is often referred to as “SPANNING” or “CONCATENATION”. Both M.2 SSDs are combined into
one drive (e.g., 30 300GByte = 600GByte).
If you remove one of the M.2 SSDs or if one is broken, the data on the other M.2 SSD is also lost.
c) Saving the operating mode
To store the setting made by the DIP switch (see table above), proceed as follows:
• To power the board, connect it to a USB3.1 / 3.0 port using one of two USB cables supplied.
Observe the information in the following chapter “Connection“.
Important!
Make sure that no short-circuit occurs. Place the board on a non-conductive surface, such as
cardboard or a plastic mouse pad. Do not touch the board, grasp it by the edges only. Do not
touch the electronic components or the SSDs.
• Hold down the “SW1” button (next to the DIP switches) for about 5 seconds.
• Disconnect the board from the USB port.
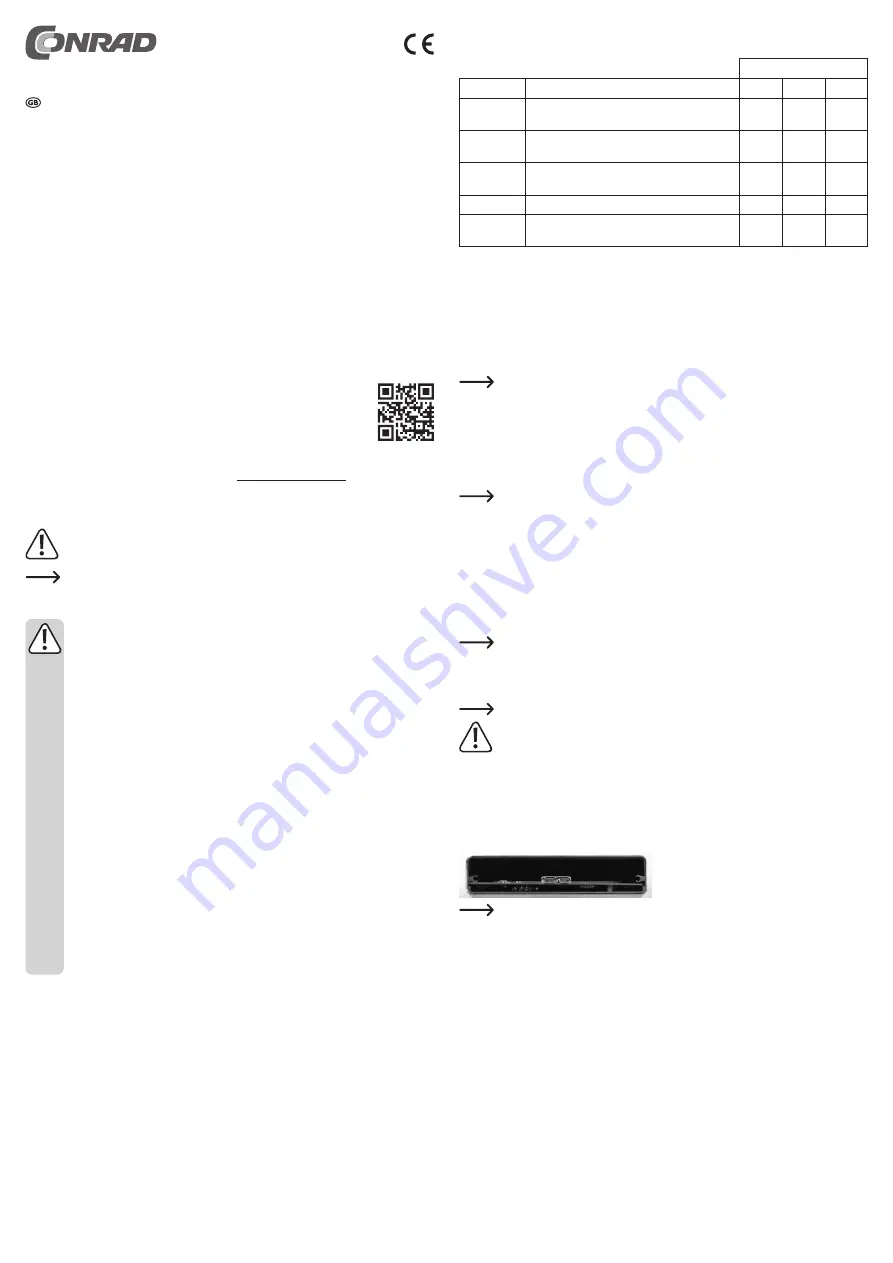
d) Installation into the enclosure
• Once configured (see point b) and c), slide the board completely into the enclosure. Please pay attention
to the correct orientation.
The board is inserted into the small slot below the two fixing threads for the cover (and not into
the large part above).
Insert the board in such a way that the M.2 SSDs face upwards.
• Fasten the cover on the back of the enclosure with two screws so that the hole for the port is exactly above
the USB socket.
Driver installation
Your operating system already contains the driver software for the RAID enclosure, which is why there is no
additional disk with driver software enclosed.
Please note that a suitable USB 3.1 controller is required for USB 3.1 operation (e.g., integrated into many
modern motherboards or available as an upgrade using an additional plug-in card).
Operating instructions
M.2 RAID housing USB type-C™ USB 3.1
Item no. 1526359
Intended use
Up to two M.2 SSDs can be installed into the enclosure. It can be operated via USB interface. The power is
also supplied via USB.
For safety and approval reasons, you may not convert and/or alter the product. If you use the product for
purposes other than those described above, you may inflict damage on it. Furthermore, an improper use
involves risks such as short-circuits, fire, electric shocks, etc. Please read the operating instructions care-
fully and do not discard them. If you pass the product on to a third party, please hand over these operating
instructions as well.
This product complies with the applicable national and European Regulations. All names of companies and
products are the trademarks of the respective owners. All rights reserved.
Package contents
• Hard drive housing
• USB 3.0 cable (50 cm)
• USB 3.1 cable type-C™ (50 cm)
• Cover
• Assembly screws and nuts
• Phillips screwdriver
• Operating instructions
Up-to-date operating instructions
Download the latest operating instructions via the link www.conrad.com/downloads or scan the QR code.
Follow the instructions on the website.
Explanation of symbols
This symbol indicates specific risks associated with handling, operation or use.
The arrow symbol indicates special tips and operating instructions.
Safety instructions
Please read the operating instructions carefully and pay particular attention to the safety
instructions. We do not assume liability for any injuries/material damages resulting from
failure to observe the safety instructions and the information in these operating instruc-
tions regarding the proper use of the product. Furthermore, in such cases, the warranty/
guarantee will be null and void.
• The product is not a toy. Keep out of the reach of children and pets.
• Do not carelessly cast aside the packaging material. It may become a dangerous plaything
for children.
• Protect the product from extreme temperatures, direct sunlight, strong vibrations, high humid-
ity, moisture, combustible gases, vapours and solvents.
• Never expose the product to mechanical stress.
• If safe operation is no longer possible, take the device out of service and secure it against
unintended use. Safe operation is no longer possible, if the product:
- has visible damage,
- no longer functions properly,
- has been stored under adverse ambient conditions for an extended period of time or
- has been exposed to considerable strain during transport.
• Please handle the product with care. The product can be damaged if crushed, struck or
dropped, even from a low height.
• If you have doubts about how the equipment should be operated or how to safely connect it,
consult a trained technician.
• Maintenance, adjustment and repair work may be carried out only by an expert or a special-
ised workshop.
• If you have any questions that are not answered in these operating instructions, please con-
tact our technical customer service or other professionals.
Installing and starting the M.2 SSDs
a) Installation
• Carefully pull the board out of the casing.
• Depending on the length of the M.2 SSD, the spacers must be tightened in the corresponding position on
the board. Insert the small T-shaped spacers into the board (at the side of the M.2 slots) from the top and
secure them with a nut from the bottom.
• Insert the M.2 SSD with a slight angle into the corresponding slots on the board (ensure correct orienta-
tion, the position of the notch on the M.2 SSD must match the connector socket). Do not exert any force.
• Bend the M.2 SSD gently downwards towards the board and fasten it to the previously installed spacer
with a screw.


