background image

39

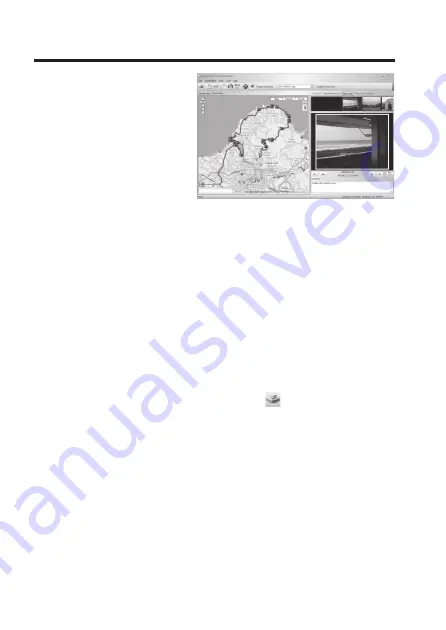
13.  ‘GPS Photo Tagger’ program

The  ‘GPS  Photo  Tagger’  program  ena-
bles  you  to  evaluate  and  display  the 
GPS position data stored by the product. 
Another function is the automatic assign-
ment  of  photos  to  the  waypoints  using 
the date and time. 

You can also use the program to confi g-
ure the product and its features. 

a) Program installation

•  Place the installation CD supplied into the correct drive in your computer.
•  If  it  fails  to  start  automatically,  look  for  the  installation  fi le  in  the  menu  tree  and  follow  the 

instructions that appear on the screen.


To  use  all  functions  of  the  program,  you  must  have  a  working  Internet  con-
nection.

b)  Activate program

Following installation, you must activate the program once before you can use the product with 
this program.

•  Make sure you have connected the product to the computer and switched it on.
•  Start the program.
•  The program window will open.
•  Select the menu item ‘File/Read Device log...’ or press the 

 button on the toolbar.

•  A window appears into which you have to enter the activation code.


The activation code for the program is located on the cover of the Installation 
CD.

•  Once the entry has been confi rmed, the program is activated and can be used.

Summary of Contents for 37 27 38

Page 1: ...software update can then be found under the Dokumente und Downloads tab Thank you for your kind attention Your CONRAD team WICHTIGER HINWEIS IMPORTANT NOTE Dieser Hinweis ist eine Publikation der Con...

Page 2: ...in De software update is te vinden onder de ruiter Dokumente und Downloads Dank u voor uw aandacht Uw CONRAD team REMARQUE IMPORTANTE BELANGRIJKE INFORMATIE Cette remarque est une publication de la s...

Page 3: ...I OPERATION INSTRUCTIONS GEBRUIKSAANWIJZING GT 750 Bluetooth GPS Logger Best Nr Item No N de commande Bestnr 37 27 38 Seite 2 28 GT 750 Bluetooth GPS Logger Page 29 54 GT 750 Bluetooth GPS Logger Page...

Page 4: ...halten 10 11 Produkt mit Bluetooth Ger t verbinden 11 12 Produkt am Computer anschlie en 12 13 Programm GPS Photo Tagger 12 a Programm installieren 12 b Programm aktivieren 13 c Produkt konfigurieren...

Page 5: ...l Datei exportieren 25 q Reiseroute exportieren 25 r Geschwindigkeit H henansicht 25 s Projekte speichern laden 26 14 Wartung und Pflege 27 15 Entsorgung 27 16 Technische Daten 28 17 Konformit tserkl...

Page 6: ...e komplette Bedienungsanlei tung durch beachten Sie alle Bedienungs und Sicherheitshinweise Alle enthaltenen Firmennamen und Produktbezeichnungen sind Warenzeichen der jeweiligen Inhaber Alle Rechte v...

Page 7: ...aps angezeigt werden Die im Lieferumfang enthaltenen Systemkomponenten d rfen nicht feucht oder nass werden Die Spannungsversorgung des GPS Loggers erfolgt via dem mitgeliefertem LI ION Akku 3 7V 1000...

Page 8: ...mAusrufezeichen im Dreieck wird verwendet wenn beson dere Gefahren bei Handhabung Betrieb oder Bedienung bestehen Dieses Symbol kennzeichnet Informationen die zum besseren Verst ndnis der Abl ufe gege...

Page 9: ...oder die Sicherheit des Ger tes haben Wartung Anpassungs und Reparaturarbeiten d rfen nur von einer qualifizier ten Fachkraft bzw einer Fachwerkstatt durchgef hrt werden Verwenden Sie dieses Produkt...

Page 10: ...et Sollten Sie noch Fragen haben die in dieser Bedienungsanleitung nicht be antwortet werden so wenden Sie sich bitte an unseren technischen Kunden dienst Akkuhinweise Akkus geh ren nicht in Kinderh n...

Page 11: ...s Produkt ein Schieben Sie den Akkufachdeckel 6 wieder auf bis dieser einrastet 9 Aufladen Wenn die Akkustatus LED gelb leuchtet m ssen Sie den Akku aufladen a KFZ Ladeadapter Verbinden Sie das Produk...

Page 12: ...angs leuchtet die Akkustatus LED rot 10 Produkt einschalten Dr cken und halten Sie die Taste EIN AUS 5 ca 2 Sekunden gedr ckt um das Produkt einzuschalten Die Bluetooth Status LED 2 blinkt langsam 1 S...

Page 13: ...GPS Empfang h ngt stark von den Umgebungsbedingungen ab In folgenden Situationen k nnen Empfangsprobleme entstehen Innerhalb von Tunneln werden GPS Signale geblockt Abdeckungen f hren zur Unterdr cku...

Page 14: ...ie die grosse Seite des Mini USB Kabels an Ihren Computer an 13 Programm GPS Photo Tagger Mit dem Programm GPS Photo Tagger k nnen Sie die vom Produkt gespeicher ten GPS Positionsdaten auswerten und a...

Page 15: ...rscheint ein Fenster indem Sie den Freischaltcode eingeben m ssen Der Freischaltcode des Programms befindet sich auf dem Cover der Installa tions CD Nach dem Best tigen der Eingabe ist das Programm ak...

Page 16: ...der Verbin dungseinstellung GPS Log Setting b Das Produkt speichert regelm ig die GPS Position mit dem aktuellen Datum und Uhrzeit In welchen Abst nden die Postitionsdaten gespeichert werden k nnen Si...

Page 17: ...tion erst ab einer Geschwindigkeit von 20 km h Das Produkt erfasst die aktuelle GPS Position erst dann wenn alle eingestell ten Bedingungen erreicht werden Data Log Memory d Hier sehen Sie die aktuell...

Page 18: ...Fotos erstellt wurden 2 Max Photo track diff time Hier geben Sie den maximalen Unterschied zwischen der Aufnahmezeit und der Speicherzeit des Wegpunktes an bis zu der das Bild dem Wegpunkt zugeordnet...

Page 19: ...schaltet haben Starten Sie das Programm W hlen Sie den Men punkt File Config GPS oder bet tigen Sie die Schaltfl che in der Werkzeugleiste Die gespeicherten Daten werden vom Produkt gelesen und analys...

Page 20: ...kleinern Mouserad runter mit den Symbolen in der rechten Ecke oben k nnen Sie die Darstellungsart w hlen Karte Anzeige als Stadtplan Satelliten Anzeige von Satellitenbildern Gel nde Kombiniert Stadtpl...

Page 21: ...ndern Route l schen b Makieren Sie die entsprechende Route Bet tigen Sie die Schaltfl che Nach der Best tigung wird die Route ge l scht Animation c Bet tigen Sie die Schaltfl che Die Route wird in de...

Page 22: ...prechenden Namen 2 GPS Info Angaben der genauen Koordinaten der Orts markierung 3 Bilder einf gen Sie k nnen Ihrer Ortsmarkierung Fotos zu weisen Bet tigen Sie die Schaltfl che W hlen Sie ein einsprec...

Page 23: ...legt h Route editieren Register Track Editor Wechseln Sie in den Register Track Editor Im Fenster wird die Route ohne Kartendarstellung angezeigt Durch die Symbole und k nnen Sie die An sicht vergr er...

Page 24: ...ie wie folgt vor W hlen Sie den Men punkt Photo Media Add Media Files From Folder oder bet ti gen Sie die Schaltfl che in der Men bersicht W hlen Sie den Ordner aus dem Sie Fotos hinzuf gen wollen Bes...

Page 25: ...lfte in der Registerkarte Media List angezeigt Sie k nnen auch mehrere Fotos markieren Strg oder Shift Taste l Fotos und GPS Daten GPS Daten den Fotos zuweisen Die GPS Informationen Breiten und L ngen...

Page 26: ...en der Fotos wird entspre chend ver ndert Anschlie end wird die Zu ordnung der Fotos zu den Wegpunkten aktualisiert n Google Earth Ansicht Um sich Ihre Route in Google Earth anzeigen zu lassen gehen S...

Page 27: ...die Sie exportieren wollen W hlen Sie einen entsprechenden Speicherort und best tigen Sie die Eingabe r Geschwindigkeit H henansicht Sie k nnen die Geschwindigkeit und die H he der jeweiligen Wegpunk...

Page 28: ...n punkt File Save Project Sollten Sie ein Projekt zum ersten Mal speichern werden Sie aufgefordert einen Speicherort anzu geben W hlen Sie einen entsprechenden Speicherort und best tigen Sie die Einga...

Page 29: ...verwertung zu Sie helfen damit zu vermeiden dass unter Umst nden belastende Stoffe in die Umwelt gelangen Batterien und Akkus Sie als Endverbraucher sind gesetzlich Batterieverordnung zur R ckgabe all...

Page 30: ...22 mm Gewicht ca 60 Gramm 17 Konformit tserkl rung DOC Hiermit erkl ren wir Conrad Electronic Klaus Conrad Stra e 1 D 92240 Hirschau dass sich dieses Ger t in bereinstimmung mit den grundlegenden Anf...

Page 31: ...37 10 Switch on the product 37 11 Connect product to Bluetooth device 37 12 Connect the product to the computer 38 13 GPS Photo Tagger program 39 a Program installation 39 b Activate program 39 c Con...

Page 32: ...p Export route as HTML file 51 q Export route 51 r Speed altitude view 51 s Store load projects 52 14 Maintenance and care 53 15 Disposal 53 16 Technical data 54 17 Declaration of Conformity DOC 54 Pa...

Page 33: ...rve these operating instructions Please read the operating instructions completely and observe the safety and op erating notices before using the product All company names and product names are tradem...

Page 34: ...in 3D maps e g Google Maps The supplied system components must not become damp or wet The GPS Logger is powered by the LI ION rechargeable battery supplied 3 7 V 1000 mAh This battery is charged usin...

Page 35: ...with the exclamation mark inside the triangle indicates particular hazards during handling operation or control This symbol denotes information provided to improve understanding of the procedures 5 Fe...

Page 36: ...ect operation or the safety of the product please consult a specialist Maintenance adjustments and repairs may only be carried out by a qualified specialist or a specialised repair shop Do not use thi...

Page 37: ...ch remained unanswered in these operating instruc tions please contact our technical advisory service Rechargeable batteries Keep rechargeable batteries out of the reach of children Please observe cor...

Page 38: ...pplied rechargeable battery into the product observing the correct polarity Slide the rechargeable battery compartment cover 6 back on until it engages 9 Charging If the rechargeable battery status LE...

Page 39: ...LED flashes briefly The parameters for saving the GPS position data can be modified in the GPS Photo Tagger program 11 Connect product to Bluetooth device Connecting this product to other Bluetooth de...

Page 40: ...ted glass Proximity to metallic conductive objects Broadband interferences e g in residential areas DECT telephones mobiles radio control led headphones radio controlled speakers radio controlled weat...

Page 41: ...ee and follow the instructions that appear on the screen To use all functions of the program you must have a working Internet con nection b Activate program Following installation you must activate th...

Page 42: ...for the USB connection manually This setting is rec ommended only for experienced user 3 Connect Connect the computer to the product only if the connection setting changes GPS Log Setting b The produ...

Page 43: ...km h for example the product will start saving the current GPS position from a speed of 20 km h The product will capture the current GPS position only when all set conditions are satisfied Data Log M...

Page 44: ...al degrees Track b 1 Here define the time in minutes that is to apply as a separating point for various routes Photo c 1 Photo time zone Set the time zones that correspond to the time zone settings of...

Page 45: ...photos is reduced for exporting to KMZ You can set the display quality here Display Language e Here you can set the language for the menus buttons and messages in the program e Display routes Make su...

Page 46: ...p view mouse wheel down You can select the display type using the symbols in the right hand corner top Map Display as street map Satellites Display of satellite images Terrain Combined street map and...

Page 47: ...sing sub menus Delete route b Mark out the route you require Press the button Following confirmation the route will be deleted Animation c Press the button The route will be displayed in the map in an...

Page 48: ...gn an appropriate name 2 GPS Info Data for precise coordination of the position marking 3 Add images You can assign photos to your position mark ing Press the button Select an appropriate photo and co...

Page 49: ...are created as place holders for photos h Edit route Track Editor tab Open the Track Editor tab The route will appear in the display without map You use the und symbols to zoom in and out Mark the way...

Page 50: ...ect the menu item Photo Media Add Me dia Files From Folder or press the button in the menu overview Select the folder from which you want to add photos Confirm the entry All photos from this folder ar...

Page 51: ...d in the right half of the window in the Media List tab You can also mark several photos Ctrl or Shift key l Photos and GPS data Assign GPS data to the photos The GPS information latitude longitude an...

Page 52: ...the entry The photo capture times are changed ac cordingly The assignment of photos to the waypoints is then updated n Google Earth view Proceed as follows to display your route in Google Earth Press...

Page 53: ...he route you want to export Select an appropriate storage location and confirm the entry r Speed altitude view You can display the speed and altitude of the waypoints concerned in the form of a dia gr...

Page 54: ...ect the File Save Project menu item If you are storing a project for the first time you will be prompted to enter a storage location Select an appropriate storage location and confirm the entry Load p...

Page 55: ...nfiltrating the environment Batteries and rechargeable batteries The end user is legally obliged Battery Regulation to return used batteries and rechargeable batteries Disposal in the domestic waste i...

Page 56: ...ions approx 74 x 44 x 22 mm Weight approx 60 g 17 Declaration of Conformity DOC We Conrad Electronic Klaus Conrad Stra e 1 D 92240 Hirschau hereby declare that this device adheres to the fundamental r...

Page 57: ...11 Raccorder le produit avec l appareil Bluetooth 64 12 Raccorder le produit l ordinateur 65 13 Programme GPS Photo Tagger 65 a Installer le programme 65 b Activer le programme 66 c Configurer le prod...

Page 58: ...chier HTML 78 q Exporter l itin raire de route 78 r Vitesse Vue d altitude 78 s Enregistrer charger les projets 79 14 Entretien et nettoyage 79 15 limination 80 16 Caract ristiques techniques 81 17 D...

Page 59: ...ce mode d emploi avant la mise en service du produit et respectez toutes les consignes d utilisation et de s curit Tous les noms d entreprises et appellations de produits contenus dans ce mode d empl...

Page 60: ...comme Google Maps par exemple Les composants syst me contenus dans la livraison ne doivent pas prendre l humidit ni tre mouill s L alimentation en tension du GPS Logger est r alis e via la batterie L...

Page 61: ...nt d exclamation dans un triangle est utilis lors de la pr sence de risques particuliers dans la manipulation l ex ploitation ou l utilisation Ce pictogramme attire l attention sur des informations qu...

Page 62: ...r le mode de fonctionnement ou sur la s curit de l appareil Les travaux d entretien d adaptation et de r paration doivent uniquement tre effectu s par un sp cialiste qualifi ou un atelier professionne...

Page 63: ...difier et ou de transformer le produit de votre propre chef Si vous aviez encore des questions auxquelles ce mode d emploi n a pas su r pondre nous vous prions de vous adresser notre service technique...

Page 64: ...t Poussez de nouveau le couvercle du compartiment de l accumulateur 6 jusqu ce que ce dernier s encliqu te 9 Charger Lorsque le t moin LED d tat de l accu s allume vous devez charger l accumulateur a...

Page 65: ...mulateur s allume 10 Allumer le produit Appuyez sur la touche ARR T MARCHE 5 et maintenez la enfonc e pour allumer le produit Le t moin LED d tat Bluetooth 2 clignote lentement 1 seconde MARCHE 3 seco...

Page 66: ...pend fortement des conditions environnantes Des probl mes de r ception peuvent se produire dans les situations suivantes Les signaux GPS sont bloqu s dans des tunnels Les recouvrements conduisent au m...

Page 67: ...B l ordinateur 13 Programme GPS Photo Tagger Avec le programme GPS Photo Tagger vous pouvez valuer et afficher les donn es de position GPS m moris es par le produit Une fonction suppl men taire est l...

Page 68: ...appara t dans laquelle vous devez entrer le code d autorisation Le code de validation du programme se trouve sur le couvercle du CD d ins tallation Apr s la confirmation de l entr e le programme est a...

Page 69: ...tres de connexion GPS Log Setting b Le produit m morise r guli rement la position du GPS avec la date et l heure actuelles Les intervalles de m morisation de donn es peuvent tre r gl s par le biais de...

Page 70: ...quement partir d une vitesse de 20 km h Le produit enregistre uniquement la position GPS actuelle lorsque toutes les conditions r gl es sont atteintes Data Log Memory d Vous voyez ici la sollicitation...

Page 71: ...inez ici le temps en minutes qui est applicable comme point de s paration pour diff rents itin raires Photo c 1 Photo time zone R glez les fuseaux horaires qui correspondent au r glage de fuseau horai...

Page 72: ...os est r duite pour l exportation vers KMZ Vous pouvez ici r gler la qualit d affichage Display Language e R glez ici la langue pour les menus les boutons et les messages du programme e Affichage d it...

Page 73: ...aut R duire la vue de la carte roulette de souris vers le bas avec les symboles dans dans le coin droit en haut vous pouvez choisir le type d affi chage SIM Affichage comme plan de ville Satellites Af...

Page 74: ...de l itin raire par le biais des sous rubriques Supprimer l itin raire b Marquez l itin raire correspondant Confirmez le bouton Apr s la confirmation l itin raire est sup prim Animation c Confirmez l...

Page 75: ...uez un nom correspondant 2 GPS Info mentions relatives aux coordonn es exactes du rep re de lieu 3 Ins rer des images vous pouvez affecter des photos au rep re de lieu Confirmez le bouton S lectionnez...

Page 76: ...iter l itin raire Onglet Track Editor Passez dans l onglet Track Editor Dans la fen tre l itin raire est affich sans repr sentation de carte De par les symboles et vous pouvez agrandir ou r duire la v...

Page 77: ...ez la rubrique de menu Photo Media Add Media Files From Folder ou confirmez le bouton dans la vue d ensemble du menu S lectionnez le dossier partir duquel les photos peuvent tre ajout es Confirmez l e...

Page 78: ...re dans l onglet Media List Vous pouvez galement marquer plusieurs photos touche Ctrl ou Maj l Photos et donn es GPS Attribuer des donn es GPS aux photos Les informations GPS degr de latitude et de lo...

Page 79: ...nfirmez l entr e Les temps d enregistrement des photos sont modifi s en correspondance L affectation des photos aux points d itin raire est ensuite actualis e n Vue Google Earth Pour afficher votre it...

Page 80: ...ute que vous souhaitez exporter S lectionnez un emplacement de m morisation correspondant et confirmez votre entr e r Vitesse Vue d altitude Vous pouvez repr senter la vitesse et l altitude des points...

Page 81: ...ment de m morisation correspondant et confirmez votre entr e Charger un projet S lectionnez la rubrique File Open Project S lectionnez un r pertoire correspondant et confirmez votre entr e 14 Entretie...

Page 82: ...ommateur final de res tituer toutes les piles et tous les accumulateurs us s ordonnance relative l limination des piles usag es Il est interdit de les jeter dans les ordures m nag res Les piles et acc...

Page 83: ...Dimensions env 74 x 44 x 22 mm Poids env 60 grammes 17 D claration de conformit DOC Conrad Electronic Klaus Conrad Strasse 1 D 92240 Hirschau Allemagne d clare que l appa reil est en conformit avec l...

Page 84: ...inschakelen 90 11 Product met Bluetooth apparaat verbinden 91 12 Product op de computer aansluiten 92 13 Programma GPS Photo Tagger 92 a Programma installeren 92 b Programma activeren 93 c Product con...

Page 85: ...d exporteren 105 q Reisroute exporteren 105 r Snelheid Hoogteprofiel 105 s Projecten opslaan laden 106 14 Onderhoud en reiniging 107 15 Afvalverwijdering 107 16 Technische gegevens 108 17 Conformiteit...

Page 86: ...n een ongevaar lijke werking te garanderen Lees voor de ingebruikstelling van het product de volledige gebruiksaanwijzing en neem alle bedienings en veiligheidsvoorschriften in acht Alle voorkomende b...

Page 87: ...en weer gegeven De in de leveringsomvang meegeleverde systeemonderdelen mogen niet vochtig of nat worden De stroomvoorziening van de GPS Logger geschiedt middels de meegeleverde LI ION accu 3 7V 1000...

Page 88: ...elektrische schok Het symbool met het uitroepteken in de driehoek wordt gebruikt als er bijzon dere gevaren zijn bij gebruik werking of bediening Dit symbool geeft informatie waardoor de procedures b...

Page 89: ...Raadpleeg een deskundige wanneer u vragen hebt betreffende de werking of veiligheid van het product Onderhouds instellings of reparatiewerkzaamheden mogen uitsluitend door een erkend technicus elektr...

Page 90: ...en en of veranderen van het product niet toegestaan Raadpleeg onze technische helpdesk wanneer u vragen hebt die niet in deze gebruiksaanwijzing worden beantwoord accu aanwijzingen Houd accu s buiten...

Page 91: ...juiste poolrichting in het product Schuif het deksel van het accuvakje 6 weer terug totdat deze vastklikt 9 Opladen Als de accustatus LED geel brandt moet u de accu opladen a Auto laadadapter Sluit he...

Page 92: ...licht de accustatus LED rood op 10 Product inschakelen Druk en houd de toets AAN UIT 5 gedurende ca 2 seconden ingedrukt om het product in te schakelen De Bluetooth status LED 2 knippert langzaam 1 s...

Page 93: ...t De GPS ontvangst is sterk afhankelijk van de omgevingsomstandigheden In de volgende situaties kunnen ontvangstproblemen ontstaan In tunnels worden GPS signalen geblokkeerd Afdekkingen leiden tot ond...

Page 94: ...van de mini USB kabel op uw computer aan 13 Programma GPS Photo Tagger Met het programma GPS Photo Tagger kunt u de door het product opgeslagen GPS positiegegeven beoordelen en weergeven Een overige f...

Page 95: ...hijnt een venster waarin u de vrijschakelcode moet invoeren De vrijschakelcode van het programma bevindt zich op de cover van de in stallatie CD Na het bevestigen van de invoer is het programma geacti...

Page 96: ...een wijziging van de ver bindingsinstelling GPS Log Setting b Het product slaat regelmatig de GPS positie met de huidige datum en tijd op In welke afstanden de positiegegevens worden opgeslagen kunt...

Page 97: ...ingesteld slaat het product de huidige GPS positie pas op bij een snelheid van 20 km uur Het product registreert de huidige GPS positie pas als aan alle ingestelde voor waarden wordt voldaan Data Log...

Page 98: ...weergegeven Track b 1 Hier definieert u de tijd in minuten die als scheidingspunt voor verschillende routes geldt Photo c 1 Photo time zone Stel de tijdzone in die overeenkomt met de tijdzone instelli...

Page 99: ...foto s wordt voor de export naar KMZ verminderd U kunt hier de weergavekwaliteit instellen Display Language e Stel hier de taal van de menu s knoppen en meldingen van het programma in e Routeweergave...

Page 100: ...ve verkleinen muiswieltje omlaag Met de symbolen in de rechterhoek boven kunt u de weergave selecteren Kaart Weergave als plattegrond van de stad Satellieten Weergave van satellietbeelden Terrein Geco...

Page 101: ...van de route wijzigen Route wissen b Markeer de overeenkomstige route Druk op de knop Na het indrukken van de knop wordt de route gewist Animation c Druk op de knop De route wordt in de kaart geanimee...

Page 102: ...e Voer een overeenkomstige naam in 2 GPS Info Gegevens van de juiste co rdinatie van de locatiemarkering 3 Foto s invoegen U kunt aan uw locatiemarkering foto s toeken nen Druk op de knop Selecteer ee...

Page 103: ...foto s opgeslagen h Route bewerken Tabblad Track Editor Selecteer het tabblad Track Editor In het venster wordt de route zonder agenda weergave weergegeven Met de symbolen en kunt u de weergave vergro...

Page 104: ...als volgt te werk Selecteer het menuoptie Photo Media Add Media Files From Folder of druk op de knop in het menuoverzicht Selecteer de map waaruit u de foto s wilt toevoegen Bevestig de invoer Alle fo...

Page 105: ...het tabblad Media List weergegeven U kunt ook meerdere foto s markeren Ctrl of Shift toets l Foto s en GPS gegevens GPS gegevens aan de foto s toewijzen De GPS informatie breedte en lengtegraad alsmed...

Page 106: ...metijden van de foto s wordt over eenkomstig gewijzigd Aansluitend wordt de toekenning van de foto s aan de wegpunten bijgewerkt n Google Earth weergave Om uw route in Google Earth te laten weergeven...

Page 107: ...ilt exporteren Selecteer een overeenkomstige opslaglocatie en bevestig de invoer r Snelheid Hoogteprofiel U kunt de snelheid en de hoogte van het desbetreffende wegpunt in de vorm van een diagram weer...

Page 108: ...eer de menuoptie File Save Project Als een project voor de eerste keer wordt opge slagen wordt u verzocht een opslaglocatie in te voeren Selecteer een overeenkomstige opslaglocatie en bevestig de invo...

Page 109: ...belastende stoffen eventueel in het milieu terechtkomen Batterijen en accu s U bent als eindverbruiker volgens de Wet Milieubeheer verplicht alle lege bat terijen en accu s in te leveren Verwijdering...

Page 110: ...4 x 22 mm Gewicht ca 60 gram 17 Conformiteitsverklaring DOC Hierbij verklaren wij Conrad Electronic Klaus Conrad Stra e 1 D 92240 Hirschau dat dit apparaat in overeenstemming is met de fundamentele ve...

Page 111: ...109...

Page 112: ...110...

Page 113: ...111...

Page 114: ...Changes in technology and equipment reserved Copyright 2010 by Conrad Electronic SE Information l gales Ce mode d emploi est une publication de la soci t Conrad Electronic SE Klaus Conrad Str 1 D 922...

Page 115: ...00086040bda indd 1 00086040bda indd 1 14 10 2009 8 53 16 Uhr 14 10 2009 8 53 16 Uhr...

Page 116: ...00086040bda indd 2 00086040bda indd 2 14 10 2009 8 53 17 Uhr 14 10 2009 8 53 17 Uhr...

Reviews: