Copyright
©
2018
congatec
AG
CAM_KIT_MIPI_13
2/4
1
Introduction
This guide gives a brief overview of the conga-CAM/MIPI and how to set it up.
1.1
Product Overview
The conga-CAM/MIPI—a congatec starter kit for two MIPI cameras—provides
manufacturers with instantly deployable smart camera platform. This platform
helps to simplify the development of smart camera solutions, reduces cost and
accelerates time to market.
The kit contains amongst other components, the conga-PA5/N3350-4G module.
The module features the Intel
®
5th generation Celeron
®
processor. With
6 W maximum TDP, the kit offers Ultra Low Power board with high computing
performance and outstanding graphics, in addition to a MIPI-CSI compliant camera
with a high-definition sensor.
The various features and capabilities the kit offers make it ideal for designing
compact, energy-efficient, performance-oriented and customizable smart camera
solutions.
The conga-CAM Kit/MIPI is for evaluation or development purposes only and is
provided "as is".
1.2
What is in the Package
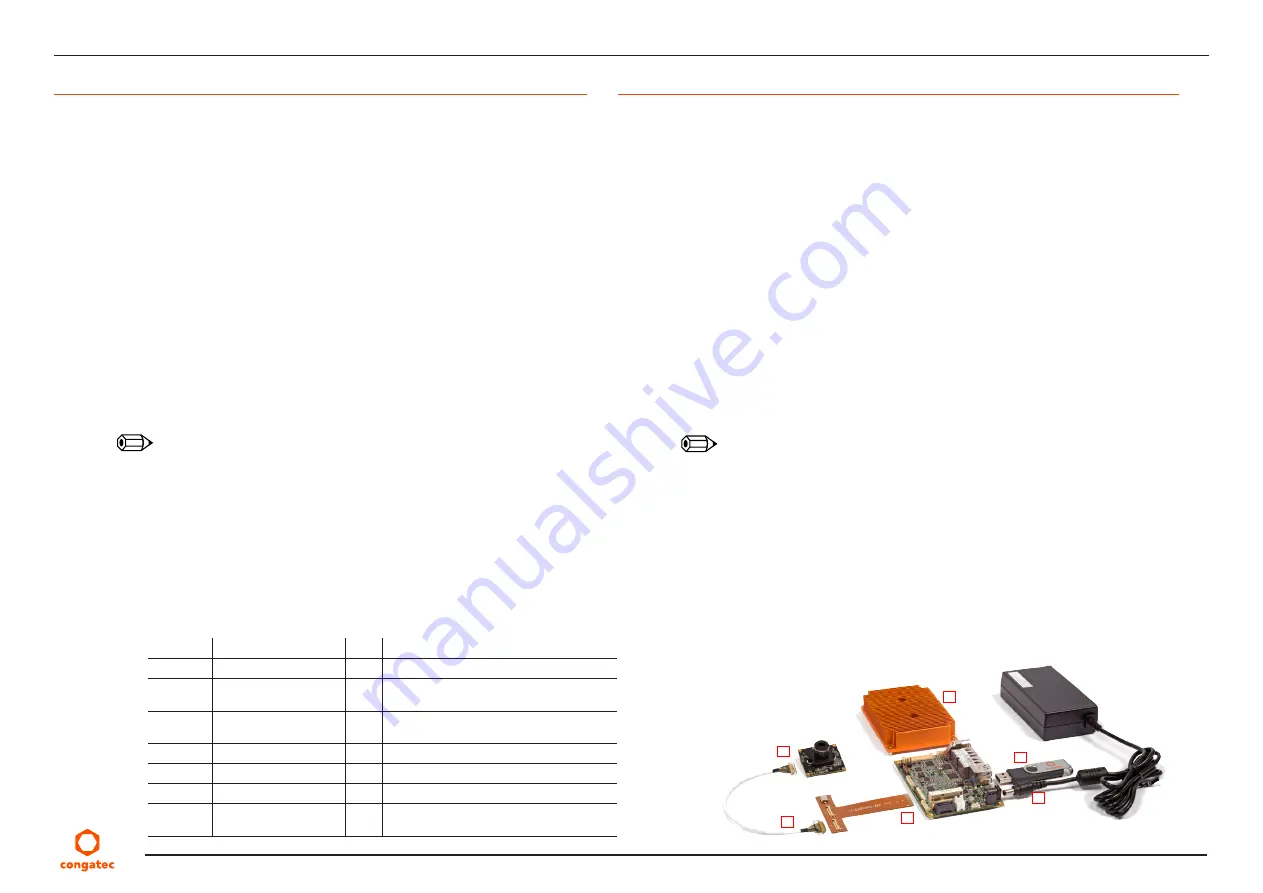
The conga-CAM/MIPI development kit (PN:077655) includes the following items:
Part No.
Item
Qty
Description
048121
conga-PA5/N3350-4G
1
congatec Single Board Computer
048152
conga-PA5/CSP-T
1
congatec passive cooling solution (threaded)
with four screws
44500036
LI-AR023Z-YUV-MIPI
1
Leopard Imaging MIPI-CSI2 Camera (HDR
video camera in pass through mode)
48000042
I-PEX cable FAW-1223-T1 1
Cable for camera-adapter connection
48000043
LI-QA50SA0-ADP v1.2
1
Camera adapter for conga-PA5
10000470
Power Supply Unit 60 W
1
Power supply (12V/5A with 5.5 x 2.5 mm plug)
10000240
USB 2.0 Flash Drive
1
USB stick with pre-configured Yocto BSP (test
image)
Note
2
Hardware Setup
Steps:
1. Attach the conga-PA5/CSP-T passive cooling solution to the module using the
supplied screws.
2. Connect one end of the I-PEX cable to the camera and the other end of the cable
to the camera adapter.
3. Connect the flat foil end of the camera adapter to the module, with the conductive
traces facing up.
4. Attach the USB stick containing pre-installed image.
5. Connect the power supply plug to the module and insert the power cord into a
convenient AC outlet.
Outcome:
a. the board boots from the pre-installed image on the USB stick.
b. login screen appears.
As soon as you plug the attached power supply to a power source, the conga-CAM/MIPI
powers up automatically.
6. Type
root
and press enter to log in.
7. Type
startx
to start the window's manager
8. Open a terminal:
–
run the camera script with the command
bash run_ar023z.sh
–
to switch between the open windows, use
ALT + TAB
keys
Note
1
2
2
3
4
5


