background image

BILL OF MATERIALS

Parts List

Required

Part #

Gate 1

6-Gate-01

Hinge Mounting Post

1

6-Gate-02

Latch Mounting Post

1

6-Gate-03

Hardware Pack

Required

Part #

#10 x 1-1/4” Screw

20

3-00-14C 

#7 x 1/2” Screw

8

3-Gate-01

Padlock

1

3-00-03

Gate Latch with Latch Bar

1

3-Gate-06

Gate Closer

1

3-Gate-07

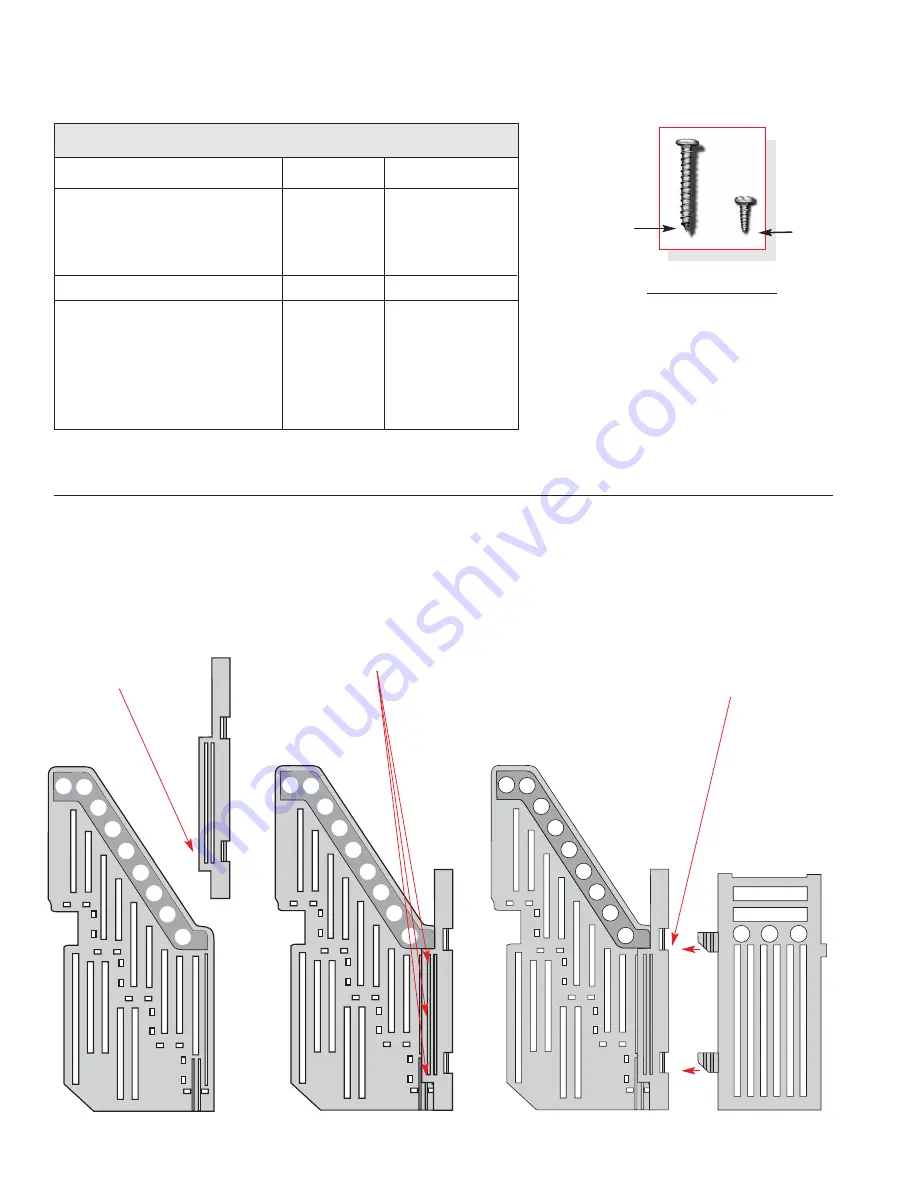
Step #1

Spread open the flange of the
hinge mounting post and slide
it down over the 

right

side

panel until the bottom edge of
the hinge post and the bottom
edge of the side
panel are even.

Step #2

Fasten the hinge post to the
side panel using six of the 
#10 x 1-1/4” self-tapping
screws at the pre-marked
spots on each side of the
hinge post (3 per side).

Step #3

Slide the open gate hinge
through the hinge post pin
opening and wrap the gate
hinge around the hinge pin.
Fasten the hinge at the four
pre-marked spots using the 
#7 x 1/2” self-tapping screws
(4 per hinge).

#10 x 1-1/4” 
Self-tapping 

Screw

#7 x 1/2”

Self-tapping 

Screw

2

Tools Required

Cordless Drill

1/16 Drill Bit

Phillips Screwdriver Bit

Silicone Spray or

Spray Lubricant

POOL ENTRY SYSTEM GATE ASSEMBLY

MODEL # PES-G

Summary of Contents for PES-G

Page 1: ...IVE TO HOMEOWNER MODEL PES G GATE ASSEMBLY Can be used on Pool Entry System SIG System and STEP Enclosure Kit ASSEMBLY AND INSTALLATION MANUAL WARNING GATE MUST BE PADLOCKED WHEN NOT IN USE CONFER PLASTICS INC Now with Automatic Gate Closer NEW ...

Page 2: ...st and the bottom edge of the side panel are even Step 2 Fasten the hinge post to the side panel using six of the 10 x 1 1 4 self tapping screws at the pre marked spots on each side of the hinge post 3 per side Step 3 Slide the open gate hinge through the hinge post pin opening and wrap the gate hinge around the hinge pin Fasten the hinge at the four pre marked spots using the 7 x 1 2 self tapping...

Page 3: ...closer in the indented portion provided on the hinge post Follow the directions provided with the gate closer package DO NOT use the slide plate It is for metal wood finish wear and will not work with our gravity hinge Step 5 Install the latch on the mounting block located on the upper portion of the latch using four 4 10 x 1 1 4 screws 3 WARNING GATE MUST BE LOCKED WHEN POOL IS NOT IN USE Note Sp...

Page 4: ...pment DANGER Use a cordless drill for assembly and installation Never use an electric drill in or around the pool CP PES G 1M 01 08 4 CONFER PLASTICS INC LIMITED PRO RATED WARRANTY Confer Plastics Inc warrants their swimming pool ladders to be free from defects in workmanship for one year from date of purchase After the first year the cost to replace a part is as follows MODEL PES G 2nd Year 20 3r...

Reviews: