background image

48

49

EN

EN

VP5130 | VP5131 | VP5132

VP5130 | VP5131 | VP5132

CHECKING THE FULLNESS OF DUST CONTAINER

If the suction power of the vacuum cleaner decreases even when the floor nozzle is raised above the floor, empty the 
dust container immediately.

Warning

: if the suction power is low even after the dust container is emptied, there may be several reasons:

-  Some of the air passages (hose, telescopic tube, suction opening, floor nozzle or other attachments) are blocked.
-  The air inlet filter in the dust container is dirty or old. It must be cleaned or replaced with a new one.
-  The air outlet filter is dirty or old. It must be cleaned or replaced with a new one.

Check each of these options and fix the problem before using the appliance again. If you are unable to identify the cause 
of the problem, take the appliance to your nearest service centre. Never use the appliance if the suction power is low, as 
this could irreparably damage the motor.

MAINTENANCE

It is recommended to empty the dust container and clean the vacuum cleaner filters after each use of the vacuum 
cleaner.

EMPTYING THE DUST CONTAINER

1.  Unplug the vacuum cleaner, pull the hose out of the suction opening.
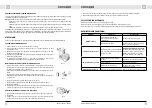
2.  Press the latch on the vacuum cleaner body (Fig. 2) and remove the dust container 

upwards.

3.  Press the empty button, remove the lid of the dust container (Fig. 3) and empty the 

dust into the waste bin.

4.  Place the lid back on the dust container, press down the lid, you must hear the lid 

latch click. 

5.  After closing the container, place it back into the vacuum cleaner. Make sure that 

the container is positioned properly. You must hear the click of the handle latch. 

DUST CONTAINER FILTER REPLACEMENT AND CLEANING
• 

The filters should be cleaned or replaced with visible soiling or when the suction 
power of the vacuum cleaner drops. Check them after each use of the vacuum 
cleaner.

• 

To avoid damaging the vacuum cleaner, do not use it without properly fitted filters.

• 

Unplug the vacuum cleaner before replacing the filters.

• 

You can purchase suitable filter types from your dealer or order from the 
manufacturer.

1.  Remove the dust container from the vacuum cleaner (Fig. 2).
2.  Remove the cartridge with the SMS fabric filter and the foam filter (Fig. 3).
3.  Remove the foam filter.
4.  The filters can be cleaned by tapping. If heavily soiled, they can be washed in 

lukewarm water and left to dry properly.

CHECKING AND REPLACEMENT OF THE AIR OUTLET FILTER

1.  Press to open the air outlet grille at the back of the vacuum cleaner and remove it 

(Fig. 4).

2.  Remove the filter.
3.  The filter can be cleaned by tapping. If heavily soiled, it can be washed in lukewarm 

water and left to dry properly.

4.  Insert a cleaned or new air outlet filter and push gently, you must hear the latch 

click. 

5.  Insert an air outlet grille and push gently, you must hear the latch click.

Fig. 3

Fig. 4

Fig. 2

CLEANING AND MAINTENANCE

Accessories and vacuum cleaner can be cleaned with a damp cloth.
Do not immerse the power cord, plug or appliance in water or any other liquid. 
Do not use aggressive substances such as solvents or abrasives for cleaning!

TROUBLESHOOTING

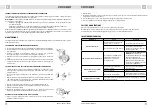
Problem

Cause

Remedy

The motor is not working

The plug inserted incorrectly or 
insufficiently in the wall outlet.

Check connection of the plug.

The wall outlet is not energized.

Check the presence of voltage, e.g. 
with another appliance.

The motor stopped working

Poor or too low airflow, thermal 
motor protection has tripped.

Unplug the power cord.

 Check 

and clear the intake and exhaust 
air passage, filter cleanliness, and 
if necessary, replace the dust bag. 
Allow the vacuum cleaner to cool 
down.

Reduction of suction power

Full or clogged dust container.

Empty and clean the dust container.

The filters are clogged.

Clean or replace the filters.

Clogged nozzle, tubes or hose.

Check and clear the intake and 
exhaust air passage.

The vacuum cleaner is warming 

up

Warming up of the vacuum cleaner during operation is normal, it is not 
a malfunction.

Summary of Contents for VP5130

Page 1: ...ač Odkurzacz podłogowy Padlóporszívó Grīdas putekļsūcējs Floorvacuum cleaner VP5130 VP5131 VP5132 CZ RO EN SK PL HU LV DE FR IT ES Fußbodenstaubsauger Aspirateur de sol Aspirapolvere da pavimento Aspiradora de piso Aspirator pardoseli ...

Page 2: ...potřebič ze zásuvky elektrického napětí není li používán Při vypojování spotřebiče ze zásuvky elektrického napětí nikdy netahejte za přívodní kabel ale uchopte zástrčku a tahem ji vypojte Nedovolte dětem a nesvéprávným osobám se spotřebičem manipulovat používejte ho mimo jejich dosahu Osoby se sníženou pohybovou schopností se sníženým smyslovým vnímáním s nedostatečnou duševní způsobilostí nebo os...

Page 3: ... horký popel Nepoužívejte spotřebič ve vlhkých místnostech nevysávejte vlhké věci nebo kapaliny hořlavé kapaliny jako je benzin a nepoužívejte spotřebič v prostorách kde se tyto látky mohou vyskytovat Nikdy nevysávejte bez použití prachového sáčku a filtrů vysavače Při každém použití spotřebiče se ujistěte že jsou prachový sáček a filtry vysavače správně nasazeny Neponořujte přívodní kabel zástrčk...

Page 4: ...uňte teleskopickou trubku na nástavec hadice a lehce pootočte 3 Prodloužení teleskopické trubky Stiskněte plastovou západku a vytáhněte menší trubku směrem ven 4 Nasazení podlahové hubice na teleskopickou trubku Nasuňte teleskopickou trubku do podlahové hubice a lehce pootočte Klapka na hubici slouží k přepnutí podlahové hubice na kartáčování pro hladké podlahy nebo na hladké vysávání pro koberce ...

Page 5: ...í li se vám zjistit příčinu problému dopravte spotřebič do nejbližšího servisního střediska Nikdy nepoužívejte spotřebič pokud je nízký sací výkon mohli byste nenapravitelně poškodit motor ÚDRŽBA Doporučujeme preventivně po každém použití vysavače vysypat prachovou nádobu a vyčistit filtry vysavače VYPRÁZDNĚNÍ PRACHOVÉ NÁDOBY 1 Odpojte vysavač ze sítě vysuňte hadici ze sacího otvoru 2 Stiskněte zá...

Page 6: ...prajeme vám aby ste boli s naším výrobkom spokojní po celý čas jeho používania Pred prvým použitím si prosím pozorne preštudujte celý návod na obsluhu a dobre ho odložte Zabezpečte aby všetci ktorí budú tento výrobok používať boli oboznámení s týmto návodom Technické parametre Napätie 220 240 V 50 60 Hz Príkon 850 W Hladina akustického výkonu 79 dB DÔLEŽITÉ BEZPEČNOSTNÉ UPOZORNENIA Nepoužívajte sp...

Page 7: ...garety zápalky a horúci popol Spotrebič nepoužívajte vo vlhkých miestnostiach nevysávajte vlhké predmety ani kvapaliny horľavé kvapaliny ako je benzín a nepoužívajte spotrebič v priestoroch kde sa tieto látky môžu vyskytovať Nikdy nevysávajte bez použitia vrecúška na prach a filtrov vysávača Pri každom použití spotrebiča sa ubezpečte že vrecúško na prach a filtre vysávača sú správne nasadené Prívo...

Page 8: ...c hadice Teleskopickú rúrku nasaďte na násadec hadice a zľahka pootočte 3 Predĺženie teleskopickej rúrky Stlačte plastovú západku a menšiu rúrku vytiahnite smerom von 4 Nasadenie podlahovej hubice na teleskopickú rúrku Teleskopickúrúrkunasaďtedopodlahovejhubiceazľahkapootočte Klapkanahubicislúžinaprepnutiepodlahovej hubice na kefovanie pre hladké podlahy alebo na hladké vysávanie pre koberce PRÍSL...

Page 9: ...z správne nasadených filtrov Pred výmenou filtrov vysávač odpojte zo zásuvky elektrického napätia Vhodné typy filtrov môžete kúpiť u vášho predajcu alebo objednať u výrobcu 1 Vyberte nádobu na prach z tela vysávača obr 2 2 Vyberte kazetu s filtrom s SMS textíliou a molitanovým filtrom obr 3 3 Vyberte molitanový filter 4 Filtre možno vyčistiť vyklepaním Keď sú silne znečistené možno ich umyť vo vla...

Page 10: ...ważne przeczytanie całej instrukcji obsługi oraz zachowanie jej na przyszłość Należy zadbać o to aby także inne osoby które będą obchodziły się z produktem zapoznały się z niniejszą instrukcją Parametry techniczne Napięcie 220 240 V 50 60 Hz Pobór mocy 850 W Poziom mocy akustycznej 79 dB WAŻNE PRZESTROGI DOTYCZĄCE BEZPIECZEŃSTWA Nie wolno korzystać z urządzenia w sposób inny niż opisany w niniejsz...

Page 11: ...osy zapałki lub gorący popiół Nie wolno używać urządzenia w wilgotnych pomieszczeniach nie wolno odkurzać wilgotnych przedmiotów lub cieczy jak również cieczy łatwopalnych takich jak benzyna Nie wolno używać urządzenia w pomieszczeniach w których takie substancje mogą występować Nigdy nie wolno odkurzać bez użycia worka na kurz i filtrów odkurzacza Podczas używania urządzenia należy każdorazowo up...

Page 12: ...pową na końcówkę węża i lekko obróć nią 3 Przedłużenie rury teleskopowej Naciśnij zapadkę plastikową i wyjmij mniejszą rurę na zewnątrz 4 Założenie dyszy podłogowej na rurę teleskopową Zasuń rurę teleskopową do dyszy podłogowej i lekko obróć nią Za pomocą klapki na dyszy można włączyć funkcję szczotki na dyszy podłogowej do gładkich podłóg albo ją wyłączyć aby odkurzać gładko do dywanów AKCESORIA ...

Page 13: ...o bez prawidłowo założonych filtrów Przed wymianą filtrów odłącz odkurzacz od gniazda elektrycznego Odpowiednie typy filtrów możesz zakupić u Twojego sprzedawcy albo zamówić u producenta 1 Wyciągnij pojemnik na kurz z korpusu odkurzacza Rys 2 2 Wyciągnij kasetę z filtrem i materiałem SMS oraz filtrem piankowym Rys 3 3 Zdejmij filtr piankowy 4 Filtry można oczyścić poprzez otrząsanie Jeśli są mocno...

Page 14: ...ÁS Köszönjük hogy megvásárolta ezt a Concept márkájú készüléket és kívánjuk hogy használata során végig elégedett legyen termékünkkel Az első használat előtt figyelmesen tanulmányozza át az egész használati útmutatót és őrizze meg Gondoskodjon róla hogy a terméket kezelő valamennyi személy megismerje az útmutató tartalmát Műszaki adatok Feszültség 220 240 V 50 60 Hz Teljesítményfelvétel 850 W Zajs...

Page 15: ...edves helyiségekben ne porszívózzon nedves tárgyakat vagy folyadékokat gyúlékony folyadékokat pl benzint és ne használja a készüléket olyan helyeken ahol ilyen anyagok előfordulhatnak Soha ne porszívózzon porzsák és szűrő nélkül A készülék minden használata előtt ellenőrizze hogy a porszák és a szűrők megfelelően vannak e elhelyezve Se a tápkábelt se a csatlakozót se a készüléket ne merítse vízbe ...

Page 16: ...kihúzható csövet a csőtoldalékra és enyhén fordítsa el 3 A kihúzható cső meghosszabbítása Nyomja meg a műanyagreteszt és húzza kifelé a kisebbik csövet 4 Tegye a padlószívófejet a kihúzható csőre Illessze a kihúzható csövet a padlószívófejre és enyhén fordítsa el A szívófejen lévő retesszel kapcsolhatja át a padlószívófejet kefélésre puha talaj esetén vagy sima porszívózásra szőnyegen TARTOZÉKOK A...

Page 17: ...ztett szűrők és szűrőtartó nélkül A szűrő cseréje előtt a porszívót kapcsolja ki és húzza ki a konnektorból Megfelelő típusú szűrőket az eladójánál vásárolhat vagy a gyártótól rendelhet 1 Vegye ki a portartályt a porszívó házából 2 ábra 2 Vegye ki az SMS szövetet és molitán szűrőt tartalmazó kazettát 3 ábra 3 Vegye le a molitánszűrőt 4 A szűrőket ütögetéssel lehet tisztítani Ha erősen szennyezette...

Page 18: ...ateicamies par šīs Concept ierīces iegādi Ceram ka būsiet apmierināti ar šo izstrādājumu visu tā izmantošanas laiku Pirms lietošanas rūpīgi izlasiet šo lietošanas instrukciju un uzglabājiet to drošā vietā lai nepieciešamības gadījumā varētu pārlasīt Nodrošiniet lai arī citi cilvēki kuri izmantos šo ierīci pirms tās lietošanas būtu iepazinušies ar norādījumiem Tehniskie dati Spriegums 220 240 V 50 ...

Page 19: ...iemēram cigaretes sērkociņus vai karstus pelnus Nelietojiet ierīci mitrās telpās Netīriet ar putekļusūcēju slapjus objektus šķidrumus vai viegli uzliesmojošus šķīdumus piemēram benzīnu un neizmantojiet ierīci telpās kur šādas vielas var rasties Nekad neizmantojiet ierīci bez putekļu maisiņa un putekļsūcēja filtriem Katrreiz izmantojot putekļsūcēju vienmēr pārliecinieties ka tā putekļu maisiņš un f...

Page 20: ...es adapteram Ievietojiet teleskopisko cauruli caurules adapterā un nedaudz pagrieziet 3 Teleskopiskās caurules izbīdīšana Nospiediet plastmasas aizbīdni un izvelciet mazāko cauruli uz āru 4 Grīdas tīrīšanas piederuma ierīkošana uz teleskopiskās caurules Ievietojiet teleskopisko cauruli grīdas tīrīšanas piederumā un mazliet pagrieziet Sprauslas vārsts ļauj iestatīt grīdas tīrīšanas piederumu birstē...

Page 21: ...iltriem Pirms filtru maiņas atvienojiet putekļsūcēju no elektrotīkla Piemēroti filtru tipi ir pieejami pie vietējā mazumtirgotāja vai tos var pasūtīt pie ražotāja 1 Izņemiet putekļu tvertni no putekļsūcēja korpusa 2 att 2 Izņemiet kasetni ar filtru ar SMS audumu un molitāna filtru 3 att 3 Izņemiet putuplasta filtru 4 Filtrus var iztīrīt izkratot tos Ja filtri ir ļoti netīri tos var mazgāt remdenā ...

Page 22: ...you for purchasing a Concept product We wish you much joy with your new appliance every day you use it Pleasereadtheinstructionmanualcarefullybeforeinitialuse Torefertothismanualanytimeyouneedto werecommend you to keep it in a safe place And please pass it to any future owner of the appliance Technical specifications Voltage 220 240 V 50 60 Hz Input 850 W Sound performance level 79 dB IMPORTANT SA...

Page 23: ...e in rooms with increased air humidity do not vacuum flammable liquids such as petrol and do not use the appliance in rooms where these substances may be present Never vacuum without using the vacuum cleaner dust bag and filters Every time you use the appliance make sure the vacuum cleaner dust bag and filters are properly installed Do not immerse the power cord plug or appliance in water or any o...

Page 24: ...sion and turn slightly 3 Extending the telescopic tube Press the plastic latch and pull the smaller tube out 4 Attaching the floor nozzle to the telescopic tube Insert the telescopic tube into the floor nozzle and turn slightly The flap on the nozzle is used to switch the floor nozzle to brushing for smooth floors or smooth vacuuming for carpets ACCESSORIES The following accessories are included i...

Page 25: ...the vacuum cleaner do not use it without properly fitted filters Unplug the vacuum cleaner before replacing the filters You can purchase suitable filter types from your dealer or order from the manufacturer 1 Remove the dust container from the vacuum cleaner Fig 2 2 Remove the cartridge with the SMS fabric filter and the foam filter Fig 3 3 Remove the foam filter 4 The filters can be cleaned by ta...

Page 26: ... change them DANKSAGUNG Vielen Dank dass Sie ein Produkt der Marke Concept angeschafft haben Wir wünschen Ihnen dass Sie mit unserem Produkt über seine gesamte Gebrauchsdauer zufrieden sind LesenSiesichvordemerstenGebrauchdieganzeBedienungsanleitungsorgfältigdurchundbewahrenSiediesedannauf StellenSiesicher dassauchanderePersonen diediesesProduktbehandelnwerden sichmitdieserGebrauchsanweisung vertr...

Page 27: ...mt Saugen Sie nichts Brennendes wie Zigaretten Streichhölzer oder heiße Asche Nutzen Sie das Gerät in keinen feuchten Räumen saugen Sie keine feuchten Sachen und keine Flüssigkeiten keine brennbaren Flüssigkeiten wie Benzin und nutzen Sie das Gerät in den Räumen nicht wo diese Stoffe auftreten können Führen Sie das Staubsaugen niemals ohne Staubbeutel und ohne Staubsaugerfilter durch Überzeugen Si...

Page 28: ... Sie es leicht um 3 Verlängerung des Teleskoprohrs Drücken Sie die Kunststoffklinke und ziehen Sie das kleinere Rohr nach außen 4 Anbringen der Bodendüse an das Teleskoprohr Stecken Sie das Teleskoprohr in die Bodendüse ein und drehen Sie es leicht um Klappe auf der Düse dient zum Umschalten der Bodendüse zwischen Bürsten für glatte Oberflächen und glattem Staubsaugen für Teppiche ZUBEHÖR Einen Pa...

Page 29: ...ngssteckdose bevor die Filter ersetzt werden Geeignete Filtertypen können Sie bei Ihrem Händler kaufen oder beim Hersteller bestellen 1 Nehmen Sie den Staubbehälter aus dem Körper des Staubsaugers heraus Abb 2 2 Nehmen Sie die Kassette mit dem Filter mit dem SMS Gewebe und mit dem Schaumstofffilter heraus Abb 3 3 Nehmen Sie den Schaumstofffilter ab 4 Die Filter können durch Ausklopfen gereinigt we...

Page 30: ...ons d avoir acheté le produit de la marque Concept et nous espérons qu il vous apportera votre entière satisfaction pendant son utilisation Lire attentivement le manuel d emploi avant la première utilisation et le conserver Faire prendre connaissance du manuel d emploi par les autres personnes pouvant manipuler le produit Caractéristiques techniques Tension 220 240 V 50 60Hz Puissance 850 W Niveau...

Page 31: ...u de la cendre chaude Ne pas utiliser l appareil dans des locaux humides ne pas aspirer d objets humides de liquides de liquides inflammables tels que l essence et ne pas utiliser l appareil dans des locaux pouvant contenir de tels produits Ne jamais aspirer sans sacs à poussière ou filtres Avant de commencer à utiliser l aspirateur s assurer que le filtre est bien installé Ne jamais plonger le co...

Page 32: ...ut du tuyau et le tourner légèrement 3 Rallongement du tube télescopique Appuyer sur le loquet en plastique et tirer le petit tuyau vers l extérieur 4 Fixation du suceur brosse sur le tube télescopique Faire glisser le tube télescopique sur le suceur et le tourner légèrement Le clapet permet de changer la position pour brossage pour les sols lisses ou aspiration des tapis position sans brosse ACCE...

Page 33: ...aspirateur de la prise secteur Contacter votre revendeur ou le fabricant de l appareil pour acheter le type de filtre approprié 1 Retirer le bac à poussière du corps de l aspirateur Fig 2 2 Retirer la cartouche à filtre en tissu SMS et filtre en mousse Fig 3 3 Retirez le filtre en mousse 4 Les filtres peut être nettoyé en le tapotant S il est très sale il peut être lavé à l eau tiède il est import...

Page 34: ...mation préalable RINGRAZIAMENTO Grazie per aver acquisito il prodotto di marchio Concept e vi auguriamo che vi dia la massima soddisfazione per tutta la durata della sua vita utile Si consiglia di leggere attentamente l intero manuale d uso prima di procedere al primo uso dell apparecchio stesso Conservare bene il manuale d uso Provvedere che tutte le persone addette all uso del prodotto facciano ...

Page 35: ... gli oggetti ardenti quali mozziconi fiammiferi o ceneri Non utilizzare l apparecchio nelle stanze umide non aspirare oggetti umidi liquidi infiammabili quale benzina e non utilizzare l apparecchio nei locali dove liquidi infiammabili possono trovarsi Non utilizzare mai l aspirapolvere senza sacchetto raccoglipolvere e o senza filtri In occasione di ogni uso assicurarsi che il sacchetto raccoglipo...

Page 36: ...sul tubo flessibile e girare leggermente 3 Prolungamento del tubo telescopico Premere il cricco in plastica ed estrarre fuori il tubo di diametro più piccolo 4 Attacco della bocchetta pavimento sul tubo telescopico Inserire la bocchetta pavimento sul tubo telescopico e girare leggermente La serranda sul tubo serve per cambiare la funzione della bocchetta pavimento tra la spazzola per pavimenti lis...

Page 37: ...tuzione dei filtri staccare l apparecchio dalla rete I tipi adatti dei filtri sono reperibili presso il venditore dell aspirapolvere oppure può essere ordinato direttamente al produttore 1 Estrarre il contenitore raccoglipolvere dal corpo dell aspirapolvere Fig 2 2 Estrarre la cartuccia con filtro con tessuto SMS e con filtro in espanso Fig 3 3 Rimuovere il filtro in espanso 4 Pulire filtro sbatte...

Page 38: ...lative specifiche tecniche senza preavviso AGRADECIMIENTO Gracias por comprar este producto de la marca Concept y esperamos que quede satisfecho con él durante todo el tiempo que lo use Antes de usar el producto lea con cuidado todo el manual y luego guárdelo Asegúrese de que las demás personas que vayan a utilizar el producto se familiaricen con el presente manual Parámetros técnicos Tensión 220 ...

Page 39: ... ambientes húmedos no aspire líquidos inflamables como gasolina y no use el artefacto en espacios en donde estas sustancias podrían encontrarse No utilice la aspiradora sin bolsa y filtros Antes de cada uso verifique que la bolsa y los filtros estén en su lugar Nosumerjaelcable elenchufeoelartefactoenaguauotrolíquido Controle regularmente el artefacto y el cable por daños No encienda el artefacto ...

Page 40: ...a manguera Inserte el tubo telescópico en el cabezal de la manguera y gire ligeramente 3 Extender el tubo telescópico Presione el pestillo de plástico y tire del tubo más pequeño 4 Instalar la boquilla de piso en el tubo telescópico Inserte el tubo telescópico en la boquilla y gire ligeramente El pestillo sirve para activar el cepillo de la boquilla para pisos suaves o para aspirado suave para alf...

Page 41: ...tros no están bien instalados Antes de cambiar los filtros desenchufe la aspiradora Puede adquirir un filtro adecuado con su proveedor o pedirlo al fabricante 1 Retire el colector de polvo Fig 2 2 Retire el cartucho de filtro de tela SMS y el filtro de espuma Fig 3 3 Retire el filtro de espuma 4 El filtro puede se puede limpiar sacudiéndolo Si está demasiado sucio se lo puede limpiar con agua tibi...

Page 42: ...trupeîntreaga durată de utilizare a acestuia Înainte de prima utilizare citiți cu atenție și în întregime manualul de utilizare și păstrați l pentru o consultare ulterioară Asigurați văcășicelelaltepersoanecarevorfolosiprodusulsuntfamiliarizatecuinstrucțiunileprezentateînprezentulmanual Parametri tehnici Tensiune 220 240 V 50 60 Hz Consum de putere 850 W Nivel acustic 79 dB INDICAȚII IMPORTANTE PR...

Page 43: ... folosiți aparatul în spații încăperi umede nu aspirați obiecte umede sau lichide lichide inflamabile precum benzina și nu folosiți aparatul în zonele unde se pot afla asemenea substanțe Nu aspirați niciodată fără folosirea sacului de praf sau și a filtrelor aspiratorului Înainte de fiecare folosire a aparatului asigurați vă că sacul de praf și filtrele aspiratorului sunt instalate corect Nu cufun...

Page 44: ...copic pe adaptorul furtunului și rotiți ușor 3 Prelungirea tubului telescopic Apăsați clichetul de plastic și trageți tubul mai mic înspre afară 4 Montarea duzei pentru pardoseli pe tubul telescopic Introduceți tubul telescopic în duza pentru pardoseli și rotiți ușor Clapa de pe duză este servește la comutarea duzei pentru pardoseli pe periere pentru pardoseli netede sau pe aspirare netedă pentru ...

Page 45: ...ele instalate corect Înaintea schimbării filtrelor deconectați aspiratorul de la rețeaua electrică Tipurile potrivite de filtre le puteți cumpăra de la vânzătorul dvs sau le puteți comanda de la producător 1 Scoateți recipientul pentru praf din corpul aspiratorului Fig 2 2 Scoateți caseta cu filtru și textil SMS și filtru din burete Fig 3 3 Scoateți filtrul din burete 4 Filtrele se pot curăța prin...

Page 46: ...pentru reciclarea echipamentelor electrice și electronice Prin asigurarea eliminării corecte a acestui produs veți contribui la prevenirea impactului negativ asupra mediului și a sănătății umane care ar fi cauzate prin eliminare necorespunzătoare Eliminarea trebuie efectuată în conformitate cu reglementările privind gestionarea deșeurilor Informații mai detaliate privind reciclarea acestui produs ...

Page 47: ...bu reklamačního nároku Vyřízení reklamace Jedná li se o odstranitelnou vadu má spotřebitel právo na bezplatné včasné a řádné odstranění vady Není li to vzhledem k povaze vady neúměrné může spotřebitelpožadovatdodánínovéhovýrobkubezvad výměnu nebo týká li se vada jen součásti výrobku výměnu takové součásti Je li však požadavek na výměnu výrobku nebo jeho součásti vzhledem k povaze vady neúměrný zej...

Page 48: ...rávo na bezplatné včasné a riadne odstránenie vady Ak to nie je vzhľadom k povahe vady neúmerné môže spotrebiteľ požadovať dodanie nového výrobku bez vád výmenu alebo ak sa týka vada len súčasti výrobku výmenu takej súčasti Ak je však požiadavka na výmenu výrobku alebo jeho súčasti vzhľadom k povahe vady neúmerná najmä ak je možné vadu odstrániť bez zbytočného odkladu má spotrebiteľ právo na bezpl...

Page 49: ...go terminowego i właściwego usunięcia wady W przypadku wystąpienia istotnej wady dla funkcjonowania produktu konsument może żądać dostarczenia nowego produktu bez wad wymiana lub jeśli dotyczy to tylko elementu produktu wymianę takiego elementu Jednakże jeżeli możliwe jest usunięcie wady bez zbędnej zwłoki żądanie wymiany produktu lub jego części z uwagi na charakter wady nie ma zastosowania a kon...

Page 50: ...málónak kiszámlázza a reklamáció jogosultságának kivizsgálásával valamint megoldásával kapcsolatos elengedhetetlen költségeket A termék díjmentes javítására ill a termék visszaváltására való jog nem érvényesíthető az alábbi esetekben ha a termék használati utasításában feltüntetett telepítési üzemeltetési és kezelési feltételeket nem tartották be ha a meghibásodás mechanikai hő vagy vegyi sérülés ...

Page 51: ...izdevumiem kas ir radušies noskaidrojot sūdzības pamatojumu Tiesības uz izstrādājuma bezmaksas labošanu respektīvi izstrādājuma atdošanu nav iespējams izmantot šādos gadījumos ja nav tikuši ievēroti instalācijas ekspluatācijas vai apkalpes nosacījumi kas ir norādīti izstrādājuma lietošanas instrukcijā ja bojājums ir radies mehāniskas termiskas vai ķīmiskas iedarbības īssavienojuma vai elektrotīkla...

Page 52: ...d the user has the right to have the defect duly removed free of charge on a timely basis Where such a procedure is not reasonable with regard to the nature of the defect the user may require to be supplied a new defect free product replacement or where the defect applies to a part of the product only replacement of the part concerned However if replacement of the product or any part thereof is no...

Page 53: ...uches Reklamationsverfahren Kann der reklamierte Mangel beseitigt werden hat der Verbraucher das Recht auf eine kostenlose zeit und ordnungsgemäße Beseitigung des Mangels Sofern dies im Hinblick auf den Charakter des Mangels nicht unangemessen ist kann der Verbraucher die Lieferung einer neuen mangelfreien Sache oder die Lieferung der fehlenden Sache fordern Austausch Kann der Mangel jedoch ohne u...

Page 54: ... dans un délai prévu Si cela n est pas disproportionné en tenant compte la nature du défaut le consommateur a le droit de demander une livraison d un nouveau produit sans vice remplacement ou si le défaut ne concerne qu une partie du produit demander le changement de cette dernière Si la demande du remplacement du produit et de sa partie est disproportionnée en tenant compte la nature du défaut no...

Page 55: ...Se considerata la natura del difetto non si tratta di una pretesa inadeguata l utente può richiedere la fornitura di un prodotto privo dei difetti la sostituzione oppure se il difetto interessa solo un elemento concreto del prodotto la sostituzione di tale elemento Se però considerata la natura del difetto la pretesa della sostituzione risulta inadeguata in particolare se il difetto può essere eli...

Page 56: ...nera oportuna y apropiada De no ser desproporcionado a la naturaleza del defecto el consumidor podrá exigir la entrega de un nuevo producto sin defectos reemplazo o si el defecto se relacionase a un componente del producto podrá exigir el reemplazo de dicho componente Sin embargo si el reemplazo del producto o su componente fuese desproporcionado a la naturaleza del defecto en especial si el defec...

Page 57: ...o defecțiune care poate fi eliminată consumatorul are dreptul la eliminarea gratuită la timp și reglementară a defecțiunii Dacă acest lucru nu este posibil ținând cont de natura defecțiunii consumatorul poate solicita livrarea unui produs nou fără defecțiuni schimb sau dacă defecțiunea este legată doar de o piesă a produsului schimbul unei astfel de piese Dacă însă având în vedere natura defecțiun...

Page 58: ...is s r o Južná trieda 48 D 040 01 Košice 055 6338501 tvaservis tvaservis sk VILLA MARKET s r o Odborárov 49 052 01 Spišská Nová Ves 053 4421857 servis villamarket sk ELSPO BB s r o Internátna 2318 24 974 01 Banská Bystrica 048 4135535 objednavky elektroobchod elspo sk Polska Nazwa Ulica Kod Miasto Telefon E mail CONCEPT POLSKA sp z o o Ostrowskiego 30 53 238 WROCŁAW 071 339 04 44 w 27 serwis my co...

Page 59: ...oclaw Tel 48 713 390 444 Fax 713 390 414 www my concept pl HU ASPICO KFT H 9027 Győr Hűtőház u 25 Tel 36 96 511 291 Fax 36 96 511 293 info aspico hu LV Verners VT Ltd Piedrujas iela 5a Riga Latvia Tel 371 67021021 fakss 371 67021000 e pasts info verners lv www verners lv HR Horvat elektronika d o o Dravska 8 HR 40305 Pušćine servis horvat elektronika hr Hotline 385 040 895 500 RO S C DANTE INTERNA...

Reviews: