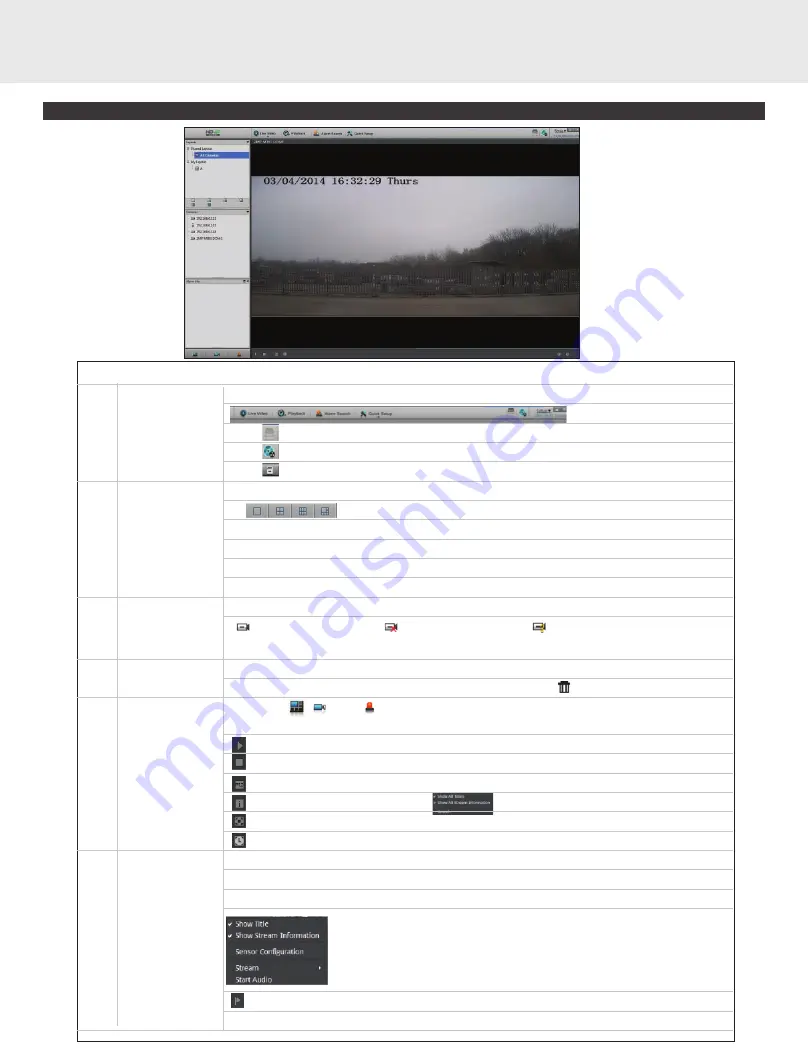
live view
Items Name
Content
1
Top menu
Click Live Video, Playback, Alarm Search and Quick Setup to enter the interface.
Click icon to check the HDD information.
Click icon to enter the recording backup interface.
Click icon to lock the interface.
2
Channel Layout
Select which display layout you would like from the available selection.
After selecting the layout mode, move the individual camera from the left list to the
position on the layout screen you want it to appear in. Click the save button to save the layout.
There are two options “Shared layout” and “My layout”, this also supports “Cycle” mode, we
can configure this from <Setup>, <NVR Setup>, <Live Video Setup>, <Layouts> .
3
Camera List
The camera list shows every camera that has been assigned to the VHDIPL.
means camera normal, means cameras offline, means camera Username and
password need to be verified
( username or password is not correct).
4
Alarm information This area displays the alarm information including motion detection and I/O alarm.
This information area will only display the last 20 alarms. Click to clear the information.
5
Bottom menu
By clicking , and icons, the layout list, alarm list and alarm information will be hidden
or viewed.
Play live video button.
Close live video button.
Click to select the PTZ control menu.
Click to display the following.
Selects Full Screen Video Playback
Automatic Full Screen control
6
Live video
Right mouse click on the live display will allow the changing of some display information.
Start the Audio, bookmark the current video footage for ease of finding later, change the video
stream and access the Sensor Configuration set up menu of the camera being viewed.
Mark/Tag, press this button during live video and the recording will be highlighted in “yellow”
and make it easier to find the footage at a later date.


