


Hardware Installation and WLAN Configuration
DeviceMaster AIR User Guide
: 2000365 Rev. C
- 9
Hardware Installation and WLAN
Configuration
Use the
Connecting the Hardware and Initial Configuration
discussion to initially
set up the DeviceMaster AIR so that you can configure the wireless settings.
The second step to installing and configuring the DeviceMaster AIR is to set up
the wireless communications (WLAN). After configuring the wireless settings, you
can configure the serial portion. See
Network Configuration for the Serial Portion
Connecting the Hardware and Initial Configuration
Use this procedure to initially set up the DeviceMaster AIR so that you can
configure the wireless portion. If the wireless settings and IP address have been
previously configured, go to
Network Configuration for the Serial Portion
27. Initial configuration of the wireless portion does not include configuring the IP
address.
1.
Assign a static IP address to the computer that you are using to configure the
DeviceMaster AIR, within the IP address range of the DeviceMaster AIR.
Note:
The computer that you are using for initial configuration must have an
IP address within the same range as the WLAN IP address of the
DeviceMaster AIR
, see
assistance
.
2.
Record the LAN MAC address, model, and serial number of the DeviceMaster
AIR unit on the customer service label provided.
You may need the LAN MAC address during the NS-Link driver configuration.
The serial number and LAN MAC address are located on a label on the device.
The LAN MAC address starts with
00 C0 4E
.
3.
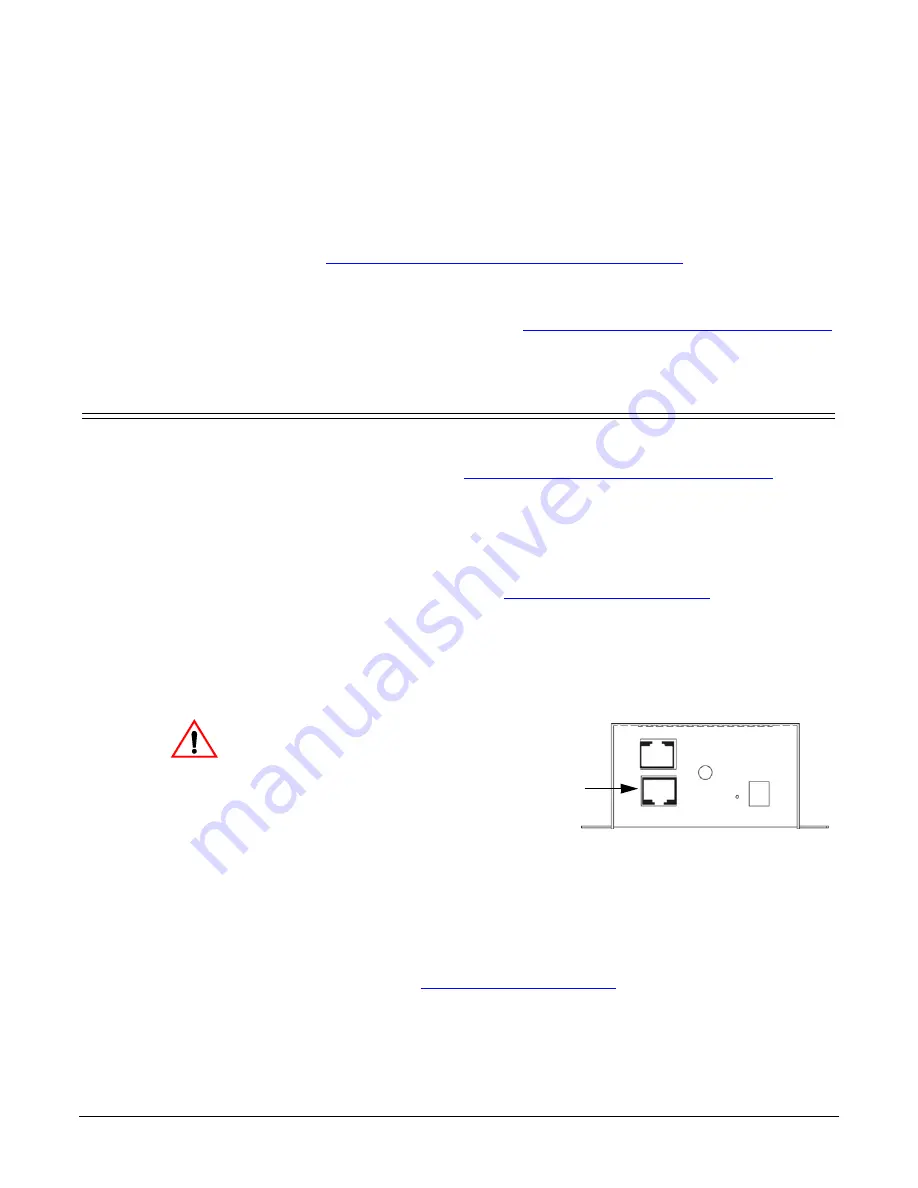
Disconnect the 4” Ethernet jumper
cable from the WLAN connector.
Note:
You will need to reconnect
the 4” Ethernet cable after
configuring the WLAN
network information.
4.
Attach the antenna.
5.
Place the DeviceMaster AIR on a
stable surface or optionally mount the AIR using the DIN rail adapters or
mounting flanges.
6.
Connect the DeviceMaster AIR port labeled
WLAN
to the same Ethernet
network segment as the host PC using a standard network cable. An Ethernet
cable is shipped with the DeviceMaster AIR.
7.
Apply power to the DeviceMaster AIR by connecting the AC power adapter to
the DeviceMaster AIR and a power source. If you want to provide your own
power supply, see
Caution
WLAN
Connector