


11
-
Administrator Name & Password
-
Time & Date
It is recommended you configure these settings before using the
access point.
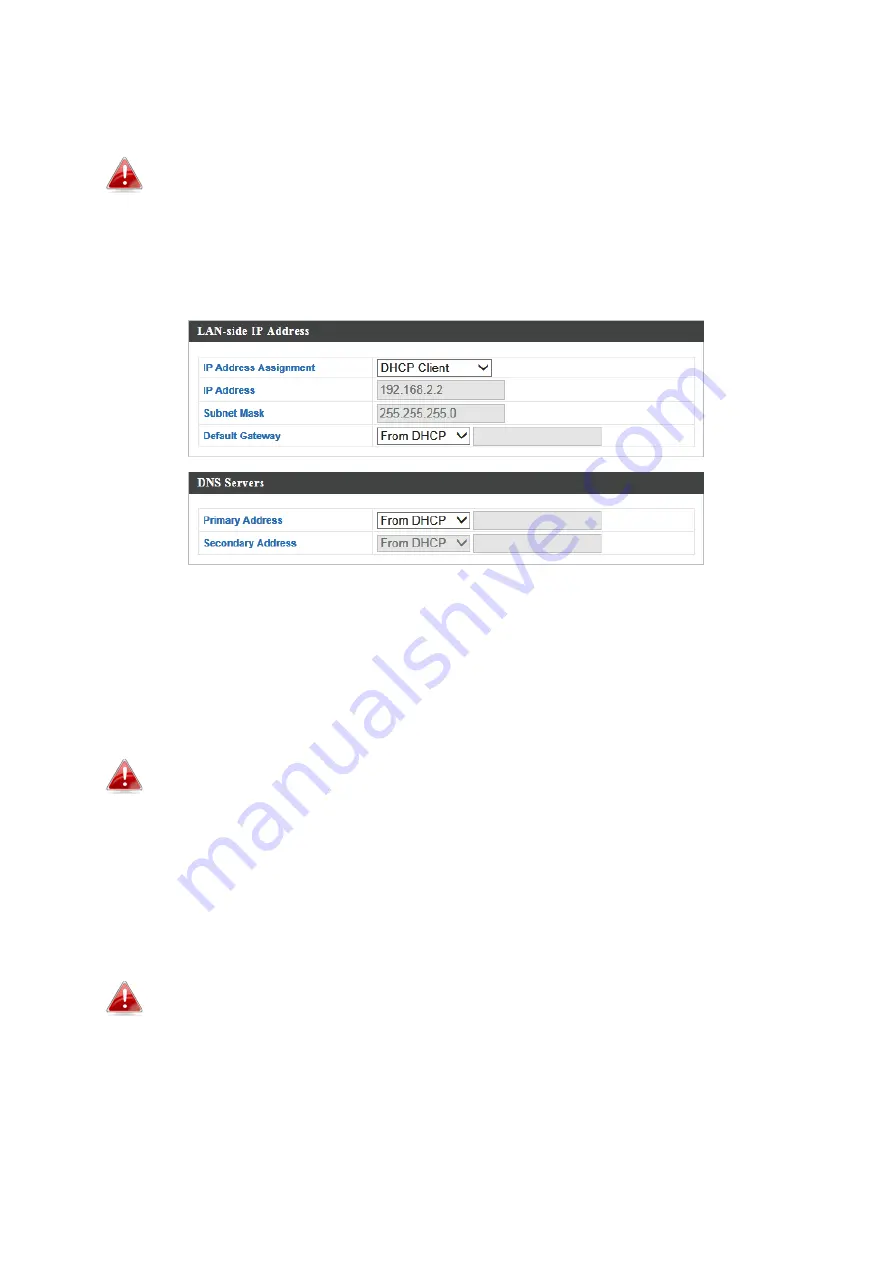
1.
To change the access point’s LAN IP address, go to
“Network Settings” >
“LAN-side IP Address”
and you will see the screen below.
2.
Enter the IP address settings you wish to use for your access point. You
can use a dynamic (DHCP) or static IP address, depending on your network
environment. Click “Apply” to save the changes and wait a few moments
for the access point to reload. (Default setting is DHCP Enabled)
When you change your access point’s IP address, you need to use
the new IP address to access the browser based configuration
interface instead of the default IP
192.168.2.1.
3.
To change the SSID of your access point’s 2.4GHz wireless network(s), go
to
“Wireless Setting” > “2.4GHz 11bgn” > “Basic”
. Enter the new SSID for
your 2.4GHz wireless network in the “SSID1” field and click “Apply”.
To utilize multiple 2.4GHz SSIDs, open the drop down menu
labelled
“Enable SSID number”
and select how many SSIDs you
require. Then enter a new SSID in the corresponding numbered
fields below, before clicking “Apply”.
Summary of Contents for WAP-PC1200C
Page 7: ...7 D E...